
Smart Lawn Recovery: Automating Irrigation for Overseeding Success
The Challenge of Lawn Renovation and Recovery
Reviving a thin, patchy, or drought-stressed lawn requires far more than simply tossing grass seed over existing turf. True lawn renovation bridges the gap between traditional horticulture and modern smart home technology. According to the Environmental Protection Agency (EPA), outdoor water use accounts for nearly 30% of total household water consumption, with a significant portion wasted due to inefficient, outdated irrigation schedules. By integrating smart irrigation controllers with a meticulous overseeding and soil recovery plan, homeowners can achieve a lush, resilient landscape while conserving vital resources and lowering utility bills.
Whether your lawn has suffered from summer heat stress, heavy foot traffic, or soil compaction, this comprehensive guide will walk you through the exact steps to renovate your turf. We will focus heavily on how to leverage smart home irrigation technology to automate the delicate watering requirements of seed germination, ensuring your lawn recovery project is a resounding success.
Step 1: Soil Assessment, Dethatching, and Core Aeration
Before a single seed touches the soil, you must prepare the seedbed. Grass seed requires direct soil contact to germinate; if it lands on a thick layer of thatch or compacted dirt, it will dry out and die.
Managing the Thatch Layer
Thatch is the layer of dead and living organic matter that accumulates between the green vegetation and the soil surface. While a thin layer (under 0.5 inches) protects the soil, a thicker layer blocks water and nutrients. Use a thatch rake or rent a power dethatcher (typically $60 to $80 per day) to aggressively pull up dead material. Rake and remove the debris to expose the soil.
Core Aeration for Compacted Soil
Soil compaction suffocates grassroots and prevents water infiltration. Core aeration involves pulling small plugs of soil from the ground to relieve compaction and create pockets for seed and water. Rent a walk-behind core aerator ($70 to $100 per day) and make two passes over your lawn in perpendicular directions. Aim to pull plugs that are 2 to 3 inches deep and spaced 2 to 3 inches apart. Leave the soil plugs on the lawn; they will break down naturally and return valuable microbes to the surface.
Step 2: Selecting Premium Seed and Smart Irrigation Hardware
The success of your lawn renovation hinges on two major purchases: the right grass seed for your microclimate and a reliable smart irrigation controller.
Choosing the Right Seed
Invest in high-quality, weed-free seed. Avoid cheap big-box store blends that contain high percentages of annual ryegrass or weed seeds. Look for a mix tailored to your region:
- Cool-Season Lawns (Northern US): Turf-type Tall Fescue is highly recommended for its deep root system and drought tolerance. Kentucky Bluegrass is excellent for high-traffic areas but requires more maintenance.
- Warm-Season Lawns (Southern US): Bermudagrass or Zoysia grass are ideal, though warm-season lawns are typically renovated via sprigs or plugs rather than seed.
Plan to apply 5 to 8 pounds of seed per 1,000 square feet for overseeding an existing lawn.
Upgrading to a Smart Sprinkler Controller
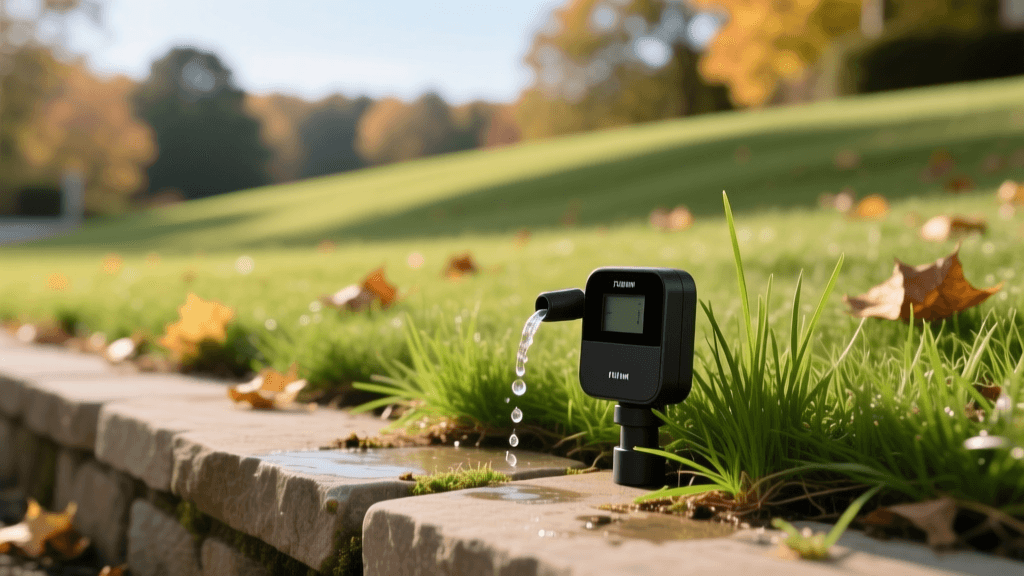
Traditional timers water on a rigid schedule, regardless of rain or humidity. Smart controllers, such as the Rachio 3 or Orbit B-hyve, connect to your home Wi-Fi and use local weather data to adjust watering automatically. More importantly for lawn recovery, they allow you to create highly customized, multi-cycle schedules that are essential for seed germination. Expect to invest between $150 and $250 for a quality smart controller, a cost that is quickly offset by water savings and the prevention of seed failure.
Step 3: The Overseeding and Fertilization Process
Once the soil is prepped and your smart controller is installed, it is time to seed.
- Mow Low: Cut your existing grass to about 1.5 inches. This reduces competition for sunlight and allows seeds to reach the soil.
- Spread the Seed: Use a rotary broadcast spreader. Apply half the seed while walking in horizontal lines, and the other half in vertical lines. This crisscross pattern ensures even coverage and prevents striping.
- Apply Starter Fertilizer: New seedlings need phosphorus for rapid root development. Apply a dedicated starter fertilizer (such as Scotts Turf Builder Starter Food with an N-P-K ratio of 24-25-4) immediately after seeding. Do not use standard weed-and-feed products, as the herbicides will prevent your new grass seed from germinating.
- Top Dress (Optional but Recommended): Lightly rake a thin layer (1/8 inch) of compost or peat moss over the seeded areas to retain moisture and protect seeds from birds.
Step 4: Programming Smart Irrigation for Seed Germination
This is where smart home integration transforms lawn recovery. Grass seed must remain consistently moist during the germination phase, which typically takes 7 to 21 days depending on the grass type. If the seed dries out even once during this window, the germ tube dies, and the seed is ruined. Conversely, heavy, deep watering will wash the seeds away or cause them to rot.
Using your smart controller's mobile app, bypass the standard "weather intelligence" features temporarily and create a custom Germination Schedule. You need frequent, very light watering cycles.
| Recovery Phase | Watering Frequency | Duration per Zone | Primary Goal |
|---|---|---|---|
| Weeks 1-2 (Germination) | 3 times daily | 3 to 5 minutes | Keep top 1 inch of soil constantly moist without pooling. |
| Week 3 (Seedling Growth) | 2 times daily | 5 to 8 minutes | Encourage roots to stretch slightly deeper as sprouts emerge. |
| Week 4 (Establishment) | 1 time daily | 10 to 15 minutes | Transitioning roots toward deeper soil moisture. |
Pro Tip: Schedule your smart controller to run these micro-cycles in the early morning (e.g., 6:00 AM, 10:00 AM, and 2:00 PM). Avoid evening watering, as prolonged moisture on the grass blades overnight can invite fungal diseases like Pythium blight.
Step 5: Transitioning to Deep, Infrequent Watering
Once your new grass reaches a height of about 2 to 2.5 inches, it is time to transition away from the germination schedule. At this stage, frequent, shallow watering becomes detrimental because it trains the grassroots to stay near the surface, making the lawn highly susceptible to future drought stress.
Re-enable the weather intelligence and smart scheduling features on your irrigation controller. According to the University of California Agriculture and Natural Resources (UC ANR) Lawn Care Guide, established lawns generally require about 1 to 1.5 inches of water per week, including rainfall. Program your smart controller to deliver this volume in one or two deep watering sessions per week. Deep watering forces the root system to grow downward in search of moisture, creating a robust, drought-tolerant lawn.
Long-Term Maintenance and Seasonal Adjustments
Lawn renovation does not end once the grass turns green. Proper ongoing maintenance ensures your investment pays off for years to come.
The One-Third Mowing Rule
Never remove more than one-third of the grass blade in a single mowing session. If your target height is 3 inches, mow when the grass reaches 4.5 inches. Cutting too much at once shocks the plant and diverts energy away from root growth.
"Proper mowing heights promote deeper root systems, which in turn increase the lawn's ability to access water and nutrients from a larger soil volume, drastically improving drought recovery." - UC ANR Lawn Watering Guide
Smart Seasonal Adjustments
As the seasons change, your smart controller will automatically adjust watering times based on evapotranspiration (ET) rates. However, you should manually adjust your mowing height seasonally. Raise the mower deck to 3.5 or 4 inches during the peak heat of summer to shade the soil and reduce moisture evaporation. In the cooler fall months, you can lower the deck slightly to prevent snow mold and matting.
Conclusion
Renovating a damaged lawn is a highly rewarding DIY project that significantly boosts your home's curb appeal and property value. By combining the physical labor of core aeration and overseeding with the precision of smart home irrigation technology, you eliminate the guesswork from lawn recovery. Your smart controller ensures that every drop of water is utilized efficiently, nurturing delicate seedlings into a thick, vibrant carpet of grass. With the right preparation, premium seed, and automated watering strategy, your lawn will not just recover—it will thrive.

