
Gardening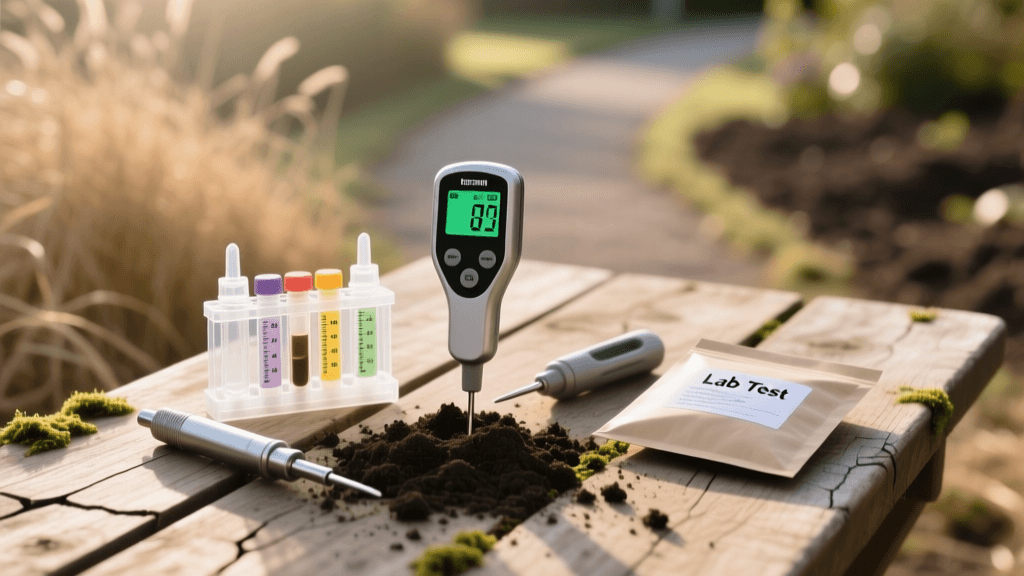
Essential Soil Testing Tools and pH Meters for Gardens
The Foundation of a Thriving Garden: Why Soil Testing Matters
Every seasoned gardener knows that the secret to a bountiful vegetable harvest or a vibrant flower bed lies beneath the surface. Soil is the living, breathing foundation of your garden, providing essential nutrients, water retention, and structural support for root systems. Yet, countless home gardeners rely on guesswork when it comes to soil preparation, blindly applying fertilizers and amendments without understanding what their soil actually needs. This approach not only wastes money but can also lead to nutrient lockout, environmental runoff, and stunted plant growth.
According to the Clemson University Home & Garden Information Center, a comprehensive soil test is the only reliable way to determine the current nutrient profile and pH level of your garden beds. By investing in the right soil testing tools and equipment, you can transition from reactive gardening to proactive soil management. Whether you are preparing a new raised bed, troubleshooting a struggling tomato crop, or establishing a perennial flower border, understanding your soil chemistry is the critical first step.
Types of Soil Testing Equipment for Home Gardeners
The market is flooded with soil testing gadgets, ranging from cheap plastic probes to high-tech digital meters. Choosing the right equipment depends on your budget, required accuracy, and the specific parameters you need to measure. Here is a breakdown of the three primary categories of soil testing tools.
1. Digital pH Meters and EC Probes
Digital soil meters are highly popular among tech-savvy gardeners and hydroponic growers. High-quality digital pH meters use a glass bulb electrode to measure the hydrogen-ion activity in a soil-water slurry, providing a precise numerical readout. Many advanced models also measure Electrical Conductivity (EC), which indicates the total concentration of soluble salts and fertilizers in the soil.
- Pros: Instant results, reusable for hundreds of tests, high precision (often up to 0.1 pH accuracy), and no messy chemicals.
- Cons: Requires regular calibration with buffer solutions, the glass electrodes are fragile, and entry-level models can be inaccurate if not properly maintained.
- Best For: Gardeners who need to monitor pH fluctuations frequently, such as those growing acid-loving plants like blueberries or azaleas.
2. Chemical Dye Test Kits
Chemical test kits, such as the widely recognized Luster Leaf Rapitest, use colorimetric analysis. You mix a soil sample with water and a specific chemical reagent capsule or liquid. The solution changes color based on the concentration of Nitrogen (N), Phosphorus (P), Potassium (K), or pH. You then compare the color of the liquid against a provided chart.
- Pros: Very affordable, no batteries or calibration required, and provides a general overview of N-P-K levels.
- Cons: Subjective color matching can be difficult for some users, reagents expire over time, and the results provide ranges rather than exact numerical values.
- Best For: Beginners on a budget who want a quick, general snapshot of their soil's macronutrient levels before the planting season.
3. Professional Mail-In Laboratory Kits
For the most accurate and actionable data, nothing beats a professional laboratory analysis. You collect soil cores from your garden, mail them to a university extension or private agronomy lab, and receive a detailed digital report. The UMass Amherst Soil and Plant Nutrient Testing Laboratory is a premier example, offering home gardeners comprehensive reports that include pH, organic matter percentage, cation exchange capacity (CEC), and exact fertilizer recommendations tailored to the specific crops you intend to grow.
- Pros: Unmatched accuracy, measures micronutrients (calcium, magnesium, iron, etc.), and provides scientifically backed amendment prescriptions.
- Cons: Costs between $15 and $30 per sample, and results take one to two weeks to arrive.
- Best For: Establishing a baseline for new garden plots, diagnosing severe plant deficiencies, and large-scale vegetable garden planning.
Comparison Chart: Soil Testing Tools
| Tool Type | Accuracy Level | Estimated Cost | Parameters Tested | Best Application |
|---|---|---|---|---|
| Digital pH/EC Meter | High (if calibrated) | $50 - $150 | pH, EC / TDS | Frequent monitoring, container gardening |
| Chemical Dye Kit | Moderate (Range-based) | $15 - $30 | pH, N, P, K | Quick seasonal checks, budget-conscious growers |
| Mail-In Lab Test | Very High | $15 - $35 | pH, N-P-K, Micronutrients, CEC, Organic Matter | New beds, troubleshooting, precise amendment planning |
How to Properly Collect Soil Samples
The most expensive laboratory test is useless if the soil sample is collected improperly. A garden bed is rarely uniform; soil composition can vary drastically from one end of a raised bed to the other. To get a representative sample, you must follow a rigorous collection protocol. The University of Minnesota Extension recommends the following methodology for home gardeners:
- Gather Your Tools: Use a clean stainless steel trowel or soil probe. Avoid galvanized metal or brass tools, as they can contaminate the sample with zinc or copper. Use a clean plastic bucket for mixing.
- Determine Depth: For vegetable gardens and annual flower beds, sample the top 6 to 8 inches of soil, as this is the primary root zone. For lawns or perennial beds, 4 to 6 inches is sufficient.
- Collect Multiple Cores: Do not just dig one hole. Walk in a zig-zag pattern across your garden plot and collect 5 to 8 sub-samples (cores) from different areas.
- Mix and Prepare: Break apart any clumps, remove rocks, roots, and earthworms, and mix the soil thoroughly in your plastic bucket. Allow the soil to air-dry at room temperature if it is excessively wet.
- Package: Place about one cup of the mixed, dry soil into the collection bag or ziplock pouch provided by your testing kit or laboratory.
Interpreting Results and Amending Your Soil
Once your results arrive, the numbers can seem overwhelming. The most critical metric for home gardeners is the soil pH, which dictates nutrient availability. Most vegetables thrive in a slightly acidic to neutral pH range of 6.0 to 7.0. If your pH is too low (acidic), essential nutrients like phosphorus and calcium become chemically locked up and unavailable to plant roots, even if they are physically present in the soil.
Pro Tip: Never apply lime or sulfur based on a guess. Over-liming can cause severe micronutrient deficiencies (particularly iron and manganese) that are incredibly difficult to reverse. Always let a laboratory test dictate your amendment rates.
Raising pH: If your soil is too acidic, you will need to apply agricultural lime. Calcitic lime adds calcium, while dolomitic lime adds both calcium and magnesium. The amount required depends on your soil's Cation Exchange Capacity (CEC) and current pH.
Lowering pH: If your soil is too alkaline (common in arid, western climates), you can lower the pH by incorporating elemental sulfur or acidic organic matter like peat moss and pine bark fines. Note that altering soil pH is a slow biological process; it can take 6 to 12 months for sulfur applications to fully react in the soil profile.
Top Recommended Brands and Models
If you are ready to invest in soil testing equipment, here are three highly regarded options across different categories:
- Best Chemical Kit: Luster Leaf Rapitest 1601. This analog kit uses color-coded capsules for N, P, K, and pH. It is incredibly user-friendly and requires no batteries, making it a staple for weekend gardeners.
- Best Digital Meter: Bluelab pH Pen. While technically designed for hydroponic solutions, the Bluelab pH Pen is the gold standard for creating accurate soil-water slurries. It features automatic temperature compensation and replaceable probes, ensuring years of reliable use.
- Best Lab Kit: SoilKit by BiomeMakers. This modern mail-in service provides a rapid, easy-to-read digital dashboard. It not only tests N-P-K and pH but also analyzes soil biology and provides exact, eco-friendly amendment recommendations based on your local climate data.
Conclusion
Equipping yourself with the right soil testing tools is one of the highest-return investments you can make in your gardening journey. By understanding the exact chemical and biological makeup of your garden beds, you eliminate the waste and frustration associated with blind fertilization. Whether you opt for a quick digital pH probe to monitor your blueberry bushes or a comprehensive laboratory analysis to build the ultimate vegetable garden from scratch, data-driven soil preparation is the hallmark of a successful, sustainable gardener. Test your soil, amend with purpose, and watch your garden thrive.

