
The Spring Seed Starting Schedule for Kitchen Gardens
Bridging the Gap: From Indoor Seed to Outdoor Harvest
The journey to a bountiful garden-to-table harvest begins long before the last snow melts or the soil becomes workable. For home gardeners looking to maximize their outdoor living spaces and cultivate fresh, organic produce, mastering the spring seed starting schedule is the most critical step you can take. Starting seeds indoors gives you a massive head start on the growing season, allowing you to grow heirloom varieties that are rarely found in local nursery centers while ensuring your kitchen garden is primed for continuous harvesting from early summer straight through to the first autumn frost.
However, timing is everything. Sow too early, and your seedlings will become leggy, root-bound, and weak before the outdoor soil is warm enough to receive them. Sow too late, and you risk losing precious weeks of peak summer production. This comprehensive guide will walk you through the exact seasonal timing, gear requirements, and smart home integrations needed to execute a flawless spring planting schedule.
Step 1: Pinpointing Your Last Spring Frost Date
Your entire seed starting calendar hinges on one crucial data point: your average last spring frost date. This is the date in spring when there is a 50% chance that the last light freeze of the season will occur. According to the Old Farmer's Almanac, you can easily find this date by entering your zip code into their frost date calculator, or by consulting local university extension offices.
Once you have your frost date, you will use it as 'Day Zero' for your planting calendar. It is also highly recommended to cross-reference your specific location with the USDA Plant Hardiness Zone Map to understand your broader climatic constraints, which will dictate which perennial herbs and fruiting shrubs can survive the winter in your outdoor garden beds.
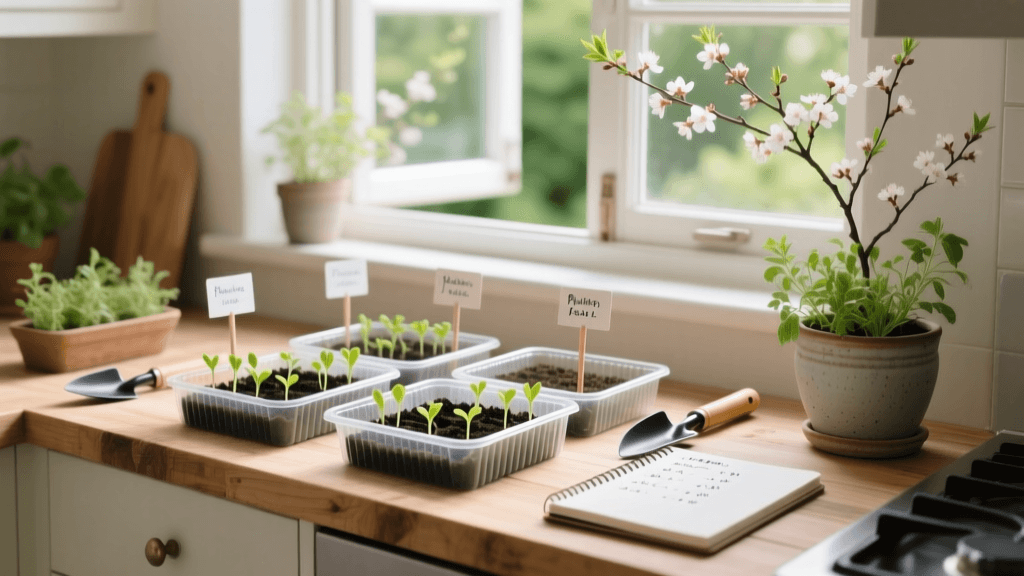
Step 2: Assembling Your Indoor Seed Starting Station
To cultivate robust transplants, you must replicate the optimal conditions of a spring greenhouse. The University of Minnesota Extension emphasizes that adequate light and consistent bottom heat are the two most common failure points for amateur seed starters.
Essential Gear and Measurements
- Grow Lights: Seedlings require 14 to 16 hours of intense light daily. Standard windowsills do not provide sufficient lumens, resulting in 'leggy' stems. Invest in full-spectrum LED grow lights or T5 High Output (HO) fluorescent fixtures. Position the lights exactly 2 to 4 inches above the plant canopy, raising them as the seedlings grow.
- Heat Mats: Most summer crops, particularly tomatoes and peppers, require soil temperatures between 70°F and 80°F for optimal germination. A waterproof seedling heat mat placed under your trays will increase germination rates by up to 80% and cut germination time in half.
- Trays and Cells: Use standard 1020 flats (measuring 21 x 11 inches) with humidity domes. Insert 72-cell or 50-cell plug trays to give root systems ample room to develop without tangling.
- Sterile Seed Starting Mix: Never use garden soil or heavy potting soil, which can harbor damping-off fungus and suffocate delicate roots. Mix your own blend using 1/3 peat moss (or coco coir), 1/3 fine vermiculite for moisture retention, and 1/3 perlite for drainage.
Step 3: The Ultimate Spring Seed Starting Calendar
The following table outlines the precise timing for some of the most popular kitchen garden crops. Remember that 'Weeks Before Frost' means counting backward from your last expected spring frost date, while 'Weeks After Frost' means counting forward from that same date.
| Crop | Sow Indoors (Weeks Before Last Frost) | Days to Germinate | Transplant Outdoors |
|---|---|---|---|
| Onions (Bulb) | 10-12 weeks | 7-14 days | 4 weeks before |
| Peppers (Hot & Sweet) | 8-10 weeks | 7-14 days | 1-2 weeks after |
| Tomatoes | 6-8 weeks | 5-10 days | 1-2 weeks after |
| Broccoli & Cauliflower | 4-6 weeks | 5-10 days | 2-4 weeks before |
| Kale & Swiss Chard | 4-6 weeks | 5-10 days | 4 weeks before |
| Zinnias & Marigolds | 4-6 weeks | 5-7 days | 1-2 weeks after |
| Cucumbers & Squash | 3-4 weeks | 7-10 days | 1-2 weeks after |
Strategic Succession Sowing
For a true garden-to-table experience, do not plant all your seeds at once. Practice succession sowing by starting a new tray of fast-growing crops like kale, lettuce, and bush beans every 14 days. This ensures that as your early spring harvest finishes, the next wave of mature plants is ready to take its place in the raised beds, providing a continuous supply of fresh greens for your kitchen.
Step 4: The Art of Hardening Off
You cannot move a tender, indoor-grown seedling directly into the harsh, unfiltered UV rays and wind of the outdoor garden. It will suffer severe transplant shock or sunscald. You must 'harden off' your plants over a 7 to 10-day period to allow their cellular structure to thicken and adapt to the elements.
The 7-Day Hardening Off Schedule:
Days 1-2: Place seedlings in a fully shaded, wind-protected outdoor area for 2 hours, then bring them back inside.
Days 3-4: Increase outdoor time to 4 hours, introducing them to dappled morning sunlight.
Days 5-6: Leave them out for 6 to 8 hours, allowing exposure to direct morning sun and gentle breezes.
Day 7: Leave them outside overnight (provided temperatures remain above 50°F) and transplant them into the garden the following morning.
Step 5: Smart Home Integration for Precision Growing
Modern home and garden care heavily benefits from smart home technology, taking the guesswork out of seasonal timing and environmental control. By integrating affordable smart devices into your seed starting station, you can ensure perfect conditions even when you are away from home.
Automating Light and Heat Cycles
Seedlings require strict photoperiods. Leaving lights on for 24 hours can disrupt their metabolic cycles. Use Wi-Fi enabled smart plugs (such as Kasa or Wyze, typically costing $10 to $15 each) to automate your grow lights. Set a rigid schedule in the companion app to turn the lights on at 6:00 AM and off at 10:00 PM, providing a perfect 16-hour photoperiod. You can also plug your seedling heat mats into a smart plug paired with a temperature sensor, ensuring the mat automatically powers off if the ambient room temperature rises above 78°F, preventing the soil from drying out too rapidly.
Environmental Monitoring
Place a Wi-Fi enabled thermometer and hygrometer (like those from Govee) near your seed trays. These devices will send push notifications to your smartphone if the humidity drops below 40% or if the temperature fluctuates outside the ideal 65°F to 75°F range. This is especially useful in basements or garages where early spring temperature swings can stall germination or invite fungal diseases.
Preparing the Outdoor Kitchen Garden
While your seedlings are hardening off, use the final weeks of the indoor schedule to prepare your outdoor raised beds and in-ground rows. Clear away winter debris and top-dress your beds with 1 to 2 inches of high-quality organic compost. Avoid aggressive tilling, which destroys the delicate soil food web and mycorrhizal fungi networks. Instead, use a broadfork to gently aerate the soil to a depth of 8 inches. Test your soil pH using a digital meter; most kitchen garden vegetables thrive in a slightly acidic pH range of 6.2 to 6.8. If your soil is too alkaline, amend it with elemental sulfur or peat moss; if it is too acidic, incorporate garden lime according to the package measurements.
Conclusion
Mastering the seasonal timing of your kitchen garden transforms a chaotic spring rush into a streamlined, highly rewarding process. By anchoring your schedule to your local frost dates, utilizing proper indoor growing equipment, and leveraging smart home technology to maintain perfect environmental conditions, you guarantee that your garden-to-table harvest will be abundant, flavorful, and perfectly timed. When the soil finally warms and the danger of frost has passed, your robust, hardy transplants will hit the ground running, setting the stage for a spectacular season of outdoor living and culinary delight.

