Tree Care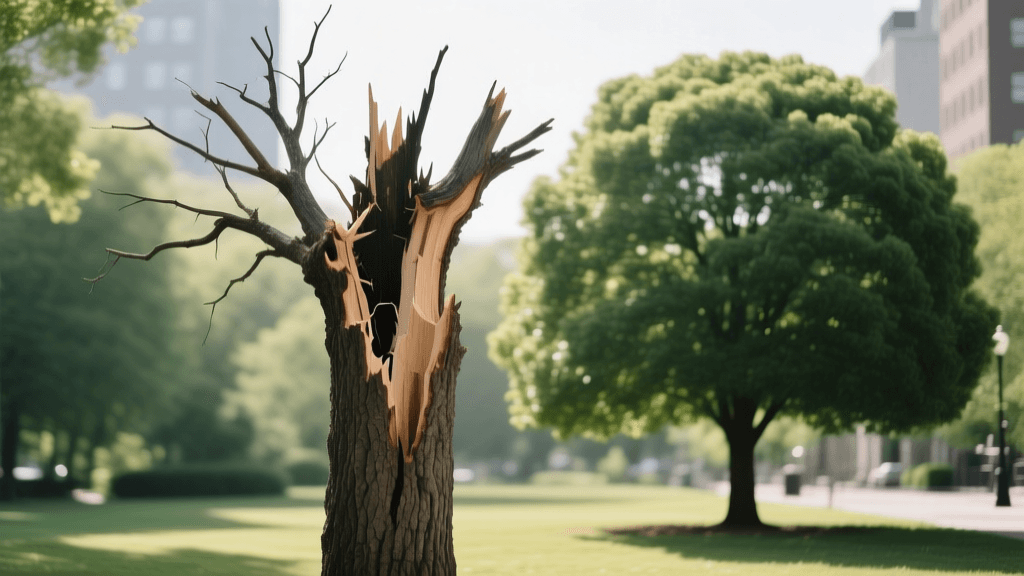
Tree Topping Recovery: A Before & After Pruning Guide
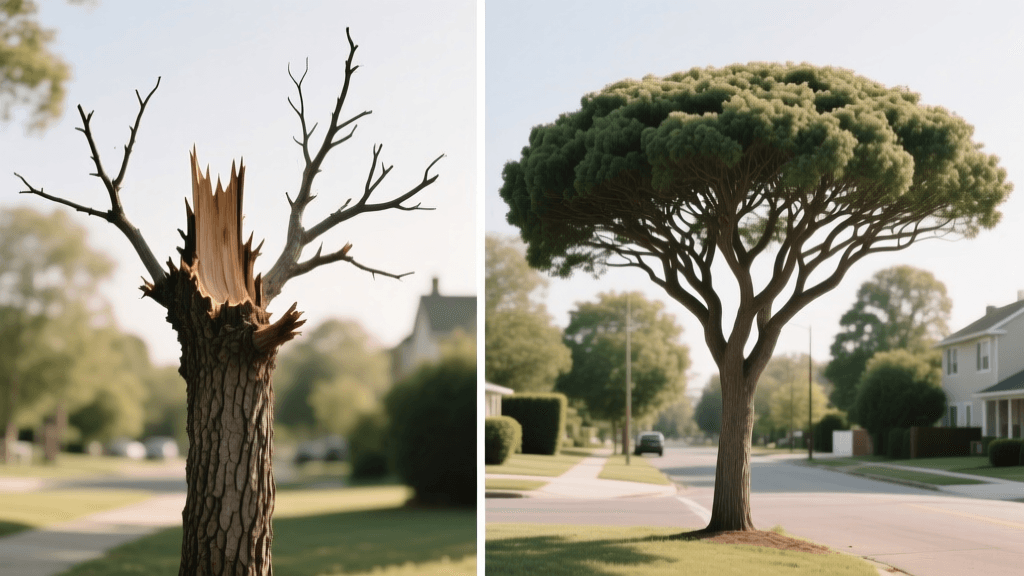
The Ugly Truth: The "Before" State of a Topped Tree
Tree topping—the indiscriminate cutting of tree branches back to stubs—is one of the most harmful pruning practices in arboriculture. Often done by unqualified individuals aiming to quickly reduce a tree's height or clear utility lines, topping leaves behind a mangled, stressed, and hazardous tree. If you have inherited a topped tree or made the mistake of topping one in the past, you are likely staring at an eyesore. The "before" state of a topped tree is characterized by brutal, flat cuts, peeling bark from sudden sun exposure, and an explosion of weak, spindly water sprouts that desperately attempt to replace the lost canopy.
However, all hope is not lost. Through a meticulous, multi-year process known as crown restoration, you can guide a topped tree back to a safe, structurally sound, and aesthetically pleasing state. This before-and-after transformation guide will walk you through the science of the damage, the step-by-step recovery process, and the exact tools and timelines required to revive your landscape's centerpiece.
Assessing the Candidate: Is Your Tree Worth Saving?
Before you commit to a three-to-five-year restoration plan, you must evaluate whether the tree is a viable candidate. Not every topped tree can be saved. Consider the following factors:
- Species Vitality: Fast-growing, resilient species like silver maples, poplars, and sycamores respond vigorously to restoration. Slow-growing species like oaks or beeches may struggle to compartmentalize the massive wounds.
- Decay and Structural Integrity: If the topping cuts were made more than five years ago and the stubs show deep, hollowing decay or fungal conks, the tree may be a hazard that requires removal rather than restoration.
- Root Zone Health: A tree with a compromised root system (due to construction damage or severe soil compaction) will not have the energy reserves required to push through a heavy pruning regimen.
The Science of the Damage
To understand the "after" vision, you must understand the "before" trauma. According to Penn State Extension, topping removes 50 to 100 percent of a tree’s leaf-bearing crown, effectively starving the tree and triggering a massive, weak survival response. The tree is forced into a state of shock, rapidly depleting its stored carbohydrate reserves to push out epicormic shoots (water sprouts) from the latent buds just beneath the bark.
"The numerous water sprouts that emerge after topping are poorly anchored and highly susceptible to breaking during storms, creating a significant safety hazard."
These sprouts are attached only to the outermost layers of the wood, lacking the deep, structural integration of normal branches. Furthermore, the large, ragged stubs left by topping cuts rarely heal. Instead, they invite wood-decaying fungi, hollowing out the tree from the inside out.
The "After" Vision: Crown Restoration Over 3 Years
Crown restoration is not a one-weekend project. It is a strategic, phased approach designed to re-establish a central leader or a strong scaffold structure, eliminate weak unions, and restore the tree's natural form. Here is your year-by-year transformation roadmap.
Year 1: Triage and Subordination (Late Winter)
The first year is all about damage control and selecting future leaders. Wait until late winter (February to early March) when the tree is dormant, and the branch structure is visible.
- Remove the Dead and Dying: Cut away any completely dead stubs or sprouts back to the branch collar. Do not leave new stubs.
- Identify Leaders: Look for 1 to 3 strong, well-angled water sprouts near the end of each stubbed limb that are growing upward and outward. These will become your new scaffold branches.
- Subordinate the Competition: The experts at The Morton Arboretum emphasize the importance of subordination cuts. Reduce the length of competing, overly vigorous water sprouts by cutting them back to a lateral branch that is at least one-third the diameter of the parent stem. This slows their growth and forces energy into your chosen leader sprouts.
- Limit Removal: Never remove more than 25% of the living canopy in a single year, even if the tree looks like a mess. The tree needs the remaining leaves to photosynthesize and heal.
Year 2: Selection and Thinning (Late Winter)
By year two, the tree will look significantly healthier, but the canopy will be dense and chaotic.
- Thin the Clusters: Water sprouts often grow in tight clusters of four or five from a single node. Select the single best, straightest sprout with the widest crotch angle and remove the rest entirely at the base.
- Direct Growth: Make heading cuts on your chosen leaders just above a lateral branch that is growing in the direction you want the canopy to expand (usually outward and slightly upward).
- Clear the Interior: Remove any crossing, rubbing, or inward-growing branches to allow sunlight and airflow into the center of the canopy, reducing the risk of fungal diseases like powdery mildew.
Year 3: Finalizing the Scaffold (Late Winter)
Year three is about refining the architecture. The "after" transformation should now be visibly apparent to even an untrained eye.
- Establish Terminal Leaders: Ensure your selected scaffold branches have a clear, dominant terminal bud or leader.
- Weight Reduction: If any restored limbs have become excessively long and heavy, perform end-weight reduction cuts to prevent them from splitting out at the old, decayed topping wound.
- Final Aesthetic Shaping: Step back and assess the overall symmetry. Make minor thinning cuts to balance the visual weight of the canopy.
The Restoration Timeline: At a Glance
| Phase | Primary Objective | Canopy Removal Limit | Expected Visual Result |
|---|---|---|---|
| Year 1 | Triage, deadwood removal, leader selection | Max 25% of live tissue | Less chaotic; obvious stubs remain but sprouts are managed |
| Year 2 | Thinning clusters, subordinating competition | Max 20% of live tissue | Noticeable canopy filling; natural branch angles forming |
| Year 3 | End-weight reduction, architectural refinement | Max 15% of live tissue | Restored natural form; old wounds largely hidden by foliage |
Essential Tools and Products for the Job
Executing a precise crown restoration requires sharp, high-quality tools. Dull tools crush plant tissue, delaying healing and inviting disease.
- Pruning Saw: The Silky Gomboy 240mm folding saw features impulse-hardened teeth that slice through 3-inch thick water sprouts like butter, leaving a glass-smooth finish that heals rapidly.
- Hand Pruners: Felco 2 Classic Bypass Pruners are the industry standard. Use these for all cuts under 3/4 inch in diameter.
- Loppers: Fiskars 28-Inch Bypass Loppers provide the leverage needed for 1-inch to 1.5-inch subordinate cuts deep in the canopy.
- Sterilization Solution: Keep a spray bottle of 70% Isopropyl Alcohol on hand. Spray and wipe your blades between every single tree, and after cutting any visibly diseased wood, to prevent the spread of pathogens like fire blight or verticillium wilt.
- Wound Dressings: Do NOT use them. Decades of arboricultural research prove that pruning paints and tar sealants trap moisture against the wound, accelerating decay. Let the tree's natural compartmentalization process (CODIT) do the work.
Cost Breakdown: DIY vs. Professional Arborist
Restoring a large shade tree is an investment. If the tree is under 20 feet tall and accessible from the ground with a pole pruner, a DIY approach is viable.
- DIY Costs: Expect to spend between $120 and $200 upfront for professional-grade Silky saws, Felco pruners, and safety gear (ANSI Z87.1 safety glasses and Kevlar chaps).
- Professional Costs: If the tree is over 20 feet tall, requires climbing, or is near utility lines, you must hire an ISA Certified Arborist. Crown restoration is highly skilled work. Expect to pay between $400 and $900 per pruning session, depending on your region, the tree's size, and the complexity of the damage. Over a three-year period, budget roughly $1,500 to $2,500 for complete professional restoration.
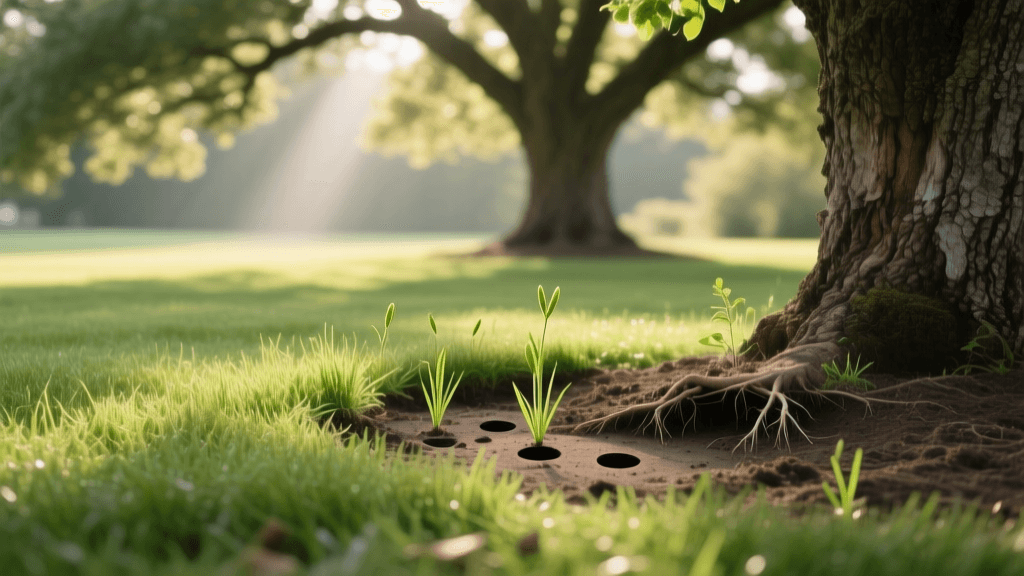
Post-Pruning Aftercare: Watering and Mulching
The physical pruning is only half the transformation. A topped tree is severely stressed and requires intensive below-ground support to fuel the energy-intensive process of growing new, structural wood.
The Mulch Ring
Apply a high-quality, aged hardwood mulch in a wide ring around the base of the tree. The mulch ring should be at least 4 feet in diameter for young trees, and ideally extend to the drip line for mature specimens. Apply the mulch to a depth of exactly 3 inches. Crucial: Keep the mulch at least 3 inches away from the trunk flare to prevent "volcano mulching," which causes trunk rot and girdling roots.
Deep Root Watering
During the first two growing seasons following the initial pruning, the tree will lack a full canopy to draw water efficiently. Supplement rainfall with deep, slow watering. Use a soaker hose coiled around the drip line, running it for 2 to 3 hours once a week during dry spells. This encourages deep root growth, anchoring the tree securely as the new, heavy canopy develops above.
Conclusion
Transforming a topped tree from a hazardous, unsightly stub into a majestic, safe shade tree is a test of patience and horticultural skill. By respecting the tree's biological limits, executing precise subordination cuts, and providing diligent aftercare, you can reverse the sins of the past. The "after" result is not just a beautiful tree, but a safer, more resilient landscape asset that will provide cooling shade and ecological benefits for decades to come.