
Vermicomposting vs Traditional Composting: Which is Best?
Bridging Indoor and Outdoor Living Through Soil Health
Every thriving garden-to-table harvest begins beneath the surface. Whether you are growing heirloom tomatoes on a suburban patio or cultivating herbs in a sunny kitchen window, soil health is the unsung hero of your outdoor and indoor living spaces. For homeowners looking to reduce waste and enrich their garden beds, composting is the ultimate sustainable practice. However, not all composting methods are created equal. When deciding how to process your kitchen scraps and yard waste, the two most prominent methods are traditional hot composting and vermicomposting (worm composting). Both techniques yield incredible organic matter, but they differ vastly in their execution, spatial requirements, and the specific biological benefits they offer to your soil.
According to the Environmental Protection Agency (EPA), composting is the managed, aerobic decomposition of organic solid materials. It diverts millions of tons of food scraps and yard trimmings from landfills annually, transforming potential methane-producing waste into a dark, crumbly, nutrient-dense soil amendment. But should you rely on thermophilic bacteria in an outdoor bin, or enlist the help of epigeic earthworms in a specialized bin? This comprehensive guide breaks down the science, logistics, and soil-health benefits of vermicomposting versus traditional composting to help you choose the right method for your home and garden.
The Science of Traditional Hot Composting
Traditional composting, often referred to as hot or aerobic composting, relies on a delicate balance of carbon-rich 'browns' and nitrogen-rich 'greens'. When layered correctly in a pile or bin that measures at least three feet by three feet by three feet, naturally occurring thermophilic bacteria begin to break down the organic matter. This microbial activity generates significant heat, often raising the internal temperature of the pile to between 135°F and 160°F.
The Carbon-to-Nitrogen Ratio
The secret to a successful hot compost pile lies in the C:N ratio. For optimal microbial activity, you should aim for a ratio of roughly 30 parts carbon to 1 part nitrogen by weight.
- Nitrogen-rich Greens: Vegetable scraps, fruit peels, coffee grounds, and fresh grass clippings provide the proteins and amino acids bacteria need to multiply rapidly.
- Carbon-rich Browns: Dry autumn leaves, shredded newspaper, untreated cardboard, and straw provide the carbohydrates and energy required to sustain the bacterial colonies.
Hot composting is exceptional for processing large volumes of yard waste, such as fallen leaves and garden prunings. The high temperatures achieved during the thermophilic phase are also highly effective at killing off weed seeds and neutralizing common soil-borne plant pathogens, making it an ideal choice for preparing large-scale outdoor garden beds.
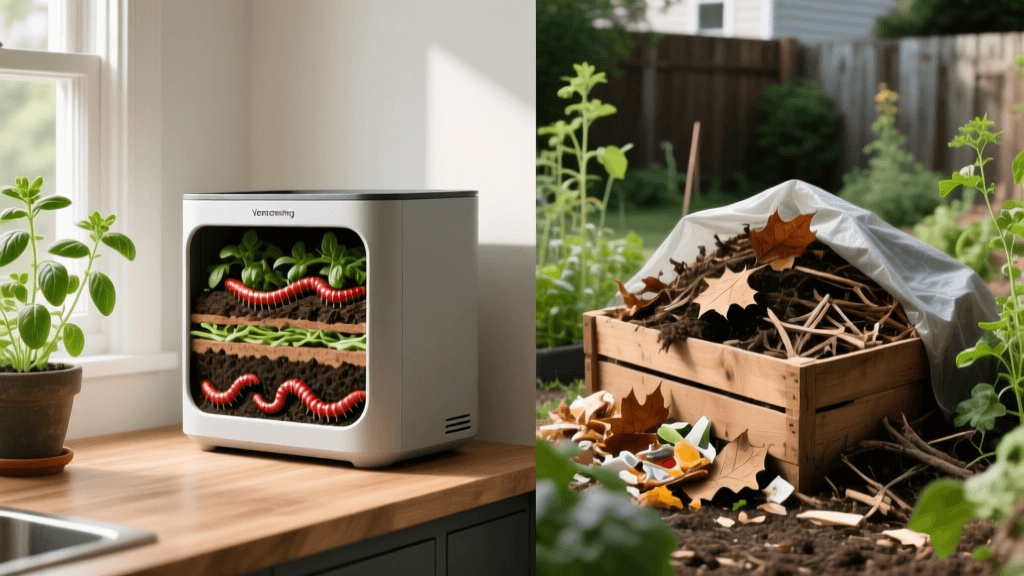
Vermicomposting: Harnessing Earthworms for Indoor and Outdoor Spaces
Vermicomposting bypasses the high-heat bacterial phase and instead utilizes specific species of composting worms—most notably the Red Wiggler (Eisenia fetida)—to consume and digest organic waste. As the worms process the kitchen scraps, they excrete 'castings' (vermicast), which is widely considered one of the most potent and biologically active organic fertilizers available to home gardeners.
Unlike traditional composting, vermicomposting is a cold process. It does not require large outdoor spaces or heavy physical labor to turn the pile. In fact, as noted by Penn State Extension, vermicomposting systems can be easily maintained indoors, in garages, or on shaded balconies, making it the perfect bridge for apartment dwellers or those who want to process daily kitchen scraps without trekking out to a backyard bin in the winter.
What Can You Feed Worms?
Worms are efficient but have sensitive digestive systems. They thrive on fruit and vegetable scraps, coffee grounds, and tea bags. However, you must avoid feeding them highly acidic foods (like large amounts of citrus or onions), meat, dairy, and oily foods, which can cause the bin to become anaerobic and attract pests.
Head-to-Head Comparison Chart
To help you visualize which system aligns with your lifestyle and garden goals, review the comparison table below:
| Feature | Traditional Hot Composting | Vermicomposting (Worm Bin) |
|---|---|---|
| Primary Agents | Thermophilic bacteria and fungi | Red Wiggler worms and mesophilic microbes |
| Space Required | Outdoor space (minimum 3x3x3 ft area) | Indoor or outdoor (small footprint, e.g., 2x1x1 ft tote) |
| Processing Time | 2 to 6 months (depending on turning frequency) | 2 to 3 months for continuous harvest |
| Maintenance Level | High (requires regular turning and moisture monitoring) | Low to Medium (feeding and occasional bedding replacement) |
| Odor Profile | Earthy, but can smell if anaerobic | Odorless (smells like rich forest soil) when maintained |
| Volume Capacity | High (handles bulk yard waste and leaves) | Low to Medium (best for daily kitchen scraps) |
| Winter Viability | Slows down or halts in freezing climates | Can continue indoors year-round |
Nutrient Profiles: How They Impact Garden-to-Table Yields
While both methods produce excellent soil amendments, their impact on soil biology and plant nutrition differs. The USDA Natural Resources Conservation Service emphasizes that true soil health relies on organic matter to improve soil structure, water infiltration, and microbial diversity. Both compost and vermicompost achieve this, but vermicompost holds a distinct edge in concentrated nutrient density.
Traditional Compost: The Soil Conditioner
Traditional compost is a phenomenal bulk soil conditioner. It excels at improving the tilth of heavy clay soils and increasing the water-holding capacity of sandy soils. It provides a slow, steady release of macro-nutrients (Nitrogen, Phosphorus, and Potassium) and serves as a long-term food source for the broader soil food web, including beneficial nematodes and mycorrhizal fungi.
Worm Castings: The Biological Powerhouse
Vermicompost, or worm castings, is less of a bulk soil builder and more of a biological inoculant. Castings are rich in humic acids, plant growth hormones (auxins and gibberellins), and highly available micro-nutrients. The mucus secreted by worms during digestion coats the organic particles, protecting the nutrients from leaching and allowing them to be released exactly when plant roots need them. Adding just a 10% ratio of worm castings to your potting mix can dramatically increase the yield and flavor profile of garden-to-table crops like peppers, tomatoes, and leafy greens.
Soil health is not just about adding raw nutrients; it is about cultivating a living, breathing ecosystem that supports plant immunity, water retention, and robust root structures.
Space, Climate, and Lifestyle Considerations
Your living situation will largely dictate your composting strategy. If you own a home with a spacious backyard and generate significant yard waste—such as grass clippings from weekly mowing or piles of autumn leaves—traditional hot composting is essential. A tumbling compost bin or a multi-bay wooden pallet system allows you to manage high volumes of waste efficiently.
Conversely, if you live in an urban environment, an apartment, or a home with strict HOA rules regarding outdoor structures, vermicomposting is the superior choice. Modern worm bins, such as multi-tray tower systems, are aesthetically pleasing, odor-free, and can easily slide under a kitchen sink or sit in a mudroom. They allow you to seamlessly integrate waste reduction into your daily indoor routine without compromising your outdoor living space's aesthetic.
Actionable Setup Guides for Both Methods
Starting a Traditional Hot Compost Pile
- Choose a Location: Select a well-draining, partially shaded outdoor spot. Direct, all-day sun can dry out the pile too quickly.
- Build the Base: Start with a 4-inch layer of coarse twigs or straw to promote airflow at the bottom of the pile.
- Layer Materials: Alternate layers of greens and browns. A good rule of thumb is to add two to three parts browns for every one part greens by volume.
- Water and Turn: The pile should feel like a wrung-out sponge. Use a pitchfork or compost aerator tool to turn the pile every 7 to 14 days, bringing the outer edges into the hot center to ensure even decomposition.
Starting an Indoor Vermicomposting Bin
- Select a Bin: Purchase a commercial worm tower or drill ventilation and drainage holes into an opaque 10-to-18-gallon plastic storage tote. Worms are photophobic and require darkness.
- Prepare the Bedding: Shred unbleached newspaper or corrugated cardboard. Soak it in water and wring it out until it is damp. Fill the bin 3/4 full with this bedding.
- Add the Worms: Purchase 1 pound of Red Wigglers (approximately 1,000 worms) from a reputable supplier. Gently place them on top of the bedding and leave a light on above the bin for the first 24 hours to encourage them to burrow down.
- Begin Feeding: Start slowly. Bury a small handful of vegetable scraps in a different corner of the bin each week. Wait until the previous food is mostly gone before adding more to prevent anaerobic rot.
Troubleshooting Common Issues
Even the most diligent gardeners encounter composting hiccups. In traditional piles, a foul, ammonia-like odor usually indicates an excess of nitrogen (too many greens) and a lack of oxygen. The fix is simple: turn the pile and mix in a generous amount of dry, carbon-heavy browns like shredded leaves or sawdust. If the pile is not heating up, it may be too dry or lacking nitrogen; add water and fresh coffee grounds or grass clippings to stoke the bacterial fire.
In vermicomposting, fruit flies are the most common nuisance. To eliminate them, always bury your food scraps at least two inches beneath the bedding surface, and consider placing a layer of damp burlap or a sheet of newspaper over the top of the bedding to create a physical barrier. If your worm bin begins to smell sour or putrid, you have likely overfed the worms, leading to anaerobic conditions. Stop feeding immediately, stir the top layer of bedding gently to introduce oxygen, and add dry, shredded cardboard to absorb excess moisture.
Conclusion: Cultivating a Sustainable Home Ecosystem
Ultimately, the choice between vermicomposting and traditional composting does not have to be mutually exclusive. Many seasoned home gardeners utilize a hybrid approach: maintaining an outdoor hot compost pile for seasonal yard waste and bulk soil building, while keeping a sleek vermicomposting bin in the kitchen for daily food scraps and high-grade fertilizer production. By integrating these soil health practices into your home maintenance routine, you close the loop on household waste, reduce your carbon footprint, and cultivate the vibrant, living soil necessary for a breathtaking garden-to-table lifestyle.

