
Landscaping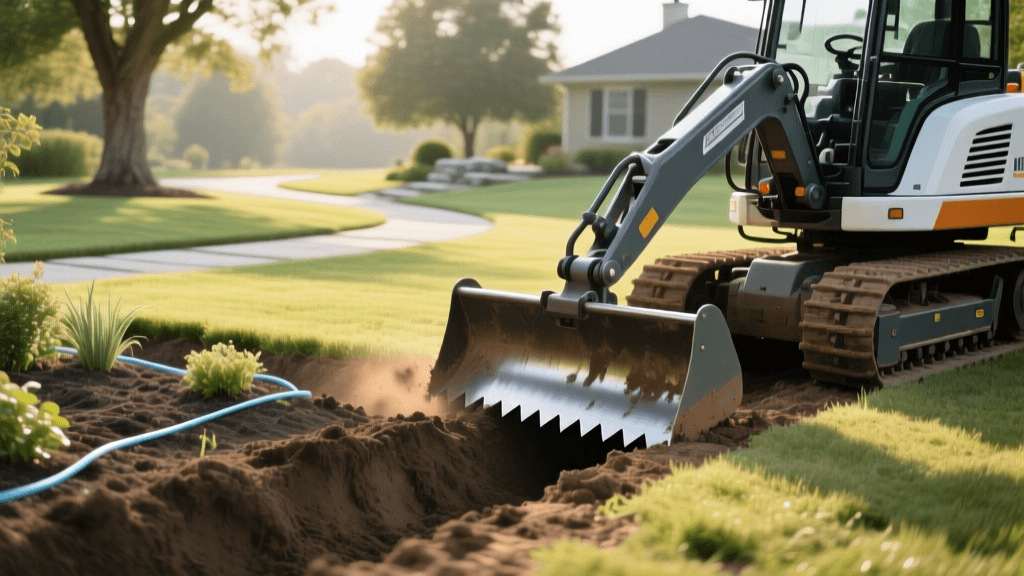
Walk-Behind Trencher Guide for Landscape Drainage Projects
Why Use a Walk-Behind Trencher for Landscaping?
When tackling major landscaping projects, few tasks are as physically demanding and time-consuming as digging trenches. Whether you are installing a French drain to divert water away from your foundation, laying underground irrigation lines, or burying low-voltage lighting cables for hardscaping features, moving earth by hand is highly inefficient. A walk-behind trencher is a compact, powerful piece of landscaping equipment designed to slice through soil, roots, and clay, dramatically reducing project timelines and physical strain.
For professional landscapers and serious DIY homeowners, understanding the nuances of trenching equipment is critical. Selecting the wrong machine can lead to equipment damage, poorly graded trenches, or even severe safety hazards. This comprehensive guide will walk you through the types of walk-behind trenchers, key specifications, soil considerations, and best practices for landscape drainage projects.
Understanding Walk-Behind Trencher Types
Not all trenchers are built for the same application. The landscaping industry generally categorizes walk-behind trenchers into three distinct types, each engineered for specific soil conditions and project requirements.
1. Chain Trenchers
Chain trenchers are the most common and versatile machines on the market. They operate similarly to a chainsaw, using a continuous metal chain equipped with cutting teeth to chew through the earth. The excavated soil is carried up the chain and deposited to the side via an auger or conveyor belt. Chain trenchers are ideal for digging deep, narrow trenches for French drains, dry wells, and primary irrigation lines. They can handle a variety of soil types, provided the correct cutting teeth are installed.
2. Plow Trenchers (Cable Plows)
Instead of removing soil, plow trenchers use a vibrating blade to slice the earth open, lay the pipe or cable directly into the fissure, and then close the soil behind them. These are exceptionally fast and cause minimal surface disruption, making them perfect for installing irrigation wiring, drip lines, or flexible poly tubing across large, established lawns. However, they are not suitable for rigid PVC pipes or projects requiring the removal of soil for gravel backfill.
3. Micro Trenchers
Micro trenchers are specialized, lightweight machines designed for shallow, narrow cuts—typically 1 to 6 inches deep and less than 2 inches wide. They are primarily used in hardscaping and urban landscaping to install fiber optics, low-voltage landscape lighting wires, or shallow drip irrigation lines along concrete sidewalks and paver patios. They often feature specialized diamond or carbide blades to cut through asphalt, concrete, and compacted base materials.
Key Specifications to Evaluate
When renting or purchasing a walk-behind trencher, evaluating the machine's specifications against your project's demands is essential for success.
- Engine Power (HP): Walk-behind trenchers typically range from 13 to 25 horsepower. A 13-18 HP engine is sufficient for soft topsoil and shallow irrigation lines. For deep French drains (24+ inches) or heavy clay soils, opt for a 20-25 HP model to maintain chain speed and prevent stalling.
- Trench Depth and Width: Standard chain trenchers can dig between 12 and 48 inches deep, and 4 to 12 inches wide. For a standard 4-inch corrugated French drain pipe surrounded by gravel, you will need a machine capable of digging at least 18 inches deep and 10 inches wide to allow room for the pipe, landscape fabric, and drainage rock.
- Tracks vs. Wheels: Wheeled trenchers are faster and easier to maneuver on hard, dry, or paved surfaces. Tracked trenchers, however, distribute the machine's weight over a larger surface area, providing superior traction and stability in muddy, soft, or sloped terrain without tearing up the turf.
- Hydrostatic Drive: Look for models with hydrostatic transmissions. They allow for infinite speed control and easy reversal, which is crucial when the chain encounters a large root or rock and needs to be backed out of the trench.
Matching Trencher Teeth to Soil Conditions
The cutting chain is only as effective as the teeth attached to it. Using the wrong tooth profile will result in excessive wear, slow progress, and potential chain snapping.
- Dirt/Cup Teeth: Best for loose topsoil, sand, and loam. They feature a cupped design that efficiently scoops and lifts the soil out of the trench.
- Shark/Combination Teeth: Designed for compacted clay, shale, and frost layers. They feature a pointed, aggressive profile that fractures hard earth before scooping it.
- Rock/Bullet Teeth: Made from heavy-duty carbide, these are necessary for trenching through gravelly soil, caliche, or soft bedrock. They do not scoop well but excel at pulverizing obstacles.
Equipment Comparison Chart
| Feature | Chain Trencher | Plow Trencher | Micro Trencher |
|---|---|---|---|
| Primary Use | French drains, rigid PVC, deep excavation | Flexible poly pipe, irrigation wire, turf preservation | Low-voltage lighting, shallow drip lines near hardscapes |
| Typical Depth | 12 - 48 inches | 6 - 24 inches | 1 - 6 inches |
| Typical Width | 4 - 12 inches | 1 - 3 inches (slit only) | 0.5 - 2 inches |
| Soil Disruption | High (removes soil, leaves spoil piles) | Low (slices and closes soil) | Minimal (cuts through hardscape/compacted base) |
| Average Daily Rental | $150 - $250 | $175 - $275 | $120 - $180 |
Step-by-Step: Trenching for a French Drain
Installing a French drain is one of the most common landscaping applications for a walk-behind chain trencher. Follow these steps for optimal results:
- Mark the Route: Use landscaping spray paint to mark the trench line. Ensure the path slopes away from the structure at a minimum grade of 1/8 inch per foot (1% slope).
- Set the Depth Stop: Adjust the trencher's boom depth stop to your required depth, typically 18 to 24 inches for foundation drainage.
- Engage and Walk: Start the engine, engage the chain at a moderate RPM, and slowly engage the ground drive. Let the machine pull itself forward; never force or push the trencher, as this can cause the chain to bind.
- Clear the Spoil: As the trencher deposits soil to the side, periodically clear it away from the trench lip to prevent loose dirt from collapsing back into the newly dug trench.
- Line and Fill: Line the trench with non-woven geotextile fabric, lay the perforated pipe (holes facing down), cover with washed drainage gravel, and fold the fabric over the top before backfilling with native soil.
Renting vs. Buying: A Cost Breakdown
For most residential landscapers and DIYers, renting is the most economical choice. A commercial-grade walk-behind trencher (such as a Ditch Witch C16 or Vermeer RTX150) costs between $5,000 and $10,000 to purchase new, not including maintenance, replacement teeth, and trailer transport. Rental yards typically charge $150 to $250 per day. If you are a landscaping contractor who installs drainage systems weekly, purchasing a machine and maintaining a fleet of replacement chains and teeth will yield a return on investment within the first year. For one-off weekend projects, renting is the undisputed winner.
Safety Protocols and Utility Locates
Trenching is inherently dangerous. Striking an underground utility line can result in fatal electrocution, massive gas explosions, or severe financial liability. Before the trencher's teeth ever touch the dirt, you must contact your local utility locating service. In the United States and Canada, dialing 811 or visiting Call 811 connects you to a free service that marks public underground utilities with colored paint and flags. Note that private lines, such as secondary irrigation or landscape lighting installed by previous homeowners, are not marked by 811 and must be located using a private utility locator or ground-penetrating radar.
Furthermore, trench collapse is a leading cause of fatalities in excavation work. The Occupational Safety and Health Administration (OSHA) mandates strict safety protocols for trenching. While OSHA regulations primarily target commercial job sites, the physics of soil collapse apply to everyone. Never allow a person or pet to stand inside an unshored trench deeper than 18 inches, and always keep the excavated spoil pile at least two feet away from the trench edge to prevent the weight of the dirt from caving in the trench walls.
Best Practices for Landscape Drainage
A trencher only digs the hole; the success of your drainage project relies on proper landscaping principles. According to the University of Minnesota Extension, managing yard drainage requires a holistic approach to water movement. When trenching for drainage, always direct water toward a safe termination point, such as a municipal storm drain, a dry creek bed, or a properly sized dry well. Avoid trenching directly over the root zones of mature, protected trees, as severing major structural roots can destabilize the tree and lead to its death. When working near tree canopies, use an air spade or hand-dig to carefully navigate around roots larger than two inches in diameter.
By matching the right walk-behind trencher to your specific soil conditions, adhering to strict safety and utility locating protocols, and following proven landscape grading principles, you can efficiently transform a waterlogged, unusable yard into a beautifully drained, thriving outdoor living space.

