
Gardening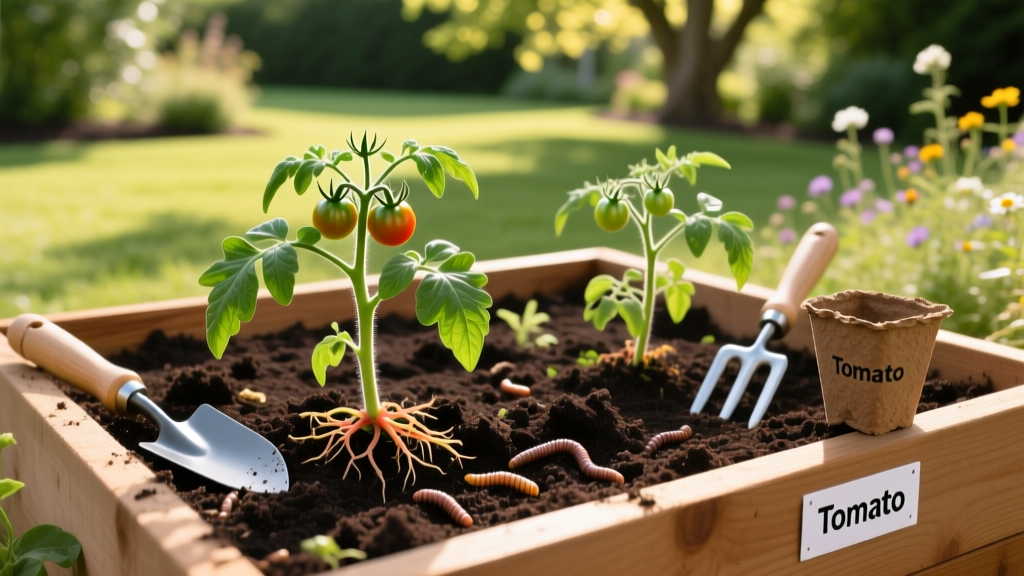
Best Soil for Tomatoes: A Beginner's Guide to Perfect Mixes
Why Tomatoes Demand More Than Just 'Dirt'
Tomatoes (Solanum lycopersicum) are the undisputed gateway crop for home gardeners, but they are notoriously heavy feeders with zero tolerance for poor drainage. Many beginners make the critical mistake of scooping up native yard soil or buying the cheapest topsoil available, only to end up with stunted plants, root rot, or blossom end rot. The truth is that the best soil for tomatoes isn't just dirt; it is a carefully engineered, living matrix designed to balance moisture retention, aeration, and nutrient density.
According to the University of Minnesota Extension, tomatoes require a loose, well-drained loam rich in organic matter. Achieving this requires understanding the physical and chemical properties of your growing medium. This guide strips away the guesswork, providing exact mixing ratios, specific product recommendations, and the science-backed adjustments needed to turn a beginner into a master tomato cultivator.
The Golden Rule of Tomato Roots: Tomato roots need oxygen just as much as they need water. If your soil stays waterlogged for more than 24 hours after a heavy rain or watering, the roots will suffocate, leading to fungal pathogens like Phytophthora blight. Always prioritize drainage over moisture retention.
The 3 Non-Negotiables of Tomato Soil
Before mixing or buying, you must ensure your soil meets three baseline criteria. If any of these are missing, your plants will struggle regardless of how much fertilizer you apply.
- Optimal pH (6.2 to 6.8): Tomatoes are slightly acid-loving. If your soil pH drifts above 7.0 (alkaline), essential micronutrients like iron, manganese, and zinc become chemically locked up, causing severe chlorosis (yellowing leaves). If it drops below 6.0, calcium uptake is inhibited, triggering blossom end rot.
- High Cation Exchange Capacity (CEC): CEC is a measure of the soil's ability to hold onto positively charged nutrients (like calcium, magnesium, and potassium). Soils heavy in organic compost and clay have high CEC, acting like a slow-release nutrient battery. Sandy soils have low CEC and require frequent, smaller feedings.
- Structural Porosity: The ideal mix contains both macropores (for rapid drainage and root expansion) and micropores (for holding water against gravity). This is achieved by combining organic matter with inorganic aeration materials like perlite or pumice.
Growing Method Matrix: In-Ground vs. Raised Beds vs. Containers
The 'best' soil formulation changes drastically depending on where you are planting. Never use heavy in-ground soil mixes in containers, and never use lightweight container mixes in the ground.
| Growing Method | Ideal Soil Base Strategy | Primary Risk Factor | Watering & Feeding Frequency |
|---|---|---|---|
| In-Ground | Amend native soil 50/50 with compost; avoid adding sand to clay. | Compaction and poor drainage in heavy clay zones. | Moderate. Deep watering 1-2 times weekly. |
| Raised Beds | 60% topsoil, 30% compost, 10% aeration (perlite/pumice). | Nutrient depletion over successive seasons. | High. Requires annual compost top-dressing. |
| Containers | 100% soilless potting mix (peat/coir, perlite, vermiculite). | Rapid drying and salt buildup from synthetic fertilizers. | Very High. Daily watering in peak summer heat. |
Formulating the Ultimate Tomato Mix (Step-by-Step)
If you are filling a new raised bed or large container, mixing your own soil is significantly cheaper and yields better results than buying bagged potting soil. Here is the exact volume ratio for a premium, beginner-friendly tomato blend.
1. The Base: 40% High-Quality Topsoil or Coconut Coir
For raised beds, use a screened loamy topsoil. For containers, skip topsoil entirely and use buffered coconut coir. Coir is superior to peat moss because it has a neutral pH (around 6.0) and rewets much easier once dried out.
2. The Nutrition: 30% Organic Compost & Worm Castings
Blend 20% diverse organic compost (leaf mold, manure, food scraps) with 10% pure earthworm castings. Worm castings are the secret weapon for tomatoes; they contain beneficial microbes and humic acids that dramatically increase the soil's CEC and suppress soil-borne diseases.
3. The Aeration: 20% Perlite or Pumice
Use coarse-grade perlite or horticultural pumice. This prevents the organic matter from breaking down and compacting over the 4-to-5-month growing season. Do not use vermiculite as your primary aerator; it holds too much water and can lead to soggy root zones in humid climates.
4. The Amendments: 10% Targeted Minerals
Mix in kelp meal (for trace minerals and cytokinins), rock phosphate (for root and bloom development), and a slow-release organic granular fertilizer (like a 4-6-3 NPK blend).
Beginner Mistake Alert: Never add raw, uncomposted manure or fresh wood chips to your tomato soil. Raw manure carries pathogens and burns roots with excess ammonia, while fresh wood chips tie up nitrogen as they decompose, starving your plants.
Bagged Soil Showdown: Top 3 Blends for Beginners
Not everyone has the space or time to mix soil from scratch. If you are buying pre-bagged soil, skip the generic 'Garden Soil' bags and opt for these premium, purpose-built blends. Prices reflect average 2026 retail estimates for 1.5 cubic foot bags.
- FoxFarm Ocean Forest Potting Soil (~$24/bag): A powerhouse mix containing forest humus, bat guano, and Pacific Northwest sea-going crab and fish meals.
Pros: Incredible microbial life; virtually no fertilizer needed for the first 4 weeks.
Cons: Can run slightly hot (high nitrogen) for very young seedlings; occasionally lacks sufficient calcium. - Coast of Maine Castine Blend (~$28/bag): Formulated specifically for raised beds and large containers, featuring mycorrhizae and aged bark.
Pros: Exceptional water retention without waterlogging; pH is perfectly buffered out of the bag.
Cons: Premium price point; heavy bags are difficult to transport. - Pro-Mix Premium Organic Vegetable Mix (~$22/bag): A peat-based, OMRI-listed soilless mix designed for high-drainage container growing.
Pros: Extremely lightweight; uniform texture prevents dry pockets.
Cons: Lacks long-term nutrients; requires a strict liquid feeding schedule after week 3.
Preventing Blossom End Rot: The Calcium Connection
Blossom end rot (BER) manifests as a sunken, leathery black scab on the bottom of the tomato. Beginners often assume this means the soil lacks calcium. However, the NC State Extension notes that BER is usually a calcium transport issue caused by erratic watering, not a true soil deficiency.
Calcium moves through the plant via the transpiration stream (water moving up the roots). If the soil dries out completely and then is flooded, calcium cannot reach the rapidly expanding fruit cells.
Pro-Tip: If your soil test confirms adequate calcium but you still see BER, apply Gypsum (Calcium Sulfate) at a rate of 1/2 cup per plant at the time of transplanting. Gypsum adds highly soluble calcium without altering your soil's pH, unlike agricultural lime, which will spike your pH and lock out other nutrients.
Mulching and Maintenance for the Season
The best soil for tomatoes will degrade quickly if left exposed to the sun and heavy rain. Once your transplants are established and the soil has warmed (usually 3-4 weeks after planting), apply a 2-to-3-inch layer of organic mulch. Clean straw, shredded autumn leaves, or untreated grass clippings are ideal.
Mulch serves three critical functions: it prevents soil-borne fungal spores from splashing onto the lower leaves during rain, it regulates soil temperature (keeping roots cooler during 90°F+ summer days), and it drastically reduces evaporation, maintaining the consistent soil moisture required to prevent fruit cracking and blossom end rot. By combining a structurally sound soil mix with proper mulching and consistent watering, even first-time gardeners can achieve the kind of massive, flavorful harvests usually reserved for seasoned horticulturists.

