
Gardening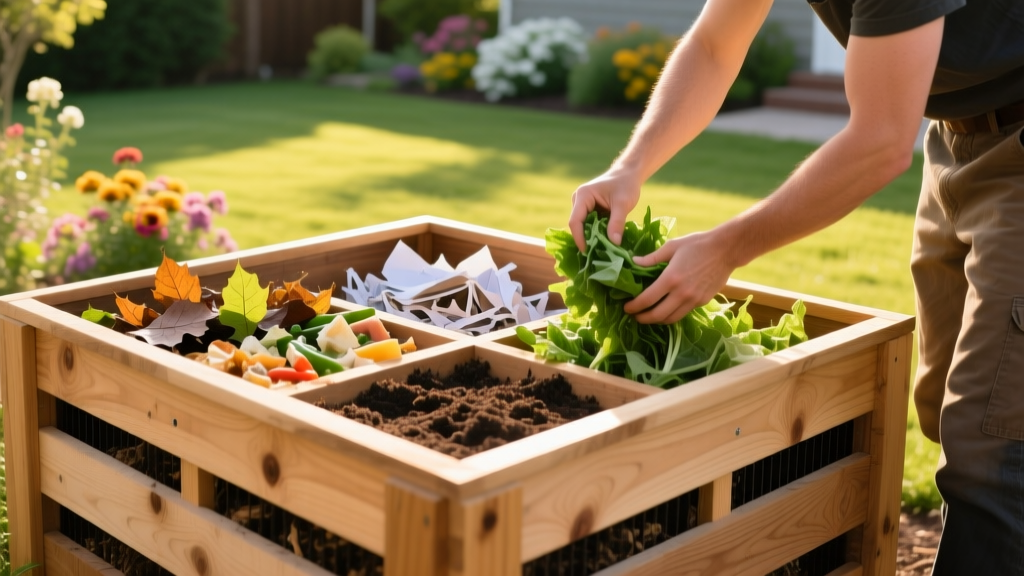
How to Build a Composting Bin for Rich Soil Amendments
The Thermodynamic Sweet Spot: Why Dimensions Matter
Commercial compost tumblers often fail to produce high-grade humus because they lack the critical mass required for thermophilic decomposition. When learning how to build a composting bin specifically for generating rich soil amendments and mulch, you must prioritize volume and airflow over convenience. The biological engine of hot composting relies on thermophilic bacteria, which require a minimum of 27 cubic feet of material to generate and sustain internal temperatures between 135°F and 160°F. This temperature range is non-negotiable; it is the exact threshold required to destroy weed seeds, neutralize soil-borne pathogens like Fusarium and Pythium, and break down complex lignins into stable humic acids.
A bin measuring exactly 3 feet wide by 3 feet deep by 3 feet high (36" x 36" x 36") provides the ideal 27-cubic-foot footprint. Bins smaller than this lose heat too rapidly through their surface area. Conversely, bins exceeding 4 feet in any dimension restrict oxygen penetration to the core, causing the center to go anaerobic. Anaerobic conditions produce phytotoxic organic acids that will actively harm your garden plants when applied as a soil amendment.
Pro Tip: Build a three-bay system (three adjacent 3x3x3 bins). This allows you to simultaneously manage fresh inputs in Bay 1, actively turning and heating material in Bay 2, and curing finished soil amendments in Bay 3.
Material Selection Matrix for Soil Safety
The materials you choose directly impact the chemical safety of your finished soil amendment. Many DIY builders mistakenly use pressure-treated lumber, which leaches copper, quaternary ammonium compounds, or older chromated copper arsenate (CCA) into the compost matrix. These heavy metals accumulate in the soil and stunt root development in sensitive crops like tomatoes and brassicas. Below is a comparison of optimal, soil-safe materials for constructing your bin.
| Material | Est. Cost (3-Bay) | Lifespan | Soil Safety & Notes |
|---|---|---|---|
| Western Red Cedar | $180 - $240 | 10-15 Years | 100% safe. Natural rot resistance. Best overall choice for premium amendments. |
| Untreated Hemlock | $120 - $150 | 5-7 Years | Safe, but degrades faster. Line interior with HDPE plastic to extend life. |
| Recycled Plastic Lumber | $350 - $500 | 25+ Years | Inert and safe. Heavy and requires specialized structural bracing. |
| 10-Gauge Welded Wire | $60 - $80 | 15-20 Years | Safe if galvanized. Excellent airflow, but poor moisture retention in dry climates. |
Step-by-Step Construction: The Slatted Cedar Bay
For the optimal balance of longevity, airflow, and moisture retention, a slatted cedar bin is the gold standard for serious soil amendment production. Follow these precise construction steps to ensure structural integrity and proper aeration.
1. Site Preparation and Rodent Exclusion
Select a level, well-drained site with partial shade to prevent the compost from drying out too quickly during summer months. Dig a shallow 2-inch trench matching the footprint of your bin. Lay down a base layer of 19-gauge, 1/2-inch galvanized hardware cloth. This specific mesh size is critical; standard chicken wire (1-inch hexagonal gaps) will not stop mice and voles from burrowing into the nutrient-dense base of your pile. Extend the hardware cloth 6 inches beyond the bin perimeter and bury it to prevent edge tunneling.
2. Frame Assembly
Cut four 4x4 untreated cedar posts to 42 inches in length. Sink them 6 inches into the ground at the corners of your 3x3 footprint, leaving 36 inches above grade. Secure the posts by tamping native soil tightly around them. Using 3-inch #10 star-drive exterior deck screws (which resist cam-out and corrosion better than standard Phillips or coated nails), attach 2x4 cedar rails horizontally between the posts at the bottom, middle, and top to create a rigid frame.
3. Installing the Slats for Airflow
Cut 1x6 cedar boards to 36-inch lengths. Attach these horizontally to the 2x4 frame on the back and two side walls. Crucial detail: Leave a precise 1/2-inch gap between each slat. This gap size allows adequate passive oxygen infiltration while preventing excessive moisture loss. If gaps are wider, the outer edges of the pile will dry out and stall decomposition; if narrower, the pile will suffocate.
4. The Front Access Panel
The front wall must be removable to allow you to turn the heavy, wet material with a pitchfork. Install two vertical 2x4 tracks on the inside of the front corner posts, creating a 1-inch channel. Cut your front 1x6 slats to 34 inches and slide them down into the channels. This allows you to remove the slats one by one from the top down as you harvest the cured soil amendment from the bottom of the pile.
Warning: Never use pallets stamped with "MB" (Methyl Bromide) or "HT" (Heat Treated) if they have been exposed to chemical spills. Furthermore, avoid pressure-treated wood stamped with ACQ or MCQ for any compost destined for edible vegetable gardens, as copper accumulation can reach phytotoxic levels over successive seasons.
Optimizing the C:N Ratio for Rapid Breakdown
Building the bin is only half the equation; managing the biochemistry inside it dictates the quality of your soil amendment. According to the Cornell Waste Management Institute, the ideal Carbon-to-Nitrogen (C:N) ratio for rapid thermophilic composting is between 25:1 and 30:1.
- High Carbon (Browns): Shredded autumn leaves (C:N 60:1), pine needles (C:N 80:1), and cardboard (C:N 350:1). These provide the structural bulk and energy for bacteria.
- High Nitrogen (Greens): Grass clippings (C:N 17:1), vegetable scraps (C:N 25:1), and coffee grounds (C:N 20:1). These provide the proteins necessary for bacterial cell multiplication.
To achieve the 30:1 target, mix materials by volume at a ratio of roughly 3 parts browns to 1 part greens. Chop all inputs into pieces no larger than 2 inches to exponentially increase the surface area available for microbial attack. The EPA's home composting guidelines also emphasize maintaining moisture levels between 40% and 60%. Perform the "sponge test": grab a handful of compost and squeeze it. It should yield one or two drops of water. If it drips continuously, add shredded cardboard; if it crumbles, water it with a hose while turning.
Harvesting and Curing Your Soil Amendment
Once the internal temperature drops below 100°F and the material is dark, uniform, and smells earthy (geosmin production), the active phase is complete. However, applying it immediately can tie up soil nitrogen as residual carbon continues to break down.
- Sifting: Build a simple sifting frame using 1/2-inch hardware cloth. Shovel the compost through the screen into a wheelbarrow. The fine material that passes through is your premium, ready-to-use soil amendment.
- Returning Overs: Toss the large, uncomposted twigs and clumps back into Bay 1 to act as an inoculant and bulking agent for your next batch.
- Curing: Move the sifted amendment to Bay 3. Let it cure for 3 to 4 weeks. This allows pH levels to stabilize (ideally settling between 6.5 and 7.5) and ensures any phytotoxic organic acids produced during the hot phase are fully oxidized.
Frequently Asked Questions
Can I add wood ash to my composting bin?
Add wood ash sparingly. While it provides potassium and calcium, it is highly alkaline (pH 10-12). Adding more than 5% wood ash by volume can spike the compost pH, causing nitrogen to volatilize and escape as ammonia gas, which robs your soil amendment of its most valuable nutrient.
How often should I turn the compost in a 3-bay system?
Turn the material in the active bay (Bay 2) every 3 to 5 days during the initial thermophilic phase. Moving the material from the outside of the pile to the center ensures all organic matter is exposed to the 140°F+ temperatures required for pathogen destruction. Once the temperature drops, reduce turning to once a week.
Why is my compost pile heating up but then stalling at 110°F?
A stall at 110°F usually indicates a nitrogen deficiency or insufficient moisture. The mesophilic bacteria have consumed the easily accessible nitrogen and cannot support the transition to thermophilic bacteria. Remix the pile, adding a nitrogen source like blood meal or fresh grass clippings, and check the moisture level using the sponge test.

