
Gardening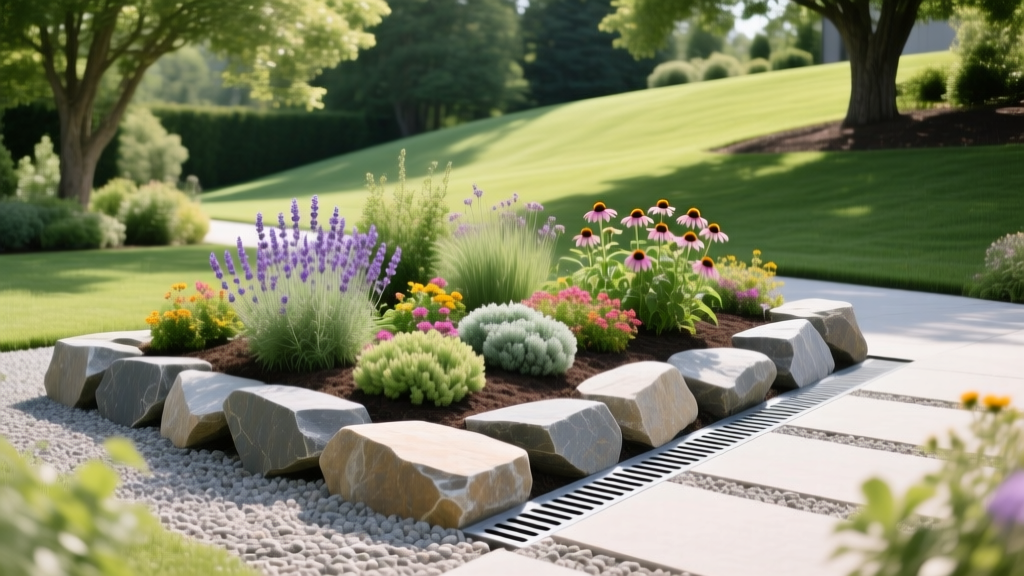
How to Build Flower Beds with Rocks: Edging and Drainage Guide
The Structural Advantage of Rock-Integrated Beds
Building flower beds with rocks solves two persistent landscaping failures: edge degradation and poor soil drainage. Unlike plastic or metal edging that warps under frost heave, and wood mulch that decomposes and invites fungal pathogens, a properly engineered rock border and base create a permanent, permeable hardscape boundary. When executed correctly, rock edging defines the planting zone while the internal rock mulch layer regulates soil moisture and suppresses weeds without suffocating root zones.
Thermal Dynamics and Rock Selection Matrix
Before purchasing materials, you must account for the thermal mass of stone. Rocks absorb solar radiation and transfer heat to the soil. According to Penn State Extension, rock mulch can significantly raise soil temperatures, which promotes early spring growth but can scorch shallow roots in mid-July. Selecting the correct stone type and color is critical to prevent root cook-off.
| Rock Type | Best Use Case | Thermal Profile | 2026 Avg. Cost (per ton) |
|---|---|---|---|
| 3/4" Crushed Granite | Base drainage layer, dry creek beds | Moderate (angular stones create air gaps) | $45 - $65 |
| 1-3" River Rock | Surface mulch, dry shade beds | Low (light colors reflect UV, smooth surface) | $75 - $110 |
| Red Lava Rock | Xeriscaping, succulent beds | High (dark red absorbs intense heat) | $85 - $120 |
| 6-12" Fieldstone Boulders | Perimeter edging, retaining walls | Low (massive thermal inertia, slow to heat) | $120 - $180 |
Pro Tip: If you are growing heat-sensitive perennials like Hostas or Astilbe, use light-colored river rock and apply a 1-inch layer of shredded hardwood mulch directly over the soil before adding the rocks. This buffer insulates the root zone from extreme thermal transfer.
Essential Tools and Material Costs
Skip the consumer-grade landscaping fabrics. Commercial-grade materials cost slightly more upfront but eliminate the need for replacement every three years. Budget for the following 2026 market rates:
- 3.5 oz Non-Woven Geotextile Fabric: $0.55 - $0.80 per sq. ft. (Must be permeable; allows water infiltration while blocking weed seeds).
- 6-inch Galvanized Steel Landscape Staples: $18 per 50-pack (Essential for anchoring fabric against wind uplift).
- Manual Trenching Spade (e.g., Fiskars 46" Steel D-Handle): $45 - $60 (Narrow blade is required for clean vertical trench walls).
- Hand Tamper (8x8 inch steel base): $35 (Required for compacting the trench base to prevent frost heave).
Step-by-Step Installation Guide
Step 1: Trenching and Grading the Perimeter
Mark your bed outline using a garden hose for natural curves. Using your trenching spade, dig a continuous trench along the perimeter. The trench must be exactly 4 inches deep and 6 inches wide. This depth allows your edging boulders to sit 50% below grade and 50% above grade, locking them into the soil profile. Grade the interior of the bed so it slopes away from any nearby foundations at a minimum 2% grade (1/4 inch drop per foot).
Step 2: Sub-Base Compaction and Fabric Deployment
Do not lay geotextile fabric directly over loose, uncompacted soil. Over time, foot traffic and heavy stones will push the fabric into the mud, destroying its permeability. Add 1 inch of 3/4" crushed granite to the bottom of your perimeter trench and compact it firmly with your hand tamper. Roll out your 3.5 oz non-woven geotextile fabric over the entire bed area. Overlap all seams by a minimum of 6 inches. Secure the fabric every 12 inches along the perimeter and every 3 feet in the center using galvanized steel staples. Cut X-shaped slits in the fabric wherever you plan to install plants.
Critical Warning: Never use solid black polyethylene plastic sheeting as a weed barrier. Research from NC State Extension confirms that impermeable plastic blocks oxygen exchange to the soil microbiome and causes severe water pooling, leading to root asphyxiation and anaerobic rot.
Step 3: Setting the Hardscape Edging
Place your 6-12" fieldstone boulders into the compacted trench. Position them tightly together, ensuring the bottom third of each stone is buried in the crushed granite base. The soil excavated from the trench should be mounded against the interior side of the stones to create a seamless transition into the planting zone. Check the top line of the stones with a 4-foot level; minor variations are natural, but avoid drops greater than 1 inch between adjacent stones.
Step 4: Soil Amendment and Strategic Planting
Fill the interior bed with your planting mix. When placing your perennials or shrubs, dig through the X-slits you cut in the fabric. The most common failure in rock beds is the "rock volcano"—piling stones directly against the plant stem. Maintain a strict 2-to-3-inch clearance between the plant crown and the rock mulch. Fill this clearance zone with fine wood mulch or bare soil to prevent the heavy stones from abrading the stem and trapping excess moisture against the bark.
Troubleshooting Common Failure Modes
Even well-planned flower beds with rocks can experience mechanical or biological failures. Use this diagnostic matrix to identify and correct issues in existing installations.
| Symptom | Root Cause | Corrective Action |
|---|---|---|
| Water pooling on top of the fabric after rain | Using woven plastic or degraded cheap fabric that has clogged with silt. | Rake back rocks, remove old fabric, and install 3.5 oz non-woven polypropylene geotextile. |
| Perimeter edging stones heaving upward after winter | Trench base was not compacted; expanding freezing water pushes stones up. | Excavate heaved stones, add 2 inches of crushed gravel base, tamp thoroughly, and reset stones deeper. |
| Plant stems rotting or girdling at the soil line | Rocks piled against the crown, trapping moisture and harboring fungal pathogens. | Pull all rocks 3 inches away from the stem. Replace the inner ring with breathable shredded cedar mulch. |
| Weeds emerging through the center of the bed | Wind-blown soil settling on top of the fabric, creating a germination layer. | Use a leaf blower on low setting to remove surface debris twice a year. Spot-treat emergent weeds with 20% horticultural vinegar. |
Long-Term Maintenance Protocol
Rock beds are not entirely "zero maintenance," but they reduce annual labor by up to 60% compared to traditional wood mulch beds. In early spring, before new perennial growth emerges, use a stiff-tined metal leaf rake to gently agitate the top layer of river rock. This breaks up compacted debris and dislodges weed seeds before they establish roots. Every three to four years, the rock layer will inevitably sink slightly into the soil profile due to earthworm activity and settling. Plan to top-dress the bed with a fresh 1-inch layer of matching river rock to maintain the original 2-inch depth and ensure complete fabric coverage.

