
Gardening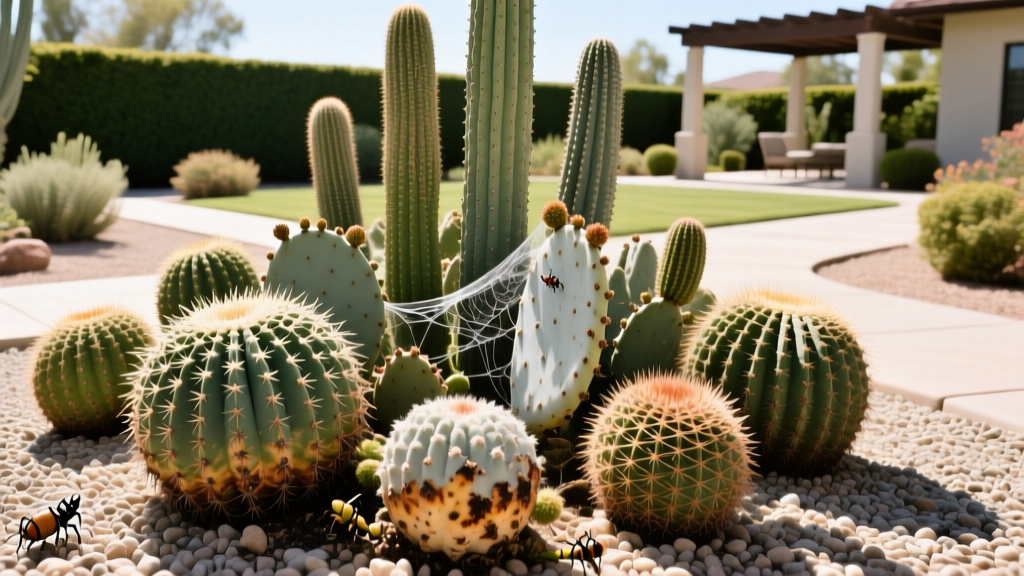
Cactus Gardening Problem Solver: Diagnosing Rot, Pests, and Sunburn
The Cactus Diagnostic Matrix
Cacti are frequently marketed as indestructible houseplants, but improper cultivation rapidly triggers physiological decline. Successful cactus gardening requires moving beyond generic watering schedules and learning to read the subtle morphological cues your plants display. Before attempting any treatment, cross-reference your plant's symptoms with the diagnostic matrix below to identify the primary stressor.
| Visible Symptom | Primary Cause | Immediate Action | Long-Term Correction |
|---|---|---|---|
| Mushy, black/brown base | Root/Stem Rot (Overwatering) | Unpot, excise rot, dust with sulfur | Rebuild soil with 60% inorganic grit |
| White, cottony clusters | Mealybugs (Pseudococcidae) | Spot-treat with 70% isopropyl alcohol | Apply systemic Imidacloprid soil drench |
| Elongated, pale, thin growth | Etiolation (Insufficient Light) | Move to brighter location gradually | Install 200W full-spectrum LED grow light |
| Bleached, dry, scabbed patches | Sunburn (UV Shock) | Move to filtered light immediately | Harden off using 30% aluminet shade cloth |
| Wrinkled, deflated epidermis | Severe Underwatering | Submerge pot in water for 30 mins | Adopt the 'soak and dry' watering method |
Root and Stem Rot: The Surgical Approach
Root and stem rot, primarily caused by Phytophthora and Pythium water molds, is the leading cause of mortality in cactus gardening. These pathogens thrive in anaerobic, moisture-retentive environments. If your cactus feels soft at the base, or if the soil remains damp for more than five days after watering, rot is likely already advancing through the vascular tissue.
Warning: The Squeeze Test
Gently squeeze the base of the cactus. A healthy cactus will feel firm and rigid, even when fully dehydrated. If the tissue yields to pressure, feels spongy, or leaks dark fluid, you must perform surgical excision immediately. Do not wait for the rot to reach the apical meristem.
Gently squeeze the base of the cactus. A healthy cactus will feel firm and rigid, even when fully dehydrated. If the tissue yields to pressure, feels spongy, or leaks dark fluid, you must perform surgical excision immediately. Do not wait for the rot to reach the apical meristem.
Step-by-Step Rot Excision
- Unpot and Inspect: Remove the cactus from its container. Wash away all soil from the root system. Healthy roots are firm and white/tan; rotted roots are black, mushy, and detach easily.
- Sterilize Your Tools: Wipe a sharp, serrated knife with a 10% bleach solution or 70% isopropyl alcohol. Serrated edges cause less cellular crushing than smooth blades on fibrous cactus tissue.
- Amputate: Cut horizontally across the stem, well above the visible rot margin. You must cut until the exposed cross-section is 100% white or pale green. If you see any brown or orange vascular rings, sterilize the blade and cut another half-inch higher.
- Treat and Callus: Dust the fresh wound generously with powdered sulfur or Captan fungicide. Place the cactus in a dry, shaded area with high airflow for 7 to 14 days until a hard, dry callus forms over the cut.
- Re-root: Plant the callused cutting in a dry, highly porous mix. Do not water for two weeks to force the plant to push new adventitious roots.
According to cultivation guidelines from the Cactus and Succulent Society of America, the majority of rot cases stem from commercial 'cactus soils' that contain too much peat moss. For a reliable, fast-draining mix, combine 40% standard potting soil, 30% pumice, 20% coarse silica sand (grade #12 or #20), and 10% calcined clay (such as Turface). This ensures the soil drains completely within 15 seconds of watering.
Pest Eradication: Mealybugs and Spider Mites
Pests in cactus gardening are often introduced via new nursery stock. Mealybugs hide deep within the areoles and root systems, while spider mites spin microscopic webbing near the apex. Because cacti have thick cuticles, contact sprays often fail to penetrate their hiding spots.
Targeted Treatment Protocols
- Spot Treatment (Mealybugs): Dip a cotton swab in 70% isopropyl alcohol and physically touch every visible white, cottony mass. The alcohol dissolves their waxy protective coating, killing them on contact. Avoid using 90%+ alcohol, as it evaporates too quickly to be effective.
- Systemic Drench (Severe Infestations): For root mealybugs or widespread outbreaks, contact sprays are useless. Use a systemic insecticide containing 0.5% Imidacloprid (such as Bonide Annual Tree and Shrub). Mix according to the label and use it as a soil drench. The cactus absorbs the chemical through its roots, making the plant's sap toxic to sap-sucking insects for up to 12 weeks.
- Spider Mite Management: Spider mites thrive in hot, dry conditions. Increase ambient humidity slightly and spray the plant with a horticultural oil or Neem oil emulsion at a 2% concentration. Apply only in the evening to prevent the oil from magnifying sunlight and burning the epidermis.
Light Stress: Etiolation vs. Sunburn
Light management is the most misunderstood aspect of cactus gardening. Most desert species require a minimum of 10,000 to 20,000 lux of direct light for 6 to 8 hours daily to maintain compact, geometric growth.
Fixing Etiolation (Stretching)
When a cactus lacks sufficient photons, it alters its auxin hormone distribution to stretch rapidly toward the nearest light source. This etiolated growth is pale, narrow, and structurally weak. You cannot reverse etiolation. The stretched tissue will never thicken. Your options are to leave it as a permanent record of the light deficit, or to 'behead' the cactus above the stretched section and re-root the healthy apex. To prevent recurrence, supplement winter sunlight with a 200W full-spectrum LED grow light positioned 12 to 18 inches above the canopy.
Managing Sunburn and Scabbing
Conversely, moving a greenhouse-grown or indoor cactus directly into harsh, unfiltered midday summer sun will cause photoinhibition and UV damage. This manifests as permanent yellow, white, or brown scabbed patches on the side facing the sun. If sunburn occurs, move the plant to bright, indirect light immediately. When transitioning cacti outdoors in spring, utilize a 30% to 50% aluminet shade cloth for the first three weeks, gradually reducing the shade to acclimate the plant's epidermal wax layer to intense UV radiation. The University of Arizona Cooperative Extension emphasizes that gradual hardening off is critical for preventing irreversible epidermal scarring in columnar and barrel species.
'A sunburned cactus will carry its scars for life, as the damaged areoles will never regenerate. Prevention through gradual acclimation is the only viable strategy for outdoor transitions.' — Desert Horticulture Best Practices
Natural Aging vs. Underwatering: Corking and Shriveling
Not all visual anomalies are pathological. 'Corking' (suberization) is a natural aging process where the lower stem of a mature cactus develops a dry, brown, bark-like texture. This provides structural support for the heavy, water-filled upper growth. Corking starts at the soil line and moves upward uniformly; the tissue is hard and dry. Do not attempt to treat or cut away natural corking.
Pro Tip: The Wrinkle Test
If the base is brown but the upper stem is deeply wrinkled, ribbed, and feels slightly deflated, the plant is severely dehydrated, not just aging. Submerge the entire pot in a basin of room-temperature water for 30 minutes to force the dry peat-based soil to rehydrate, then allow it to drain completely.
If the base is brown but the upper stem is deeply wrinkled, ribbed, and feels slightly deflated, the plant is severely dehydrated, not just aging. Submerge the entire pot in a basin of room-temperature water for 30 minutes to force the dry peat-based soil to rehydrate, then allow it to drain completely.
Mastering cactus gardening requires shifting from a passive observation mindset to an active diagnostic approach. By maintaining a highly porous inorganic soil matrix, utilizing systemic pest controls when necessary, and strictly managing light exposure, you can cultivate structurally perfect, disease-free specimens for decades. For further reading on species-specific light requirements and winter dormancy protocols, consult the cultivation archives at the Royal Horticultural Society.

