
Gardening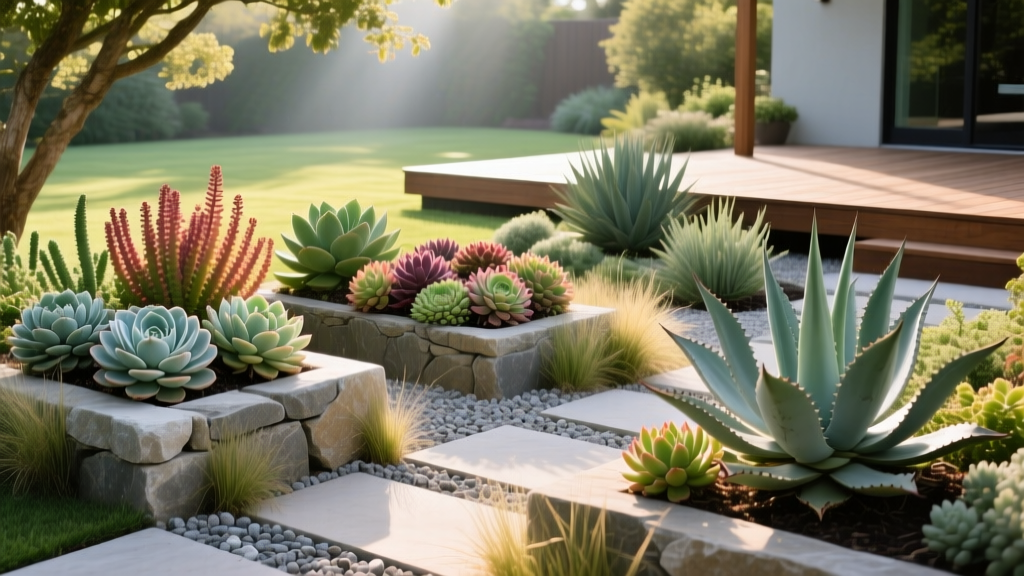
Best Cold-Hardy Outdoor Succulents for Year-Round Gardens
The Botanical Reality of Cold-Hardy Succulents
Most gardeners mistakenly confine succulents to indoor windowsills or arid desert landscapes, assuming these fleshy plants will instantly turn to mush at the first sign of frost. This is a fundamental misunderstanding of the Crassulaceae and Cactaceae families. Many outdoor succulents possess remarkable physiological adaptations—specifically 'dehydration hardening'—that allow them to survive sub-zero temperatures by pulling moisture out of their leaves and into their root systems before winter sets in.
For beginners looking to build a resilient, low-water, year-round garden, integrating cold-hardy outdoor succulents provides architectural texture and vibrant seasonal color shifts that traditional perennials simply cannot match. The secret to success lies not in the temperature, but in moisture management and soil engineering. Below is a comprehensive, expert-level framework for selecting, planting, and maintaining outdoor succulents in temperate and cold climates.
The Big Three: Best Beginner-Friendly Outdoor Succulents
When starting an outdoor succulent bed, bypass the tender Echeveria and Aloe varieties sold in big-box garden centers. Instead, focus on these three proven, cold-tolerant genera that thrive in Zones 3 through 9.
| Variety / Cultivar | Hardiness Zones | Mature Size | Sun & Water Needs | Estimated Cost (2026) |
|---|---|---|---|---|
| Sempervivum tectorum (Hens & Chicks) | 3 - 8 | 4' H x 12' W | Full sun; extremely low water | $4 - $8 per 3-inch plug |
| Sedum spurium 'Dragon's Blood' | 3 - 9 | 6' H x 18' W | Full to part sun; low water | $10 - $14 per 1-gallon pot |
| Opuntia humifusa (Eastern Prickly Pear) | 4 - 9 | 12' H x 24' W | Full sun (6+ hrs); zero supplemental water | $18 - $25 per 1-gallon pot |
According to the Royal Horticultural Society (RHS), Sempervivum species are virtually indestructible once established, provided they are not sitting in waterlogged soil. Their rosettes often shift from bright green to deep burgundy or purple in response to winter cold and high UV exposure, adding crucial winter interest to the garden.
The Make-or-Break Factor: Engineering the Perfect Soil
The number one cause of outdoor succulent failure is root asphyxiation and subsequent rot caused by heavy, moisture-retentive native soils. You cannot plant cold-hardy succulents directly into standard garden loam or clay. You must engineer a highly porous, fast-draining micro-environment.
The Professional Nursery Soil Recipe
Do not rely on bagged 'Cactus and Succulent Mix' from hardware stores; these often contain too much peat moss, which holds water like a sponge. Mix your own using this exact ratio by volume:
- 50% Pumice or Calcined Clay: Use 1/4-inch Bonsai Jack pumice or Turface MVP. This provides permanent aeration and will not break down over time like perlite.
- 30% Coarse Silica Sand: Must be coarse horticultural sand (grit size 1-2mm). Never use play sand or masonry sand, which will compact and create concrete.
- 20% Pine Bark Fines or High-Quality Compost: Provides just enough organic matter to feed the soil microbiome without retaining excess moisture.
Step-by-Step Planting Protocol for In-Ground Beds
Proper planting depth and crown management are critical for outdoor succulents. Follow this precise protocol to ensure long-term survival:
- Excavate and Amend: Dig a hole twice as wide as the root ball, but only as deep as the root ball itself. If your native soil is heavy clay, excavate 6 inches deeper and backfill the bottom with 2 inches of crushed gravel for a French-drain effect.
- Tease the Roots: Gently loosen the outer roots of the nursery pot. Succulents often become severely root-bound in containers; failing to tease them out will cause the plant to slowly strangle itself over the first year.
- Elevate the Crown: This is the most crucial step. Place the plant in the hole so that the base of the stem (the crown) sits 1/4 to 1/2 inch above the surrounding soil grade. Burying the crown guarantees rot.
- Backfill and Tamp: Fill the voids with your custom 50/30/20 soil mix. Tamp down gently to eliminate large air pockets, but do not compact the soil.
- Apply a Gravel Mulch Ring: Top-dress the soil surface around the base of the plant with a 1-inch layer of 1/4-inch pea gravel or crushed granite. This inorganic mulch wicks moisture away from the basal leaves, prevents soil splashing during heavy rains, and radiates heat back to the plant at night.
Winter Survival: Managing Moisture vs. Temperature
Beginners often assume that freezing temperatures kill outdoor succulents. In reality, wet cold is the true enemy. A dry Sempervivum can easily survive -20°F (-29°C), but that same plant will turn to mush at 30°F (-1°C) if its roots are sitting in saturated, freezing mud.
The Autumn Hydration Cut-Off
Starting in early September (or 4 weeks before your first average frost date), stop all supplemental watering. This intentional drought stress triggers the plant's dehydration hardening process. The leaves will visibly shrivel slightly as the plant pulls water into its root system to prevent cellular ice crystal formation. If you continue watering into late autumn, the leaves remain turgid and will burst when the first freeze hits.
For areas that experience heavy winter rains or snowmelt, consider planting outdoor succulents on a slight berm (a raised mound of soil 4 to 6 inches high) or on a south-facing slope to ensure rapid runoff. The Missouri Botanical Garden heavily utilizes raised berms in their rock gardens specifically to protect alpine and succulent specimens from winter waterlogging.
Troubleshooting Common Outdoor Succulent Failures
Even with perfect soil, environmental stressors can cause issues. Use this diagnostic framework to identify and correct problems before they become fatal.
- Symptom: Leaves become translucent, yellow, and mushy at the base.
Diagnosis: Crown rot caused by excess moisture or planting too deeply.
Fix: If caught early, remove the plant, cut away all rotting tissue with a sterilized knife, let the cut callous over in the shade for 3 days, and replant in fresh, dry pumice. If the rot has reached the main stem, the plant is a loss; discard it and treat the soil with a copper-based fungicide before replanting. - Symptom: Rosettes are stretching upward, losing their tight, symmetrical shape, and turning pale green.
Diagnosis: Etiolation due to insufficient sunlight. Outdoor succulents require a minimum of 6 hours of direct, unfiltered sunlight daily.
Fix: Relocate the plant to a full-sun exposure. You can 'behead' the stretched rosette with a clean blade, let it callous, and replant it to reset its compact growth habit. - Symptom: Fleshy pads or leaves are shriveled, crispy, and brown at the tips during mid-summer.
Diagnosis: Severe underwatering or sunburn from sudden exposure.
Fix: While highly drought-tolerant, newly planted outdoor succulents need a deep watering every 10-14 days during their first summer to establish roots. If the plant was moved directly from a greenhouse to blazing noon sun, provide 30% shade cloth for the first two weeks to acclimate the cuticle.
By prioritizing drainage over traditional fertilization, respecting the autumn hydration cut-off, and selecting genetically cold-hardy cultivars, you can establish a striking, architecturally diverse succulent garden that thrives outdoors year-round with minimal intervention.

