
Gardening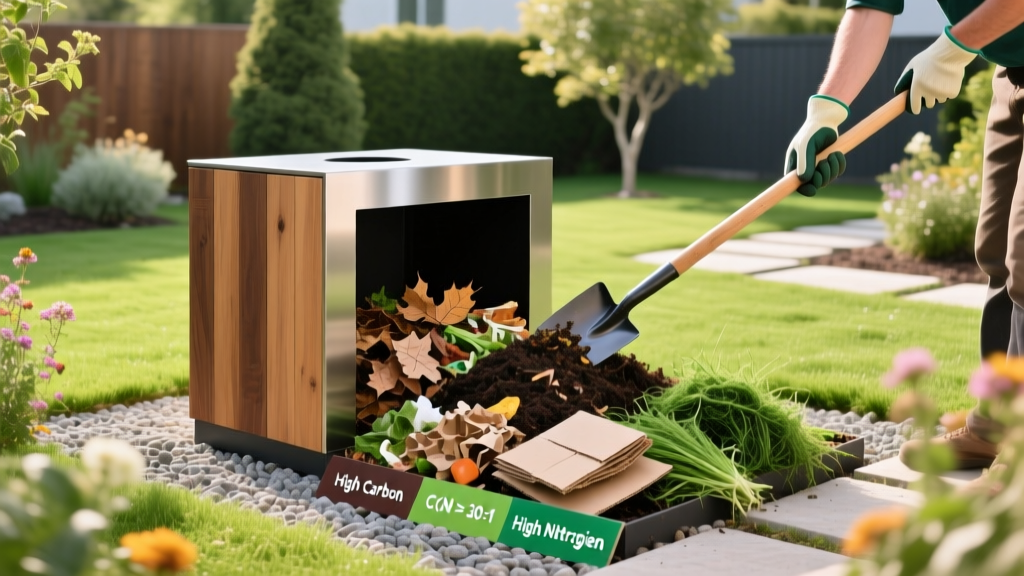
Composting Outdoors: Bin Setup, C/N Ratios, and Soil Amendment Guide
Selecting the Right Outdoor Composting System
Composting outdoors is the most efficient method for processing high volumes of yard waste and kitchen scraps into humus-rich soil amendments. Unlike indoor vermicomposting, outdoor systems leverage ambient temperature fluctuations, solar radiation, and larger microbial populations to achieve thermophilic decomposition. The first critical decision is selecting a containment system that matches your property size, waste volume, and local pest pressure.
To achieve the thermal mass required for pathogen-killing temperatures (131°F to 160°F), an outdoor pile must be at least 3 feet wide, 3 feet long, and 3 feet high (27 cubic feet). Smaller volumes will decompose, but they will remain in the slower mesophilic temperature phase.
| System Type | Top Model Example | Avg. Cost | Capacity | Pest Resistance | Best Use Case |
|---|---|---|---|---|---|
| Stationary Bin | Geobin Expandable | $35 - $45 | 30 - 40 Gal | Low (Open bottom) | High-volume yard waste, leaf mold |
| Dual Tumbler | FCMP Dual Chamber | $90 - $120 | 37 Gal (Total) | High (Fully enclosed) | Urban lots, kitchen scraps, rodent areas |
| Insulated Bin | Hotbin Mk II | $200 - $250 | 25 - 30 Gal | High | Year-round cold climates, fast composting |
| Open Bay (DIY) | Pallet/Wire Mesh | $0 - $20 | Unlimited | None | Farms, large properties, heavy brush |
The Science of C/N Ratios: Building the Perfect Pile
Microbes require carbon (C) for energy and nitrogen (N) for protein synthesis. The ideal starting ratio for rapid outdoor decomposition is 30 parts carbon to 1 part nitrogen (30:1) by weight. Because home gardeners rarely weigh their scraps, we translate this into volume measurements based on the specific C/N profiles of common materials.
Expert Framework: The 2-to-1 Volume Rule
To consistently hit the 30:1 target without a scale, mix 2 parts by volume of high-carbon browns (e.g., dry leaves, 40:1) with 1 part by volume of high-nitrogen greens (e.g., vegetable scraps, 15:1). This mathematical synthesis reliably yields a pile ratio between 28:1 and 32:1.
To consistently hit the 30:1 target without a scale, mix 2 parts by volume of high-carbon browns (e.g., dry leaves, 40:1) with 1 part by volume of high-nitrogen greens (e.g., vegetable scraps, 15:1). This mathematical synthesis reliably yields a pile ratio between 28:1 and 32:1.
High-Nitrogen 'Greens' (The Accelerators)
- Fresh Grass Clippings: 17:1 ratio. High moisture; apply in thin 2-inch layers to prevent anaerobic matting.
- Coffee Grounds: 20:1 ratio. Despite their brown color, they are a potent nitrogen source. Limit to 10% of total pile volume to avoid caffeine-induced microbial inhibition.
- Vegetable Scraps: 15:1 to 20:1 ratio. Chop into 1-inch pieces to increase surface area for bacterial colonization.
High-Carbon 'Browns' (The Bulking Agents)
- Dry Oak Leaves: 40:1 to 50:1 ratio. Shred with a mulching mower before adding; whole leaves take 12+ months to break down.
- Pine Needles: 60:1 to 80:1 ratio. Highly acidic initially, but pH neutralizes during decomposition. Limit to 15% of the pile.
- Shredded Corrugated Cardboard: 350:1 ratio. Excellent for moisture retention and structure. Remove all glossy tape and wax coatings.
Step-by-Step Pile Construction and Moisture Management
Proper assembly prevents the most common failure modes: anaerobic stagnation and moisture loss. Follow this exact layering sequence when building a new 27-cubic-foot outdoor pile.
- The Base Layer (Aeration): Lay down 4 to 6 inches of coarse, woody material (e.g., 1-inch wood chips or thick twigs). This creates a passive air plenum at the bottom, allowing oxygen to draw upward through the pile via the chimney effect.
- The Inoculant Layer: Add a 1-inch layer of finished compost, topsoil, or compost starter. This introduces the initial population of Bacillus and Actinomycetes bacteria.
- The Core Layers (Alternating): Add 4 inches of browns, followed by 2 inches of greens. Water each brown layer lightly as you build.
- The Cap (Insulation & Pest Deterrence): Finish with a 3-inch layer of pure browns (dry leaves or straw). This bio-filter traps escaping ammonia odors and hides food scraps from raccoons and flies.
Moisture Metrics: The pile must maintain 45% to 60% moisture content. Perform the 'wrung-out sponge' test: grab a handful of compost (wearing gloves) and squeeze. If zero drops fall out, it is too dry (microbial activity halts). If a steady stream of water runs out, it is too wet (displaces oxygen, causing anaerobic rot). Aim for exactly one or two drops.
Troubleshooting Common Outdoor Composting Failures
Even with precise ratios, environmental variables can disrupt the thermophilic phase. Use this diagnostic matrix to correct issues before the pile stalls.
| Symptom | Root Cause | Exact Corrective Action |
|---|---|---|
| Strong ammonia odor | Excess Nitrogen (C/N ratio below 20:1) | Turn pile and incorporate 30% more shredded dry leaves or straw by volume. |
| Rotten egg / sulfur smell | Anaerobic conditions (Compaction or excess water) | Turn pile immediately. Mix in 3-inch wood chips to increase free air space to 35%. |
| Pile stalled at 80°F - 90°F | Insufficient moisture or nitrogen depletion | Check moisture. If dry, add water. If moist, mix in 1 cup of blood meal per cubic foot to restart bacterial heat. |
| Swarm of black soldier flies | Exposed kitchen scraps or excess moisture | Bury new food scraps at least 6 inches deep and cover the entire pile with a 2-inch layer of sawdust. |
| White, ashy, powdery spots | Overheating (Temperatures exceeding 160°F) | Turn the pile to dissipate heat. Ashy spots are beneficial Actinomycetes, but sustained heat above 160°F kills essential fungi. |
Harvesting and Applying Compost as a Soil Amendment
Outdoor composting typically yields finished humus in 3 to 6 months using hot methods, or 9 to 12 months using passive cold methods. Finished compost should be dark brown, crumbly, and smell like rich forest soil. The original materials should be unrecognizable, except for a few stubborn wood chips.
'Compost improves soil structure, increases water retention in sandy soils, and enhances drainage in heavy clay. However, it is a soil amendment, not a complete fertilizer. Always pair compost applications with a soil test to address specific N-P-K deficiencies.' — University of Minnesota Extension
Application Rates for Specific Landscapes
- Established Lawns (Topdressing): Apply a 1/4-inch to 1/2-inch layer of finely screened compost in early fall. This requires approximately 0.75 to 1.5 cubic yards per 1,000 square feet. Rake it into the aeration holes to improve the root zone.
- New Vegetable Garden Beds: Incorporate 2 to 3 inches of compost into the top 6 inches of native soil before spring planting. This translates to roughly 3 cubic yards per 1,000 square feet.
- Perennial and Shrub Mulching: Apply a 1-inch ring of compost around the drip line of trees and shrubs, followed by a 2-inch layer of arborist wood chips to lock in moisture and feed the soil food web.
For comprehensive data on the environmental benefits of diverting organic waste from landfills and the fundamental biology of decomposition, refer to the EPA's Composting Basics guide. Additionally, the Cornell Waste Management Institute provides extensive, peer-reviewed research on large-scale and residential carbon-nitrogen dynamics.

