
Gardening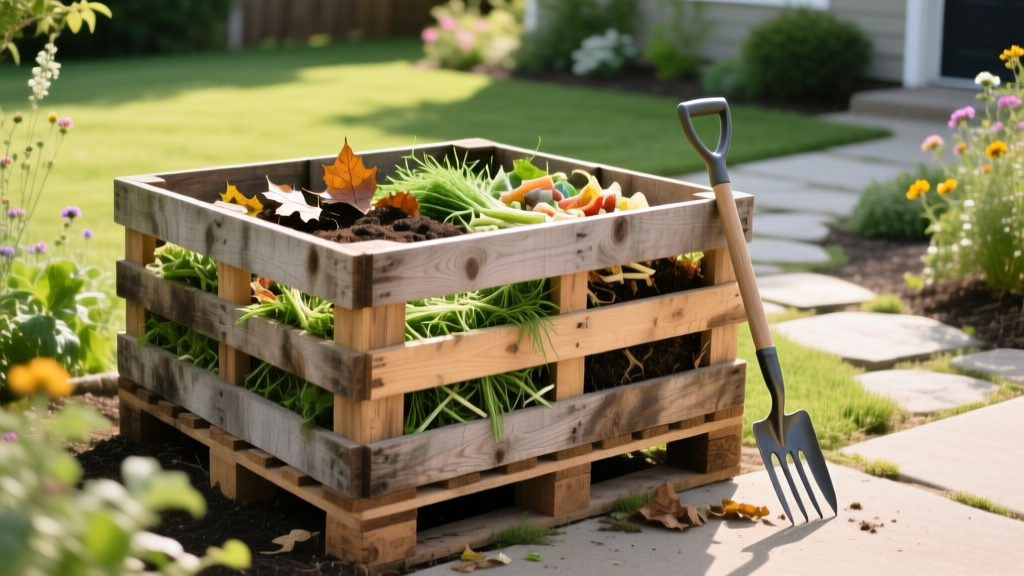
How to Construct a Compost Bin Using Reclaimed Wooden Pallets
The Biological Engine: Why Bin Geometry Dictates Compost Quality
Learning how to construct a compost bin is not merely an exercise in waste reduction; it is the foundational step in manufacturing a premium, biologically active soil amendment. The physical dimensions of your bin directly control the thermodynamic properties of the decomposing mass. According to the Environmental Protection Agency (EPA), achieving the thermophilic phase (135°F to 160°F) is critical for destroying weed seeds and plant pathogens. To reach and sustain these temperatures, the composting mass must meet a minimum volume threshold to retain metabolic heat generated by thermophilic bacteria and actinomycetes.
Standard GMA (Grocery Manufacturers Association) wooden pallets measure exactly 48 by 40 inches. By arranging four of these pallets into a square enclosure, you create a bin with an internal volume of approximately 1.2 cubic yards. This exceeds the critical 1-cubic-yard minimum required for passive thermophilic composting, making reclaimed pallets the most cost-effective and structurally sound material for serious soil amendment production.
CRITICAL SAFETY WARNING: Pallet Stamp Identification
Never use chemically treated pallets for composting, as toxins will leach into your soil amendments. Inspect the IPPC stamp on the pallet wood:
HT (Heat Treated): Safe to use. Wood was heated to 140°F for 30 minutes to kill pests.
KD (Kiln Dried): Safe to use. Similar to HT, uses heat to reduce moisture and kill pests.
MB (Methyl Bromide): DANGEROUS. Do not use. This is a toxic fumigant that will persist in your compost and garden soil.
DB (Debarked): Safe, but must be paired with HT or KD to ensure pest treatment.
Never use chemically treated pallets for composting, as toxins will leach into your soil amendments. Inspect the IPPC stamp on the pallet wood:
HT (Heat Treated): Safe to use. Wood was heated to 140°F for 30 minutes to kill pests.
KD (Kiln Dried): Safe to use. Similar to HT, uses heat to reduce moisture and kill pests.
MB (Methyl Bromide): DANGEROUS. Do not use. This is a toxic fumigant that will persist in your compost and garden soil.
DB (Debarked): Safe, but must be paired with HT or KD to ensure pest treatment.
Materials and Hardware Specifications
To ensure the bin withstands the immense hydrostatic pressure of wet, decomposing organic matter (which can weigh up to 1,500 pounds per cubic yard), you must use exterior-grade hardware. Standard interior drywall screws will shear under lateral load and rust rapidly due to the acidic environment of active compost.
- Pallets: Four (4) standard 48x40 inch GMA pallets, stamped HT or KD.
- Fasteners: One (1) box of 3-inch #10 polymer-coated star-drive (Torx) deck screws (e.g., GRK Fasteners RSS or Grip-Rite). The star-drive prevents cam-out during high-torque driving.
- Base Aeration: One (1) 4-foot by 10-foot roll of 19-gauge, 1/2-inch galvanized hardware cloth.
- Gate Hardware: Four (4) 1/4-inch galvanized carriage bolts with washers and hex nuts, plus two heavy-duty galvanized sliding bolt latches.
- Tools: Cordless impact driver, reciprocating saw (Sawzall) with a 6-inch bimetal blade, tape measure, speed square, and heavy-duty leather gloves.
Step-by-Step Assembly Protocol
Step 1: Base Preparation and Passive Aeration
Lay the galvanized hardware cloth flat on the ground where the bin will sit. This 1/2-inch mesh serves two purposes: it allows vital oxygen infiltration from below (preventing anaerobic stagnation) while excluding burrowing rodents like voles and mice. The bin will sit directly on top of this mesh.
Step 2: Erecting the Back and Side Walls
Stand three pallets on their long edges (48-inch side down) to form a U-shape. Ensure the top deck boards are facing outward. Using your impact driver, drive four 3-inch deck screws through the corner blocks of the intersecting pallets. Drive two screws at the base and two at the top of each corner joint. The 45-degree angle of the corner blocks provides excellent shear strength when pinned with screws.
Step 3: Engineering the Removable Front Gate
The fourth pallet serves as the front gate, but a full pallet makes turning the compost with a pitchfork ergonomically difficult. Use your reciprocating saw to cut the front pallet in half horizontally, right through the center support blocks.
Mount the bottom half of the cut pallet to the front of the bin using the carriage bolts. Drill 1/4-inch holes through the corner blocks of the bin and the bottom gate half. Secure with carriage bolts, washers, and nuts, leaving a 1/2-inch gap so the wood can expand when wet. Attach the top half of the gate using heavy-duty sliding bolt latches. When you need to turn the compost, simply slide the latches and remove the top half for unobstructed pitchfork access.
Optimizing the C:N Ratio for Premium Soil Amendments
The physical bin is only half the equation. According to Penn State Extension, the biological efficiency of your bin depends on maintaining a Carbon-to-Nitrogen (C:N) ratio between 25:1 and 30:1. The pallet bin's high airflow design accelerates carbon breakdown, meaning you must be precise with your feedstock layering.
| Feedstock Material | C:N Ratio | Function in Pallet Bin |
|---|---|---|
| Fresh Grass Clippings | 15:1 to 20:1 | Nitrogen activator; generates rapid heat spikes. |
| Shredded Fall Leaves | 40:1 to 60:1 | Carbon bulking agent; maintains structural porosity. |
| Coffee Grounds | 20:1 | Dense nitrogen source; requires thorough mixing to avoid clumping. |
| Wood Chips (Arborist) | 100:1 to 400:1 | Long-term carbon; use sparingly (max 10% of volume) to prevent nitrogen lockout. |
Structural Failure Modes and Preventative Engineering
Failure Mode 1: Lateral Bowing from Hydrostatic Pressure
As organic matter breaks down and retains moisture, the lower third of the bin experiences immense outward pressure. Standard pallets joined only at the corners will eventually bow outward, snapping the screws. The Fix: Drive two 3-foot lengths of 1/2-inch galvanized steel rebar vertically into the ground directly behind the center of the left and right side walls. This acts as a deadman anchor, preventing the sidewalls from blowing out under peak moisture loads.
Failure Mode 2: Anaerobic Stagnation at the Core
If the center of the pile smells like sulfur or rotting eggs, oxygen has been depleted. The 4x4 footprint of a pallet bin can sometimes restrict airflow to the exact center of the mass. The Fix: During construction, do not pack the compost tightly. Furthermore, insert a 4-inch diameter perforated PVC pipe vertically into the center of the pile every time you build a new layer. This acts as a passive aeration chimney, drawing cool air in from the hardware cloth base and venting hot, depleted gases out the top.
Advanced Compost Bin Troubleshooting FAQ
Should I line the inside of the pallet bin with landscape fabric?
No. While landscape fabric might seem like a good way to keep the wood clean and extend its lifespan, it severely restricts the lateral gas exchange that occurs through the pallet slats. Thermophilic bacteria require massive amounts of oxygen. Lining the bin will create anaerobic pockets against the walls, resulting in a slimy, foul-smelling decomposition process rather than a clean, earthy humus.
How do I extract finished compost without dismantling the bin?
The removable top-gate design detailed in Step 3 solves this. Unlatch the top half of the front gate and use a flat-tined garden fork to scrape the dark, finished compost from the bottom layer. Because the thermophilic process pushes finished material downward and fresh material stays on top, you can harvest the bottom 12 inches continuously while leaving the active upper pile undisturbed.

