
Gardening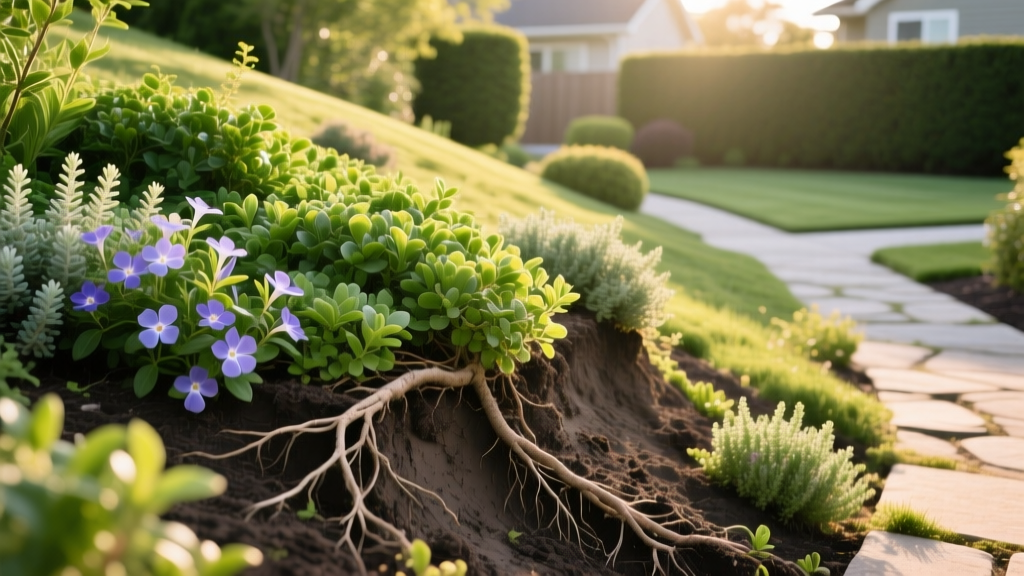
How to Plant and Contain Creeping Plants for Slope Erosion Control
The Mechanics of Slope Stabilization
Managing slopes with a gradient steeper than 15% presents a distinct hydrological challenge: water velocity exceeds soil infiltration rates, leading to topsoil washout. Creeping plants solve this not through deep taproots, but via dense, interlocking fibrous root mats and above-ground stolons. When species like Juniperus horizontalis or Thymus serpyllum establish, their root systems increase soil shear strength by up to 40%, effectively binding the top 6 to 12 inches of soil together. According to the USDA Plants Database, selecting species with high stoloniferous growth habits is the most reliable biological method for preventing sheet erosion on residential inclines.
Species Selection Matrix for Erosion Control
Not all groundcovers are suited for slopes. Plants with shallow, brittle roots or those that require heavy shade will fail on sun-baked, well-drained inclines. Use this decision matrix to match the correct creeping plant to your specific site conditions.
| Botanical Name | Common Name | Light Requirement | Root Depth | Spread Rate | Best Use Case |
|---|---|---|---|---|---|
| Juniperus horizontalis 'Blue Rug' | Creeping Juniper | Full Sun | 8-12 inches | 2-3 ft/year | Steep, dry, poor-soil slopes |
| Thymus serpyllum 'Elfin' | Creeping Thyme | Full Sun | 4-6 inches | 1-2 ft/year | Rockeries, terraced steps |
| Phlox subulata | Creeping Phlox | Full to Part Sun | 6-8 inches | 1-2 ft/year | Spring color on moderate grades |
| Pachysandra terminalis | Japanese Spurge | Deep Shade | 6-10 inches | 1 ft/year | Shaded, wooded embankments |
Warning on Invasive Species: Avoid planting Vinca minor (Periwinkle) or Hedera helix (English Ivy) on slopes adjacent to natural woodlands. While highly effective at erosion control, the Royal Horticultural Society notes these species readily escape cultivation, smothering native understory flora and altering local soil chemistry.
Site Preparation and Root Barrier Installation
Planting directly into compacted slope clay guarantees failure. Proper soil amendment and physical containment are mandatory before a single plug goes into the ground.
Step 1: Terracing and Soil Amendment
For slopes exceeding a 20% grade, dig horizontal micro-terraces (small shelves) every 2 to 3 feet down the incline. This interrupts water velocity. Amend the native soil with a mix of 30% expanded shale and 70% coarse compost. Expanded shale provides permanent aeration and drainage, preventing the root rot that frequently kills creeping plants in heavy clay depressions.
Step 2: Installing the HDPE Root Barrier
To prevent aggressive creepers from invading adjacent lawns or hardscapes, install an 18-inch High-Density Polyethylene (HDPE) root barrier at the perimeter of the planting zone.
- Dig a trench 16 inches deep and 4 inches wide along the containment line.
- Insert the HDPE barrier, ensuring 2 inches remain above grade.
- Critical Detail: Bend the top 2 inches of the barrier outward at a 45-degree angle away from the planting bed. When rhizomes hit the barrier and travel upward, this lip deflects them into the air where they desiccate, rather than allowing them to hook over the edge and root outside the zone.
- Backfill and tamp the soil tightly against the barrier to eliminate air gaps.
The Staggered-Grid Planting Technique
Never plant creeping groundcovers in straight rows parallel to the slope; water will channel down the rows, creating erosion gullies. Instead, use an equilateral triangle spacing pattern.
For 4-inch plugs, mark planting spots 10 to 12 inches apart in a staggered grid. Dig holes exactly the depth of the root ball—planting creeping plants too deep buries the crown, inviting Botrytis and crown rot. After planting, cover the exposed soil between the plugs with rolled biodegradable jute erosion netting (often sold as geotextile blankets). Pin the netting securely with 6-inch biodegradable wooden stakes. The jute holds the soil and mulch in place for the 90 to 120 days required for the plants to knit together, eventually rotting away as the plant canopy closes.
Pro-Tip: The Pin-and-Mulch Method
For species that root at the nodes (like creeping juniper), bend the lowest lateral branches down into direct contact with the soil and pin them with landscape staples. Apply a 1-inch layer of pine bark mini-nuggets over the pins. This forces secondary root development at the nodes, accelerating ground coverage by up to 40% in the first growing season.
For species that root at the nodes (like creeping juniper), bend the lowest lateral branches down into direct contact with the soil and pin them with landscape staples. Apply a 1-inch layer of pine bark mini-nuggets over the pins. This forces secondary root development at the nodes, accelerating ground coverage by up to 40% in the first growing season.
Irrigation Protocols for Steep Gradients
Overhead sprinklers are entirely ineffective on slopes; up to 60% of the water becomes surface runoff before penetrating the root zone. You must install a drip irrigation system using pressure-compensating (PC) emitters rated at 0.5 Gallons Per Hour (GPH). PC emitters maintain a constant flow rate regardless of the elevation change across the slope, ensuring the plants at the top of the hill receive the exact same volume of water as those at the bottom. Run the drip lines horizontally across the slope, zig-zagging between the plant rows, and secure them with landscape staples every 3 feet.
Cost Analysis: Establishment Economics
Budgeting for a slope stabilization project requires understanding the trade-off between plant size and time-to-coverage. Below is a cost breakdown per 100 square feet of slope coverage.
| Plant Format | Quantity Needed (100 sq ft) | Unit Cost (Avg) | Total Plant Cost | Time to Full Coverage |
|---|---|---|---|---|
| 50-Cell Plug Trays | 100 plugs (2 trays) | $1.20 / plug | $120.00 | 12 - 18 months |
| 4-Inch Pots | 25 pots | $4.50 / pot | $112.50 | 8 - 12 months |
| 1-Gallon Containers | 12 containers | $14.00 / gal | $168.00 | 4 - 6 months |
While 1-gallon containers offer instant visual gratification, 50-cell plug trays are the industry standard for large-scale erosion control. The root systems in plug trays are less prone to circling, and the lower initial cost allows budget reallocation toward critical infrastructure like HDPE barriers and jute netting.
Troubleshooting Common Slope Failures
- Symptom: Plants at the top of the slope are wilting while bottom plants thrive.
Cause: Hydrostatic pressure and gravity pull water down; topsoil dries out first.
Fix: Increase emitter density at the top 20% of the slope by adding a secondary drip loop, or apply a 2-inch layer of compost mulch to the upper zone to increase water retention. - Symptom: Center of the creeping plant mat is turning brown and dying back.
Cause: Crown rot caused by excessive moisture trapped under dense foliage, or the natural die-back of older woody stems in the center of herbaceous creepers.
Fix: For woody creepers (like juniper), this is normal aging; prune out dead center wood to allow light to reach the soil. For herbaceous plants, thin the canopy by 20% using shears to improve airflow and reduce humidity at the soil line. - Symptom: Soil washing out from beneath the established plant mat.
Cause: Subsurface piping (water tunneling under the root mat).
Fix: Inject a slurry of expanded shale and compost into the tunnels using a soil probe, and install a French drain at the top of the slope to intercept groundwater before it enters the planting bed.

