
Gardening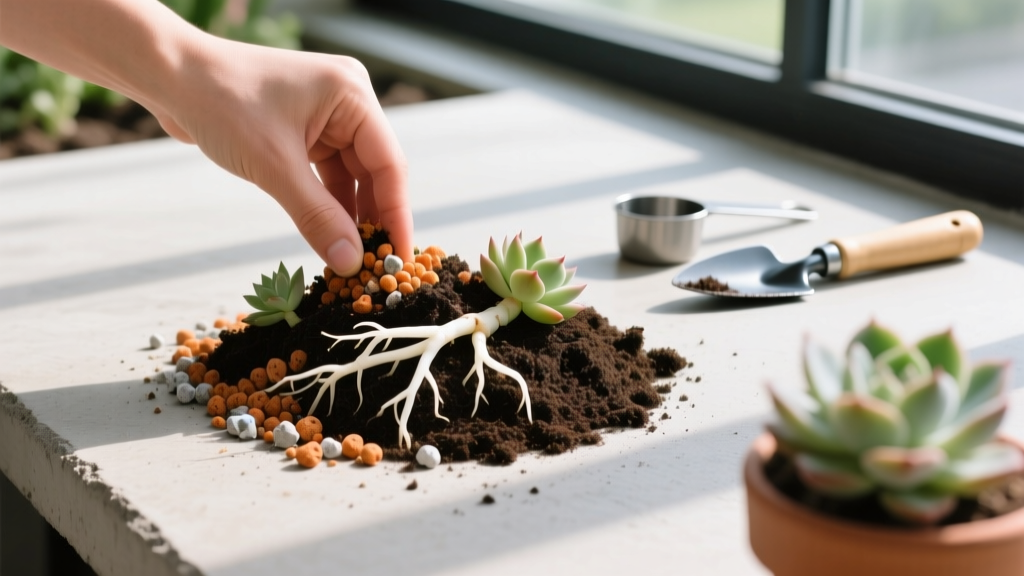
Diagnosing Root Rot: How to Mix Fast Draining Soil for Succulents
Diagnosing the Problem: Symptoms of Poor Drainage
The leading cause of succulent mortality in domestic cultivation is not underwatering, but root asphyxiation caused by moisture-retentive media. When standard potting mixes are used for arid-adapted plants, the root zone remains saturated long after watering, creating an anaerobic environment that invites Pythium and Phytophthora pathogens. Before formulating a new substrate, you must accurately diagnose whether your current soil is failing.
- The Squish Test: Gently squeeze the lower leaves. If they feel translucent, mushy, or detach with a light touch, the plant is actively rotting from the base up due to waterlogged soil.
- The Hydrophobic Channel Effect: If the plant looks wrinkled and dehydrated despite regular watering, your soil may have become hydrophobic. Peat-heavy mixes shrink away from the pot walls when dry, creating channels where water bypasses the root ball entirely and exits straight through the drainage hole.
- The Weight Check: Lift the pot immediately after watering, then lift it again 48 hours later. If the pot still feels noticeably heavy after two days of indoor ambient temperatures (68-72°F), your medium lacks the necessary macroporosity to drain efficiently.
The Science of the Perched Water Table
To understand why University of Minnesota Extension experts emphasize coarse amendments, you must understand the perched water table. In any container, gravity pulls water downward until the capillary action of the soil particles equals the gravitational pull. This creates a saturated zone at the bottom of the pot, known as the perched water table.
In fine-textured standard potting soils, this saturated zone can extend 3 to 4 inches upward from the drainage hole. For shallow-rooted succulents like Echeveria or Sempervivum, their entire root system may sit directly inside this anaerobic layer. By incorporating large, inorganic particles into your mix, you artificially raise the height of the drainage hole relative to the soil particles, effectively lowering the perched water table below the root zone and ensuring the roots sit in the aerated, fast-draining upper layer.
Formulating the Perfect Mix: Ingredients and Costs
Creating the ideal fast draining soil for succulents requires abandoning cheap perlite. Standard perlite breaks down into dust over time, floats to the top during watering, and offers poor structural stability. Instead, rely on dense, inorganic amendments that maintain their physical structure for years.
| Ingredient | Particle Size | Est. Cost (2026) | Primary Function |
|---|---|---|---|
| Pumice | 1/4" to 3/8" | $18 - $24 / cu ft | Provides macroporosity, retains minimal moisture, anchors roots. |
| Calcined Clay (Turface MVP) | 1/8" to 1/4" | $25 / 50 lb bag | Highly porous, absorbs excess nutrients, prevents soil compaction. |
| Akadama (Hard Baked) | 1/4" (Small Grain) | $45 / 6 L bag | Premium drainage, excellent for caudiciforms and rare variegated cultivars. |
| Pine Bark Fines | 1/4" or smaller | $12 / cu ft | Provides slight organic matter and acidic buffering without waterlogging. |
| Coconut Coir (Washed) | Fine to Medium | $15 / 11 lb block | Alternative to peat; re-wets easily when dry, preventing hydrophobic channeling. |
The 50/30/20 Master Recipe
For the vast majority of winter-hardy and tender succulents (Crassula, Sedum, Aloe, Haworthia), this ratio provides the optimal balance of rapid drainage and minimal nutrient retention:
- 50% Inorganic Grit: Use a 1:1 blend of 1/4" pumice and Turface MVP. This ensures a rigid skeletal structure that will never compact.
- 30% Organic Base: Use a high-quality, sifted potting mix (such as Coast of Maine Bar Harbor Blend) or a mix of pine bark fines and washed coco coir. Sift out any particles larger than 1/2" or smaller than 1/8" to maintain uniform particle distribution.
- 20% Coarse Sand or Granite Grit: Use horticultural-grade coarse sand (like poultry grit or crushed granite). Never use play sand or masonry sand, as these are fine enough to fill the air pockets between your larger pumice particles, completely defeating the purpose of the mix.
Step-by-Step Dry Repotting Protocol
According to cultivation guidelines referenced by the Old Farmer's Almanac, the repotting process is just as critical as the soil composition. Follow this exact protocol to prevent post-repotting rot:
- Extract and Inspect: Remove the succulent from its waterlogged pot. Using sterilized pruning shears, cut away all black, mushy, or brown roots. Only firm, white or pale tan roots should remain.
- Callous the Wounds: Leave the bare-root plant sitting on a dry paper towel in a shaded, well-ventilated area for 48 to 72 hours. This allows the cut root tissues to callous over, sealing them against soil-borne pathogens.
- Pack the Pot: Fill your new pot with the 50/30/20 mix, leaving a 1-inch gap below the rim. Insert the plant, gently backfilling the soil without tamping it down aggressively. Tap the sides of the pot to settle the soil naturally.
- The Dry Wait (Crucial): Do NOT water the plant immediately. Wait 5 to 7 days before the first watering. This forces the plant to push out new microscopic root hairs in search of moisture, establishing a strong anchor in the new fast draining soil for succulents.
Troubleshooting Edge Cases
Problem: The soil dries out in less than 24 hours during peak summer heat, and the plant shows severe leaf wrinkling.
Solution: Your inorganic ratio is too high for your specific climate. Increase the organic base (coco coir/pine bark) from 30% to 40%, and reduce the pumice by 10%. Alternatively, switch to a glazed ceramic pot to reduce lateral evaporation.
Solution: Your inorganic ratio is too high for your specific climate. Increase the organic base (coco coir/pine bark) from 30% to 40%, and reduce the pumice by 10%. Alternatively, switch to a glazed ceramic pot to reduce lateral evaporation.
Problem: White, crusty mineral deposits are forming on the soil surface and lower leaves.
Solution: This is salt and calcium buildup from hard tap water reacting with the calcined clay. Flush the pot with distilled or reverse-osmosis water once a month, and switch to a liquid fertilizer formulated specifically for succulents at 1/4 the recommended strength.
Solution: This is salt and calcium buildup from hard tap water reacting with the calcined clay. Flush the pot with distilled or reverse-osmosis water once a month, and switch to a liquid fertilizer formulated specifically for succulents at 1/4 the recommended strength.
Pot Selection: The Missing Drainage Variable
Even the most meticulously engineered fast draining soil for succulents will fail if housed in the wrong container. The material and geometry of the pot dictate the evaporation rate of the root zone.
Unglazed Terracotta: The gold standard for succulent cultivation. The porous clay walls wick moisture laterally out of the soil, effectively increasing the surface area for evaporation. However, terracotta requires more frequent watering in arid indoor environments. Ensure the drainage hole is at least 1/2 inch in diameter; many mass-produced terracotta pots feature holes that are too small to shed water rapidly.
Glazed Ceramic and Plastic: These materials are entirely impermeable. Water can only escape through the bottom drainage hole and the topsoil surface. If you must use glazed pots for aesthetic reasons, increase the inorganic grit ratio in your soil mix to 60% or 70% to compensate for the lack of lateral airflow, and consider adding a 1-inch layer of pumice at the very bottom of the pot to elevate the root ball above the perched water table.
By accurately diagnosing the physical symptoms of soil failure and replacing water-retentive media with a structurally sound, inorganic-heavy mix, you eliminate the primary vector for succulent root rot and establish a foundation for vigorous, long-term growth.

