
Gardening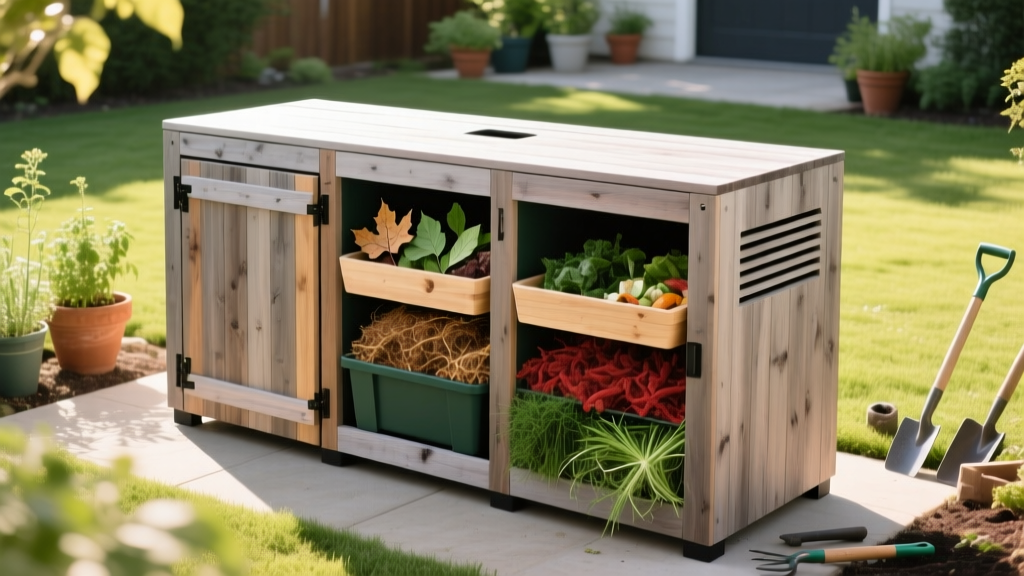
DIY 3-Bay Compost Bin Plans: Build a High-Yield Soil System
The Mechanics of Continuous Composting
Single-bin tumblers and static piles force gardeners into a batch-processing bottleneck. You add scraps, wait six months, and halt new additions while the pile cures. A three-bay system eliminates this stagnation by separating the decomposition lifecycle into three distinct phases: active hot composting, cooling and curing, and finished amendment storage. These specific 3-bay compost bin plans are engineered to produce up to 12 cubic yards of finished soil amendment annually, providing a continuous supply of humus for top-dressing lawns and amending garden beds.
The 30:1 Carbon-to-Nitrogen Rule: According to the Environmental Protection Agency (EPA), optimal microbial activity requires a C:N ratio of roughly 30:1. Bay 1 (Active) should be heavily layered with carbon-rich browns (shredded cardboard, dry oak leaves) to balance nitrogen-heavy greens (grass clippings, vegetable scraps). Bays 2 and 3 require zero new inputs, allowing the microbial population to shift from thermophilic (heat-generating) bacteria to mesophilic organisms and fungi that stabilize the humus.
Material Selection: Cedar vs. Pressure-Treated Lumber
When evaluating compost bin plans, lumber choice dictates both structural longevity and soil safety. While modern pressure-treated lumber uses Micronized Copper Azole (MCA) rather than the highly toxic Chromated Copper Arsenate (CCA) banned in 2003, University of California Agriculture and Natural Resources extension guidelines still recommend avoiding direct contact between pressure-treated wood and organic matter destined for edible food crops. Copper can leach into acidic compost environments (pH below 6.0).
Western Red Cedar is the optimal choice. Its natural thujaplicins act as a fungicide and insect repellent, yielding a 10-to-15-year lifespan without chemical treatments. For a budget-friendly alternative, consider composite decking boards for the removable front slats, paired with untreated locust or cedar posts.
Bill of Materials and Hardware
This blueprint constructs a 12-foot long, 4-foot deep, and 4-foot high structure, divided into three 4x4x4 foot bays. All measurements account for standard nominal lumber dimensions (a 2x6 is actually 1.5 x 5.5 inches).
| Component | Material & Dimensions | Quantity | Estimated Cost (2026) |
|---|---|---|---|
| Corner & Divider Posts | 4x4 Western Red Cedar (8 ft length) | 6 | $145 |
| Removable Front Slats | 2x6 Cedar (8 ft length, cut down) | 12 | $110 |
| Side & Back Slats | 1x6 Cedar (12 ft & 4 ft lengths) | 24 | $160 |
| Slat Retention Hardware | Galvanized T-Straps & 1.5" screws | 4 packs | $35 |
| Structural Fasteners | 3.5" Galvanized Lag Screws | 1 box (50) | $25 |
| Total Estimated Project Cost | $475 | ||
Precision Cut List and Framing
Phase 1: Post Preparation and Anchoring
Cut the six 4x4 posts to exactly 48 inches. Do not set these posts in concrete. Concrete traps moisture at the wood-to-ground interface, accelerating rot. Instead, dig 12-inch deep post holes, fill the base with 2 inches of crushed gravel for drainage, and backfill with soil or crushed stone, tamping firmly. This allows the entire structure to be relocated in the future if your garden layout changes.
Phase 2: Installing the Fixed Side and Back Walls
Cut the back wall slats to 117 inches (allowing a 1.5-inch overlap on each end post). Cut the side wall slats to 45 inches. Space these 1x6 boards with a 0.5-inch gap between each slat. This specific half-inch gap is critical: it provides passive aeration to the core of the pile while preventing the loss of fine, dry carbon materials. Secure them using 2-inch exterior wood screws driven at an angle (toenailing) into the 4x4 posts.
Phase 3: Engineering Removable Front Slats
The front of each bay must be modular so you can remove slats one by one as the pile grows, and easily access the bottom layer for turning. Cut the 2x6 front slats to 46.5 inches. Instead of screwing them directly to the posts, install pairs of galvanized metal T-straps or U-channels on the inside faces of the front posts. The 2x6 slats will slide down into these channels. This allows you to pull the bottom slat out, slide a flat spade under the compost, and lift it out without reaching over a 4-foot wall.
Base Aeration and Moisture Management
A common failure in DIY compost bins is anaerobic stagnation at the base. The Cornell Waste Management Institute emphasizes that oxygen depletion at the bottom of a pile halts thermophilic decomposition and generates foul-smelling hydrogen sulfide. To prevent this, lay a foundation of 4-inch diameter perforated PVC drain pipe across the back of each bay before adding organic matter. Cap one end and leave the other open to the outside air. As the hot pile creates an updraft, it pulls fresh oxygen through the PVC pipe directly into the core of the base.
Troubleshooting Structural and Biological Failures
Even with precise compost bin plans, environmental factors and biological imbalances can compromise the system. Use this diagnostic matrix to correct issues before they ruin a batch of soil amendments.
| Symptom | Root Cause | Corrective Action |
|---|---|---|
| Wooden posts bowing outward | Hydrostatic pressure from overly wet, dense clay soil or compacted grass clippings. | Install a 2x4 cross-brace at the top rear of each bay. Mix in shredded cardboard to absorb excess moisture and reduce weight. |
| Pile smells like ammonia | C:N ratio is too low (excess nitrogen from fresh grass or manure). | Pull the front slats, turn the pile, and aggressively mix in 3 parts dry, shredded autumn leaves or sawdust to 1 part green material. |
| Pile temperature stalls at 85°F | Moisture content below 40%, or pile volume is less than 27 cubic feet (1 cubic yard). | Water the pile with a hose while turning until it feels like a wrung-out sponge. Ensure Bay 1 is filled to at least the 3-foot mark to retain core heat. |
| Rodent intrusion | Gaps larger than 0.5 inches, or inclusion of dairy/meat scraps. | Bury food scraps under 6 inches of brown carbon material. Staple 0.25-inch hardware cloth to the bottom interior of the side walls. |
Harvesting and Applying Your Soil Amendments
Once the material in Bay 3 has cooled to ambient soil temperature, darkened to a rich espresso brown, and lost its original structural identity (usually 6 to 9 months after initial assembly), it is ready for harvest. Slide out the bottom two front slats and use a flat-tined garden fork to pull the finished compost into a wheelbarrow.
Pro-Tip for Lawn Top-Dressing: Do not apply raw, unfinished compost to turfgrass. Immature compost contains phytotoxic organic acids that will burn grass roots. Always screen the finished amendment through a 0.5-inch mesh screen before applying a 0.25-inch layer over your lawn in the fall, followed by core aeration to drive the humus into the root zone.
By following these specific compost bin plans, you transition from managing a messy backyard pile to operating a highly efficient, three-stage soil amendment factory. The initial investment in cedar and galvanized hardware pays for itself within two seasons through the elimination of synthetic fertilizers and commercial bagged compost.

