
Gardening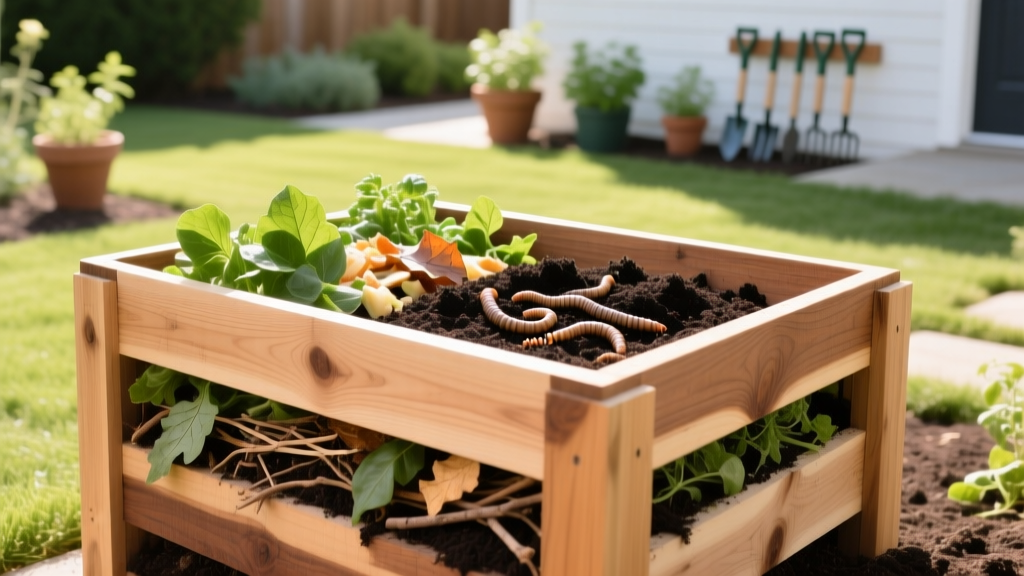
DIY Compost Containers: Build Chemical-Free Organic Soil Bins
The Hidden Dangers of Commercial Compost Bins
Most commercially available compost tumblers and stationary bins are manufactured from recycled or virgin high-density polyethylene (HDPE) or polypropylene. While durable, these plastics degrade under UV exposure, shedding microplastics into your finished compost. For gardeners strictly adhering to organic and chemical-free controls, introducing microplastics and potential plasticizers into the soil food web undermines the core philosophy of organic cultivation. Furthermore, many cheap commercial bins lack adequate aeration, leading to anaerobic conditions that produce phytotoxic organic acids rather than nutrient-rich humus.
Building your own DIY compost containers allows you to control every material that touches your decomposing organic matter. By selecting untreated, natural materials and engineering for optimal microbial respiration, you ensure a 100% chemical-free soil amendment that actively builds the soil microbiome rather than contaminating it.
Material Selection: Avoiding Toxic Leachates
The most critical step in building an organic compost system is material selection. The decomposing process generates heat (up to 160°F) and various organic acids, which can accelerate the leaching of chemicals from treated woods or metals into your compost.
What to Avoid
- Pressure-Treated Lumber (ACQ or CA-C): Modern pressure-treated wood uses alkaline copper quaternary (ACQ) or copper azole. Copper is a potent fungicide. Leached copper will decimate the mycorrhizal fungi and actinomycetes essential for breaking down lignin in your compost pile.
- Railroad Ties: Often soaked in creosote, a complex mixture of hundreds of toxic, carcinogenic chemicals that will persist in your soil for decades.
- Galvanized Fasteners: Standard galvanized screws are coated in zinc. In the acidic environment of an active compost pile, zinc can leach into the soil. While zinc is a micronutrient, excess levels are toxic to earthworms and soil bacteria.
What to Use
- Untreated Cedar or Black Locust: Naturally rot-resistant due to organic extractives (like thujaplicins in cedar) that do not harm soil biology. Expect a lifespan of 7–10 years.
- Heat-Treated (HT) Pallets: If upcycling pallets, check the IPPC stamp. Only use pallets marked HT (Heat Treated) or KD (Kiln Dried). Never use pallets marked MB (Methyl Bromide), a highly toxic neurotoxin and ozone-depleting fumigant.
- 304-Grade Stainless Steel Fasteners: The 18/8 chromium-nickel ratio in 304 stainless steel prevents rust and ensures zero heavy metal leaching into your organic compost.
- 19-Gauge 1/2-Inch Hardware Cloth: Essential for the base to prevent rodents from nesting in the warm pile while allowing drainage and soil microbe migration.
⚠️ Organic Warning: Never use wood chips or sawdust from pressure-treated lumber, plywood, or MDF in your compost. These contain urea-formaldehyde resins and copper compounds that will permanently ruin your organic soil batch.
Step-by-Step Build: The 3-Bay Cedar System
A three-bay system is the gold standard for continuous organic composting. Bay 1 receives fresh scraps, Bay 2 is the active cooking phase, and Bay 3 cures. Each bay measures 4 feet wide, 4 feet deep, and 4 feet high (64 cubic feet per bay).
Phase 1: Base and Frame Construction
- Site Prep: Clear a 12x4 foot area down to bare soil. Do not place the bins on concrete or asphalt, as this prevents drainage and blocks access to native soil microbes and earthworms.
- Rodent Barrier: Lay down three 4x4 foot sheets of 1/2-inch galvanized hardware cloth. Overlap them slightly and secure with landscape staples.
- Corner Posts: Drive four 4x4 untreated cedar posts (4.5 feet long) into the ground at the corners of the first bay, leaving exactly 4 feet above ground. Repeat for the subsequent bays, sharing the dividing posts to save material.
Phase 2: Slatted Walls for Aeration
Aerobic bacteria require oxygen to efficiently break down organic matter without producing foul odors. Solid walls suffocate the pile.
- Cut 1x4 untreated cedar slats to 4-foot lengths.
- Screw the slats horizontally to the posts using 2-inch 304 stainless steel deck screws.
- Maintain a strict 1-inch gap between each slat. This specific spacing provides maximum lateral airflow while preventing the contents from spilling out.
- Install a removable front gate using heavy-duty stainless steel hinges, allowing you to easily turn the pile with a pitchfork.
Managing the Microbiome: Organic Inoculation
Commercial "compost starters" often contain hidden synthetic salts or highly concentrated nitrogen sources that can burn plant roots when the compost is later applied. To maintain strict chemical-free controls, inoculate your DIY compost containers using native biological sources.
| Inoculant Source | Microbial Profile | Application Rate |
|---|---|---|
| Native Forest Leaf Mold | High fungal dominance, excellent for breaking down woody carbon (browns). | 1 shovel per 6 inches of pile depth. |
| Finished Organic Compost | Balanced bacteria/fungi ratio, introduces mature humic acids. | 2 gallons per new bay startup. |
| Garden Topsoil (Unsprayed) | Introduces native actinomycetes and earthworm cocoons. | Thin dusting between every 4-inch layer. |
The Science of the C:N Ratio in Chemical-Free Systems
Achieving the correct Carbon-to-Nitrogen (C:N) ratio is the most common failure point in DIY composting. According to the Cornell Waste Management Institute, the ideal starting C:N ratio is 30:1. Because you are not using synthetic nitrogen accelerators, you must balance this purely through organic inputs.
- Nitrogen (Greens): Vegetable scraps, coffee grounds, fresh grass clippings (untreated with herbicides). C:N ratio of 15:1 to 20:1.
- Carbon (Browns): Shredded dry autumn leaves, untreated cardboard, straw. C:N ratio of 60:1 to 80:1.
Pro Tip: The EPA's composting guidelines recommend a volume ratio of roughly 3 parts browns to 1 part greens. Always keep a dedicated bin of shredded dry leaves next to your DIY compost containers to immediately cover fresh kitchen scraps, which deters fruit flies and locks in nitrogen.
Troubleshooting Matrix: Organic Fixes for Common Issues
| Symptom | Underlying Cause | Chemical-Free Corrective Action |
|---|---|---|
| Rotten egg / ammonia odor | Anaerobic conditions; excess nitrogen or moisture. | Turn the pile immediately. Mix in 30% by volume of dry, shredded straw to absorb moisture and create air pockets. |
| Pile is cold and inactive | Lack of nitrogen, insufficient moisture, or cold ambient temps. | Water the pile until it feels like a wrung-out sponge (40-60% moisture). Mix in fresh coffee grounds or alfalfa meal to spike nitrogen organically. |
| Swarm of fruit flies | Exposed nitrogen-rich kitchen scraps. | Bury new scraps at least 6 inches deep into the pile. Cap the top with a 2-inch layer of finished compost or dry leaves. |
Frequently Asked Questions
Can I compost pet waste in my DIY organic containers?
No. Dog and cat feces contain pathogens (like Toxocara canis and Toxoplasma gondii) and potential heavy metals from commercial pet foods. Unless you are running a dedicated, separately managed hot-composting system that strictly maintains 145°F for a minimum of 7 consecutive days, pet waste should never enter a bin destined for edible food crops.
How do I clean the cedar bins without using bleach or chemicals?
When emptying a bay for the curing phase, scrub the interior slats with a stiff-bristle brush and a solution of distilled white vinegar and water (1:1 ratio). Vinegar is a mild, naturally occurring acid that breaks down rapidly in the soil and will not harm the microbial life when the bin is refilled. Allow the wood to dry completely in the sun, which provides natural UV sterilization.
Will the cedar extractives harm my earthworms?
While fresh cedar sawdust can be detrimental to worms due to volatile oils, the solid 1x4 slats used in this DIY build leach these compounds at a microscopic rate that is entirely harmless to the macro-biology inside the 64-cubic-foot pile. Earthworms will happily inhabit the outer edges of the compost where it meets the cedar walls.

