
Gardening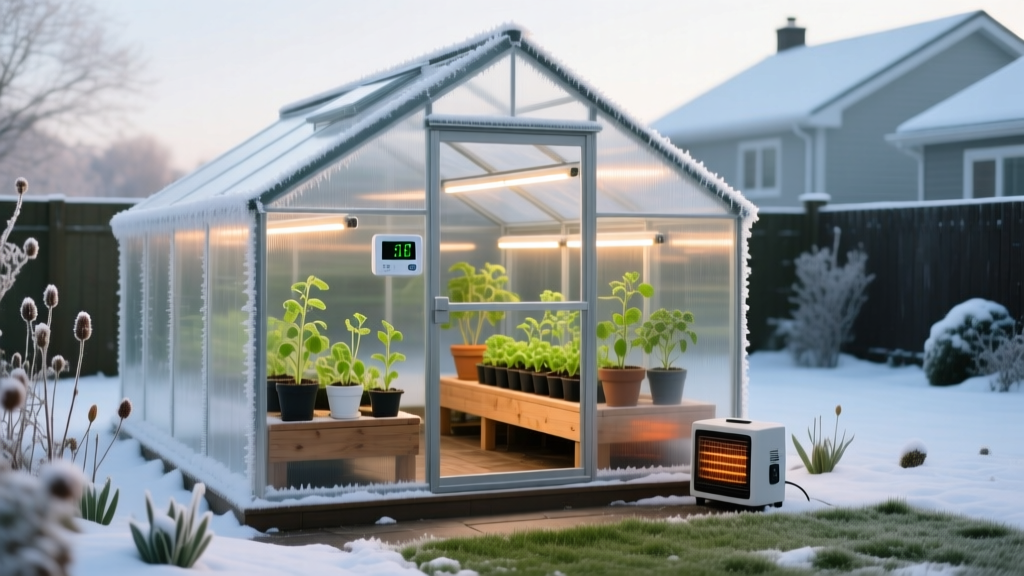
Beginner Guide to Setting Up a Heated Greenhouse for Winter
Transitioning a standard hoop house or glass structure into a fully functional heated greenhouse requires more than just plugging in a space heater. Winter cultivation demands precise thermal management, strategic air sealing, and accurate British Thermal Unit (BTU) calculations. If you undersize your heating system, a single polar vortex event will freeze your root zones and kill months of progress. If you oversize it, you will waste hundreds of dollars on unnecessary energy costs.
This guide provides a technical, step-by-step framework for beginners to properly size, insulate, and automate a winter growing environment, utilizing current 2026 equipment standards and energy-efficient practices.
The BTU Calculation Framework: Sizing Your Heater
The most common mistake beginners make is buying a heater based on the square footage of the greenhouse floor. Heating requirements are actually dictated by the total surface area of the glazing and the thermal resistance (R-value) of the materials used.
According to greenhouse engineering principles outlined by NC State University Extension, you must calculate the exact heat loss to maintain your target temperature during the coldest historical night in your region.
The Surface Area Formula
Use this formula to determine your minimum BTU requirement:
Total BTU = (Desired Inside Temp - Lowest Expected Outside Temp) x Total Surface Area x Heat Loss Factor
Real-World Calculation Example:
Imagine an 8x10-foot greenhouse with an 8-foot peak height.
• Surface Area: Floor/Ceiling (160 sq ft) + Walls (288 sq ft) = 448 sq ft.
• Temperature Difference: You want 60°F inside; your historical winter low is 10°F. (Difference = 50).
• Heat Loss Factor: Using 8mm twin-wall polycarbonate (Factor = 0.7).
• Math: 50 x 448 x 0.7 = 15,680 BTUs.
You need a heater rated for at least 16,000 BTUs (or roughly 4,700 Watts) to maintain 60°F on the coldest night.
Imagine an 8x10-foot greenhouse with an 8-foot peak height.
• Surface Area: Floor/Ceiling (160 sq ft) + Walls (288 sq ft) = 448 sq ft.
• Temperature Difference: You want 60°F inside; your historical winter low is 10°F. (Difference = 50).
• Heat Loss Factor: Using 8mm twin-wall polycarbonate (Factor = 0.7).
• Math: 50 x 448 x 0.7 = 15,680 BTUs.
You need a heater rated for at least 16,000 BTUs (or roughly 4,700 Watts) to maintain 60°F on the coldest night.
Glazing and Insulation: The R-Value Matrix
Before turning on any heat source, you must minimize thermal bleed. Upgrading your glazing or adding an interior thermal curtain drastically reduces the BTU load. Research from the University of Maine Extension highlights that adding a secondary layer of polyethylene film inside a glass greenhouse can reduce heat loss by up to 40%.
| Glazing Material | R-Value | Heat Loss Factor | Approx. Cost (per sq ft) |
|---|---|---|---|
| Single Pane Glass | 0.9 | 1.13 | $12.00 - $18.00 |
| 6-mil Polyethylene Film | 0.85 | 1.15 | $0.15 - $0.25 |
| 8mm Twin-Wall Polycarbonate | 1.42 | 0.70 | $2.50 - $3.50 |
| 16mm Triple-Wall Polycarbonate | 2.50 | 0.40 | $4.50 - $6.00 |
Selecting Your Primary Heat Source
Once your BTU requirement is established, choose a heat source that aligns with your infrastructure and ventilation capabilities.
1. Electric Fan-Forced Heaters (Best for Small, Sealed Spaces)
Electric heaters are 100% efficient at the point of use and require zero ventilation, making them ideal for tightly sealed polycarbonate structures under 150 square feet.
- Top Pick: Bio Green PAL 2.0 (2000W / 6,800 BTU). Priced around $160, it features a built-in thermostat and a splash-proof casing (IPX4 rated), which is critical in high-humidity greenhouse environments.
- Edge Case: If your BTU requirement exceeds 7,000, you will need a 240V hardwired unit or two separate 120V circuits. Running a 2000W heater on a standard 15A household circuit alongside grow lights will trip the breaker.
2. Propane Radiant Heaters (Best for Off-Grid or Large Spaces)
Propane is highly cost-effective for larger hoop houses but introduces a critical variable: combustion moisture. Burning one gallon of propane produces roughly one gallon of water vapor.
Warning: Condensation and Fungal Pathogens
If you use an unvented propane heater like the Mr. Heater MH9BX, you must install an automated exhaust fan on a humidistat. Without ventilation, the excess humidity will condense on cold glazing panels, drip onto foliage, and trigger severe powdery mildew and botrytis outbreaks within 72 hours.
If you use an unvented propane heater like the Mr. Heater MH9BX, you must install an automated exhaust fan on a humidistat. Without ventilation, the excess humidity will condense on cold glazing panels, drip onto foliage, and trigger severe powdery mildew and botrytis outbreaks within 72 hours.
3. DIY Hydronic Radiant Floor Heating (Best for Root Zone Targeting)
Heating the air is inefficient; heating the root zone promotes faster germination and growth while allowing ambient air temperatures to remain 5°F to 10°F cooler. You can build a radiant bench using 1/2-inch PEX tubing routed through a sandbox or gravel bed, connected to a standard 40-gallon electric water heater set to 110°F. This method cuts overall energy consumption by up to 30% compared to forced-air heating.
Step-by-Step Air Sealing Protocol
A heater is only as effective as the envelope it sits inside. Cold air infiltration at the base and door seals will cause short-cycling and freeze damage. Follow this sealing sequence before the first frost:
- Baseboard Trenching: Dig a 4-inch trench around the exterior perimeter of the greenhouse. Bury the bottom edge of your poly film or polycarbonate panels, then backfill with soil. This eliminates the primary draft zone.
- Door Weatherstripping: Apply 1/2-inch thick EPDM rubber weatherstripping to the interior frame of the door. Standard foam tape degrades under UV exposure and high humidity within one season; EPDM lasts for years.
- Glazing Seams: For glass or rigid polycarbonate, use a 100% silicone sealant (like GE Advanced Silicone 2) rather than acrylic caulk, which will peel off aluminum frames when exposed to freezing expansion.
- Poly Film Patching: Inspect hoop houses for micro-tears. Seal them exclusively with UV-resistant poly repair tape (e.g., Repair Tape by Greenhouse Megastore). Standard duct tape will fail and leave an unremovable adhesive residue when exposed to winter sunlight.
Microclimate Control and Thermostat Placement
Built-in heater thermostats are notoriously inaccurate, often reading 5°F to 10°F higher than the actual canopy temperature due to their proximity to the heating element. To achieve true climate control, bypass the internal dial and use an external dual-stage controller.
The Inkbird ITC-308 (approx. $40) is the industry standard for beginner greenhouse automation. It features two separate relays: one for a heating device and one for a cooling/exhaust fan.
Probe Placement Rules
- Height: Suspend the metal probe exactly at the top of your plant canopy. As plants grow, move the probe up.
- Shielding: Never let direct winter sunlight hit the bare metal probe. The sun will heat the metal, tricking the controller into shutting off the heater while the ambient air remains freezing. Shield the probe inside a small, slotted PVC pipe.
- Distance: Keep the probe at least 6 feet away from the heater's direct airflow path to prevent rapid short-cycling, which degrades the heater's internal relays.
Troubleshooting Common Winter Failures
| Symptom | Probable Cause | Corrective Action |
|---|---|---|
| Plants near the door show frost damage, while the rest of the greenhouse is fine. | Cold air pooling. Cold air is denser and sinks, rushing in under poorly sealed door thresholds. | Install a 4-inch high wooden kickboard across the bottom of the door frame and apply EPDM rubber seals to the sides. |
| Heater runs constantly, but temperature never reaches the target setpoint. | Undersized BTU output or severe thermal bleed through single-pane glass. | Hang a secondary interior curtain of 6-mil poly film to create a dead-air insulating buffer, or add a second heater. |
| Heavy condensation dripping from the ceiling onto seedlings. | High interior humidity meeting cold glazing surfaces (dew point reached). | Run a small oscillating fan 24/7 to keep air moving across the glazing, and vent the greenhouse for 15 minutes at midday when outside temps are highest. |
Building a reliable heated greenhouse is an exercise in thermodynamics and sealing as much as it is about horticulture. By calculating your exact BTU requirements, upgrading your glazing R-value, and automating your climate with an external probe controller, you will create a stable, energy-efficient winter sanctuary that protects your crops through the harshest freezes.

