
Gardening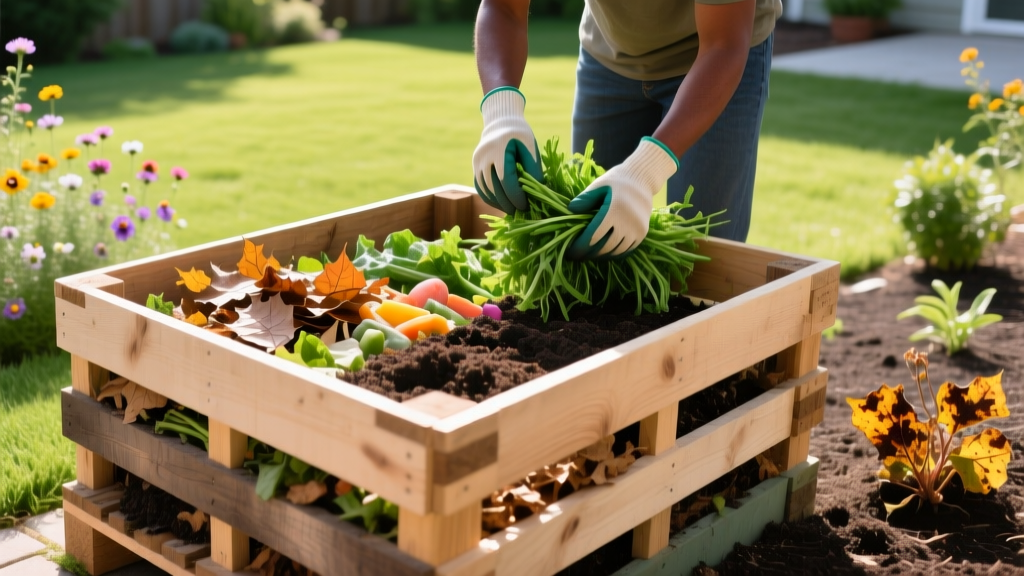
Build a Homemade Compost Bin for Organic Disease Control
The Microbiology of Compost-Induced Disease Suppression
Transitioning to an organic, chemical-free garden requires more than just eliminating synthetic pesticides; it demands building a soil food web capable of defending itself. A well-managed homemade compost bin is the cornerstone of this strategy. When organic matter decomposes at thermophilic temperatures (131°F to 160°F), it cultivates specific antagonistic microorganisms—such as Trichoderma harzianum, Bacillus subtilis, and Pseudomonas fluorescens. These beneficial microbes suppress soil-borne pathogens like Fusarium oxysporum (fusarium wilt) and Rhizoctonia solani (damping-off) through three primary mechanisms:
- Competitive Exclusion: Beneficial microbes rapidly consume available iron and carbon at the root zone, starving pathogenic fungi.
- Antibiosis: Bacteria like Bacillus secrete natural lipopeptide antibiotics that lyse the cell walls of fungal spores.
- Induced Systemic Resistance (ISR): Compost microbes trigger a plant's internal immune system, priming it to produce defensive enzymes like chitinase before an infection takes hold.
According to research published by the Cornell Waste Management Institute, compost-amended soils can reduce the incidence of root rot and wilt diseases by up to 70% compared to soils treated with synthetic fertilizers, which often lack this microbial diversity.
Sizing and Material Selection for a 3-Bay System
For continuous organic matter processing, a single-bin setup is insufficient. You need a three-bay homemade compost bin system: Bay 1 for active hot composting, Bay 2 for curing, and Bay 3 for finished, screened compost ready for application. Each bay should measure 36 inches wide, 36 inches deep, and 36 inches high (27 cubic feet per bay). This volume is the minimum required to achieve and sustain the thermophilic temperatures necessary to kill weed seeds and soil-borne pathogens.
Critical Lumber Selection for Organic Integrity
Never use pressure-treated lumber (ACQ or MCA) for a bin intended to produce organic disease-control compost. The copper and quaternary ammonium compounds used in modern pressure-treated wood leach into the soil, which is highly toxic to the very Trichoderma and mycorrhizal fungi you are trying to cultivate. Opt for naturally rot-resistant, untreated woods:
- Western Red Cedar: The gold standard. Contains natural thujaplicins that resist decay without harming compost microbes. Expect to pay $3.50–$4.50 per linear foot in 2026.
- Rough-Sawn Hemlock: A more budget-friendly alternative ($2.00–$2.80 per linear foot), though it will decompose in 5–7 years compared to cedar's 10–15 years.
Material Breakdown and 2026 Cost Estimates
| Material | Quantity Needed | Estimated 2026 Cost | Purpose |
|---|---|---|---|
| 2x4 Untreated Cedar (8 ft) | 12 boards | $145.00 | Structural framing and corner posts |
| 1x6 Untreated Cedar (8 ft) | 18 boards | $285.00 | Front, back, and side slats |
| 1/2" Galvanized Hardware Cloth | 1 roll (36" x 10') | $42.00 | Base barrier against burrowing rodents |
| 3" Exterior Wood Screws | 1 box (1 lb) | $14.00 | Primary structural fasteners |
| Heavy-Duty U-Nails (Staples) | 1 box (50 count) | $9.00 | Securing hardware cloth to base framing |
| Total Estimated Cost | $495.00 |
Step-by-Step Construction Guide
- Prepare the Base: Clear a level 10-foot by 4-foot area. Lay down the 1/2-inch galvanized hardware cloth. This specific gauge prevents Norway rats (Rattus norvegicus) from gnawing through or squeezing into the bays.
- Frame the Bays: Cut your 2x4 cedar into 36-inch lengths for the vertical corner posts. You will need 8 posts total (two shared posts between the three bays). Secure them to the ground using 18-inch rebar driven through pre-drilled holes in the posts if you are in a high-wind area.
- Attach the Slats: Cut the 1x6 cedar boards to 36-inch lengths. Attach them horizontally to the posts using the 3-inch exterior screws. Pro Tip: Leave a 1/2-inch gap between each horizontal slat. This provides essential passive aeration, ensuring the aerobic bacteria (Bacillus species) receive the oxygen required to maintain 140°F+ temperatures.
- Install Removable Fronts: Do not screw the front slats in permanently. Instead, install two 1x2 cedar cleats vertically on the inside of the front posts, creating a track. Cut the front slats to slide into these tracks. This allows you to pull the front boards out one by one as you turn the pile with a pitchfork.
Managing the Carbon-to-Nitrogen (C:N) Ratio
The most common failure mode in homemade compost bins is an imbalanced C:N ratio, which leads to anaerobic conditions and the proliferation of pathogenic Clostridium bacteria instead of beneficial aerobic microbes. The ideal C:N ratio for rapid, hot composting is 25:1 to 30:1. The Environmental Protection Agency (EPA) emphasizes that balancing these inputs is critical for maintaining the oxygen flow and moisture retention required for microbial activity.
Input Material C:N Reference Matrix
| Material Type | Classification | Approximate C:N Ratio | Preparation Requirement |
|---|---|---|---|
| Dry Autumn Leaves (Oak/Maple) | Brown (Carbon) | 50:1 | Shred with a mulching mower before adding |
| Pine Needles | Brown (Carbon) | 80:1 | Limit to 10% of total volume; highly acidic |
| Grass Clippings (Fresh) | Green (Nitrogen) | 15:1 | Dry for 48 hours to prevent matting and anaerobic slime |
| Coffee Grounds | Green (Nitrogen) | 20:1 | Break apart clumps; excellent microbial food source |
| Vegetable Kitchen Scraps | Green (Nitrogen) | 25:1 | Chop into 1-inch pieces to accelerate breakdown |
Troubleshooting Anaerobic Odors
If your bin emits a sulfur or rotten egg smell (hydrogen sulfide), the core has gone anaerobic. Immediate Fix: Do not add water or more greens. Immediately pull the front slats, turn the entire pile into the adjacent bay, and mix in three parts shredded dry leaves (browns) to one part of the smelly compost. This reintroduces oxygen and carbon, rescuing the aerobic microbial colonies within 48 hours.
Brewing Aerated Compost Tea for Foliar Protection
Finished compost from your homemade bin can be extracted into Aerated Compost Tea (ACT) to serve as an organic foliar spray. When applied to plant leaves, the microbes in ACT colonize the phyllosphere (leaf surface), outcompeting airborne fungal spores like powdery mildew (Erysiphe cichoracearum) and early blight (Alternaria solani).
ACT Brewing Protocol
- The Inoculant: Place 2 cups of finished, earthy-smelling compost into a 400-micron mesh brew bag.
- The Food Source: Add 1 tablespoon of unsulfured blackstrap molasses to a 5-gallon bucket of dechlorinated water. (Let tap water sit uncovered for 24 hours to off-gas chlorine, which kills compost microbes).
- Aeration: Suspend the compost bag in the water. Attach an aquarium air pump rated for at least 300 GPH (gallons per hour) with an air stone placed at the bottom of the bucket. The water must roil vigorously to maintain dissolved oxygen levels above 6 ppm.
- Incubation: Brew for exactly 24 to 36 hours at a temperature between 65°F and 75°F. Temperatures above 80°F will breed pathogenic E. coli and Salmonella.
- Application: Dilute 1:1 with water and spray on foliage within 4 hours of turning off the pump. Once aeration stops, the microbes rapidly consume the remaining oxygen and die off.
Frequently Asked Questions
How long does it take for a hot compost pile to finish?
In a properly managed 3-bay system with a 30:1 C:N ratio and weekly turning, the active thermophilic phase lasts 21 to 28 days. After moving the pile to the curing bay, it requires an additional 60 to 90 days for mesophilic fungi to break down complex lignins. Total time from raw inputs to finished, disease-suppressive compost is approximately 90 to 120 days.
Can I compost diseased plant material to kill the pathogens?
Yes, but only if you strictly monitor temperatures. To destroy resilient pathogens like Verticillium dahliae or clubroot spores, the core of the compost pile must reach 145°F and be held at that temperature for a minimum of 72 consecutive hours. If your pile stalls at 110°F, exclude diseased material to prevent reinfecting your garden when you spread the finished compost.
Why are my compost piles attracting slugs?
Slugs are attracted to the decaying organic matter and moisture. While they are technically decomposers, an overpopulation can migrate to your garden beds when you apply the compost. To mitigate this, ensure your pile reaches hot thermophilic stages (which drives slugs away) and avoid applying unfinished, chunky compost directly around the stems of susceptible crops like hostas or brassicas.

