
Gardening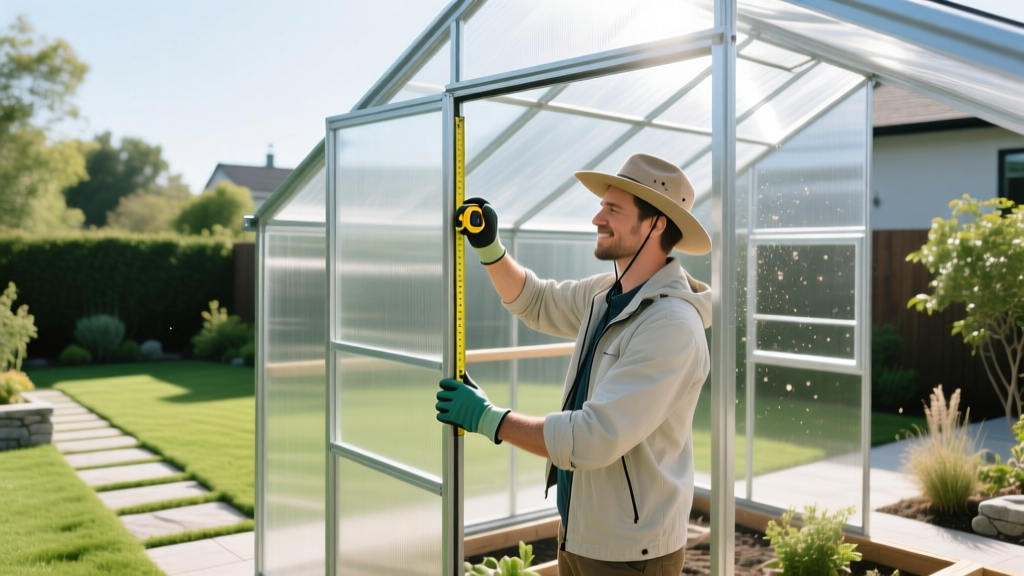
Backyard Greenhouse Construction: A Beginner's Step-by-Step Guide
Extending your growing season by 4 to 8 weeks requires more than just cold frames and row covers. For beginner gardeners looking to cultivate heat-loving crops like tomatoes, peppers, and orchids year-round, backyard greenhouse construction is the ultimate upgrade. However, jumping into a build without a structural plan or understanding microclimates often leads to collapsed frames, shattered glazing, and cooked plants. This guide strips away the fluff and provides exact measurements, material costs, and structural frameworks to help you successfully build a durable 8x10 foot polycarbonate greenhouse.
Project Snapshot: 8x10 Polycarbonate Kit
- Estimated Cost: $850 - $1,400 (Kit + Foundation Materials)
- Time Required: 2 to 3 weekends (16-24 hours)
- Skill Level: Intermediate DIY (Requires basic carpentry and power tools)
- Best Glazing: 8mm twin-wall polycarbonate (R-value 1.42)
Choosing the Right Greenhouse Style and Glazing
Before buying materials, you must match your greenhouse style to your climate zone and budget. Beginners generally choose between high-tunnel hoop houses and rigid polycarbonate kits. Traditional glass greenhouses offer unmatched aesthetics but require professional engineering, heavy concrete foundations, and carry a high risk of breakage during assembly.
According to the University of Minnesota Extension, selecting the proper glazing material is the most critical factor in maintaining stable internal temperatures without spending a fortune on supplemental heating. Below is a direct comparison of the three most common beginner glazing options.
| Glazing Material | R-Value (Insulation) | Lifespan | Cost per Sq Ft | Best Application |
|---|---|---|---|---|
| 6-mil UV Polyethylene | 0.83 | 3 - 5 Years | $0.15 - $0.25 | Hoop houses, tight budgets |
| 8mm Twin-Wall Polycarbonate | 1.42 | 10 - 15 Years | $2.50 - $3.50 | 4-season backyard kits |
| Tempered Glass (Single) | 0.95 | 30+ Years | $8.00 - $12.00 | Aesthetics, high budgets |
For most suburban gardeners in USDA Zones 5 through 8, an aluminum-framed kit utilizing 8mm twin-wall polycarbonate offers the best balance of durability, light diffusion, and thermal retention.
Site Selection and Foundation Prep (The Most Common Failure Point)
Beginners frequently unbox their greenhouse kits and attempt to assemble them directly on uneven grass. This guarantees structural racking, door misalignment, and eventual wind failure. Proper greenhouse construction starts with a perfectly level, well-draining foundation.
Step 1: Orientation and Clearing
Orient your greenhouse ridge East-to-West if you are growing primarily in the winter (maximizing low-angle southern sun exposure). Orient North-to-South for summer growing to ensure even light distribution. Clear the 8x10 foot footprint of all sod and topsoil to a depth of 3 inches.
Step 2: Building a Timber Perimeter
Construct a perimeter box using 4x6 pressure-treated ground-contact timber. Join the corners using 10-inch galvanized structural screws. Use a 4-foot carpenter's level and a string line to ensure the entire perimeter is perfectly level. If your yard slopes, bury the downhill side of the timber deeper into the soil rather than building up the uphill side with loose dirt.
Step 3: Gravel Base and Weed Barrier
Lay down a heavy-duty woven geotextile weed barrier over the exposed soil inside the timber frame. Fill the interior with 3/4-inch crushed angular gravel (not smooth pea gravel, which shifts underfoot) to a depth of 2 inches. Rake it level and compact it with a hand tamper. This provides a sterile, free-draining floor that prevents soil-borne pathogens and mud.
Step-by-Step Polycarbonate Frame Assembly
When assembling a kit (such as the popular Palram Harmony or Hybrid series), do not tighten all bolts immediately. Leave them finger-tight until the entire skeleton is erected. This allows you to square the frame by measuring diagonally from corner to corner; the diagonal measurements must be identical within 1/8 of an inch.
- Anchor the Base: Secure the aluminum base channels to your timber perimeter using 1/4-inch x 2-inch stainless steel lag bolts, spaced every 18 inches. Do not use the manufacturer's included ground spikes; they pull out in 40 mph winds.
- Erect the Arches and Eaves: Assemble the side walls and roof arches on the ground, then lift them into the base channel. Have a helper hold the frame plumb while you secure the corner brackets.
- Install the Glazing: Slide the 8mm polycarbonate panels into the aluminum channels. Critical Detail: Ensure the UV-protected side of the polycarbonate faces outward. The UV coating is usually marked with a peelable plastic film that says 'This Side Out'. Installing it backward will cause the panels to yellow and become brittle within 18 months.
- Seal the Gaps: Apply a bead of clear, 100% silicone sealant (specifically rated for polycarbonate and aluminum) along the bottom edge of the base channel where it meets the timber to prevent draft infiltration.
Climate Control and Ventilation Essentials
A sealed greenhouse can easily reach 120°F on a sunny 60°F spring day, cooking your seedlings in minutes. Research from Michigan State University Extension highlights that passive roof ventilation is non-negotiable for crop survival.
Ventilation Rule of Thumb
Your total operable vent area must equal at least 20% of your greenhouse floor space. For an 8x10 foot greenhouse (80 sq ft), you need a minimum of 16 square feet of open vent space. Always upgrade your kit's manual roof vents with wax-cylinder auto-vent openers (approx. $35 each). These require no electricity and automatically push the vents open when the internal temperature hits 70°F to 75°F.
Pair your roof vents with a louvered intake vent positioned low on the north-facing wall to create a natural thermosiphon effect, drawing cool air in the bottom and pushing hot air out the roof.
Troubleshooting Common Construction Mistakes
- Wind Uplift Failure: The most common reason backyard greenhouses end up in the neighbor's yard is inadequate anchoring. If you live in an area with wind gusts over 50 mph, add interior diagonal cross-bracing using aircraft cable and turnbuckles, anchored to deep earth augers driven 30 inches into the soil outside the perimeter.
- Condensation Drip: Twin-wall polycarbonate has hollow flutes. If you leave the top and bottom edges of the panels open, moisture enters, causing internal condensation and algae growth. Always seal the top edge with solid aluminum foil tape and the bottom edge with breathable micro-porous vent tape to allow drainage while blocking insects.
- Door Track Binding: If your sliding door sticks, the frame is out of plumb. Loosen the door-frame header bolts, use a rubber mallet to tap the frame until the diagonal measurements are perfectly square, and re-tighten.
Frequently Asked Questions
Do I need a building permit for a backyard greenhouse?
In most municipalities, accessory structures under 120 square feet (like an 8x10 or 8x12 greenhouse) do not require a building permit, provided they are not on a permanent concrete foundation and are set back at least 5 feet from property lines. Always check with your local zoning office before breaking ground.
How do I heat a polycarbonate greenhouse in the winter?
For small 8x10 spaces, a 1,500-watt ceramic space heater connected to a heavy-duty outdoor-rated extension cord on a GFCI circuit is sufficient to keep the space above freezing in Zones 6 and 7. For a safer, off-grid option, use a 5-gallon black rain barrel filled with water placed in the southern corner; it absorbs solar heat during the day and releases it at night, buffering temperature drops by 5°F to 8°F.

