
Gardening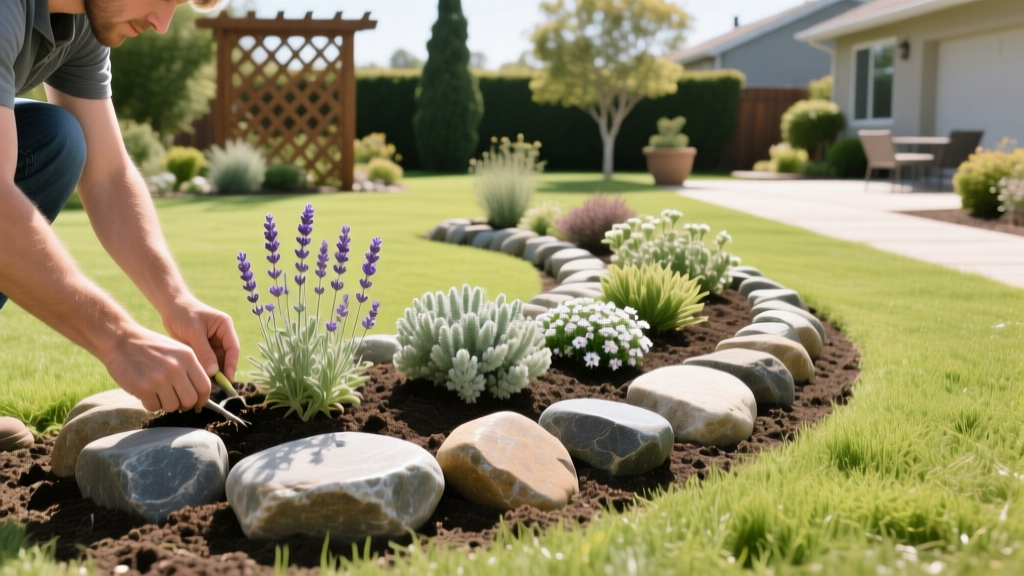
How to Build a Rock Flower Bed: Beginner's Step-by-Step Guide
Why Choose a Rock Flower Bed?
A rock flower bed solves two of the most common landscaping headaches: poor drainage and relentless weed growth. By combining natural stone edging with a well-draining soil matrix and heavy-duty geotextile fabric, you create a microclimate that mimics alpine or arid environments. This setup is ideal for drought-tolerant perennials, succulents, and creeping groundcovers. According to the University of Minnesota Extension, rock gardens significantly reduce soil erosion on sloped terrain while minimizing the need for supplemental irrigation once established.
Building one yourself is highly cost-effective. While professional installation typically ranges from $15 to $25 per square foot, a DIY approach using bulk materials drops the cost to roughly $4 to $8 per square foot, depending on your stone selection.
Pro Tip: Sun Mapping
Before digging, track sunlight across your chosen site for three consecutive days. Most rock garden plants (like Sedum and Sempervivum) require a minimum of 6 to 8 hours of direct, unfiltered sunlight. Avoid placing your bed under deciduous trees where falling autumn leaves will rot against the stones and smother low-growing alpine plants.
Before digging, track sunlight across your chosen site for three consecutive days. Most rock garden plants (like Sedum and Sempervivum) require a minimum of 6 to 8 hours of direct, unfiltered sunlight. Avoid placing your bed under deciduous trees where falling autumn leaves will rot against the stones and smother low-growing alpine plants.
Selecting the Right Stone and Base Materials
The structural integrity and aesthetic of your rock flower bed depend entirely on the stone you choose. Avoid using smooth, uniformly sized gravel for the visible edging, as it lacks the visual weight and interlocking stability of natural stone. Below is a comparison of the three most effective materials for beginner builds.
| Material | Avg. Cost (Per Ton) | Drainage Profile | Best Use Case |
|---|---|---|---|
| Flagstone | $300 - $500 | Moderate (depends on stacking gaps) | Tiered or raised bed retaining walls |
| Fieldstone / Granite | $120 - $180 | High (irregular shapes create natural gaps) | Naturalistic, rustic perimeter edging |
| Lava Rock | $150 - $220 | Very High (porous structure) | Top-dressing and heat-retaining accents |
For the base layer beneath your soil and fabric, purchase 3/4-inch minus crushed gravel. The "minus" designation means it includes stone dust and smaller particles, which lock together when tamped to form a stable, non-shifting foundation that still permits deep water percolation.
Step-by-Step Excavation and Base Preparation
Proper excavation prevents the bed from sinking or washing out during heavy spring rains. Follow these exact measurements for a durable foundation.
- Mark the Perimeter: Use a garden hose to outline a smooth, sweeping curve. Avoid sharp 90-degree angles, which complicate mowing and look unnatural.
- Dig the Trench: Excavate a trench 6 inches deep and 12 inches wide along the entire perimeter. This trench will house your edging stones and base gravel.
- Add the Base Gravel: Fill the bottom 3 inches of the trench with your 3/4-inch minus crushed gravel.
- Tamp and Level: Use a manual hand tamper or a rented plate compactor to compress the gravel. A level base is critical; if the stones tilt outward, hydrostatic pressure from wet soil will eventually push them out of alignment.
Installing the Weed Barrier and Edging
The most frequent point of failure in DIY rock beds is the use of cheap, non-woven plastic weed barriers. These plastics trap moisture, cause root rot, and degrade into microplastics within two seasons.
Warning: Choose the Correct Fabric Weight
You must use a woven polypropylene geotextile fabric. Look for a material weight of at least 3.0 oz per square yard (often labeled as commercial grade). Brands like Dewitt or Agfabric offer 4.0 oz woven rolls that allow water penetration while blocking 99% of weed seeds and aggressive grass rhizomes like Bermuda or Quackgrass.
You must use a woven polypropylene geotextile fabric. Look for a material weight of at least 3.0 oz per square yard (often labeled as commercial grade). Brands like Dewitt or Agfabric offer 4.0 oz woven rolls that allow water penetration while blocking 99% of weed seeds and aggressive grass rhizomes like Bermuda or Quackgrass.
Lay the fabric over the entire bed area, extending it 3 inches up the inside of your perimeter trench. Overlap seams by a minimum of 6 inches. Secure the fabric every 12 inches using 6-inch steel landscape pins. Once the fabric is secured, place your primary edging stones directly on top of the fabric in the trench, backfilling behind them with native soil to lock them in place.
Soil Formulation and Planting Techniques
Standard topsoil or bagged potting mix will kill most rock garden plants due to excessive moisture retention. You need a custom, fast-draining matrix. The Spruce recommends amending native soil heavily to mimic scree or alpine conditions.
The Ideal Rock Bed Soil Recipe
- 40% Coarse Horticultural Sand: Provides macro-pores for rapid drainage. Do not use fine play sand, which compacts like concrete.
- 40% Loam or Native Topsoil: Provides essential mineral structure and anchors roots.
- 20% Organic Compost: Supplies slow-release nutrients without holding excess water like peat moss does.
Mix these components thoroughly in a wheelbarrow before adding them to the bed. Mound the soil slightly higher in the center (creating a gentle 5% grade toward the edges) to encourage surface runoff away from the crowns of your plants.
Plant Selection and Spacing
When planting, cut an X into the geotextile fabric just large enough for the root ball. Fold the flaps back, plant the specimen, and fold the fabric flaps tightly around the stem before covering with top-dressing. Space creeping plants like Phlox subulata (Creeping Phlox) 12 inches apart, and rosette-forming succulents like Sempervivum (Hens and Chicks) 6 to 8 inches apart. Finish the bed with a 1-inch layer of 3/8-inch crushed pea gravel as a top-dressing. This keeps plant stems off the damp soil, preventing collar rot.
Common Beginner Mistakes and Troubleshooting
Even with careful planning, environmental factors can disrupt your rock flower bed. Use this troubleshooting matrix to diagnose and fix common issues.
| Symptom | Root Cause | Corrective Action |
|---|---|---|
| Stones leaning outward | Insufficient base tamping or frost heave | Remove stones, add 2 inches of base gravel, re-tamp, and reset stones with a slight inward lean (batter). |
| Yellowing, rotting plant crowns | Soil matrix holds too much moisture | Pull affected plants, mix 20% more coarse sand into the bed, and elevate the planting crowns 1 inch above the soil line. |
| Grass invading the bed edges | Fabric didn't extend far enough into the trench | Lift the perimeter stones, pull the fabric taut to the outer edge of the trench, and secure with additional steel pins. |
Frequently Asked Questions
Can I build a rock flower bed over an existing concrete patio?
Yes, but you must address drainage. If the patio lacks a slope or drain, water will pool beneath the fabric and cause anaerobic soil conditions. Drill 1/2-inch drainage holes through the concrete every 24 inches using a masonry bit, lay a 2-inch layer of coarse gravel over the slab, and then proceed with the fabric and soil layers.
How often do I need to replace the geotextile fabric?
High-quality woven polypropylene fabric (4.0 oz or heavier) is UV-stabilized and rated for 20+ years of subsurface use. Because it is buried beneath soil and gravel, UV degradation is negligible. You should never need to replace it unless it was physically torn during installation or you used a non-woven plastic alternative that degrades rapidly.
Will the rocks attract snakes or pests?
Rocks themselves do not attract pests, but the gaps between poorly fitted stones can provide shelter for rodents or snakes seeking shade. To minimize this, use smaller chinking stones (1 to 2 inches in diameter) to tightly fill the voids between your larger perimeter boulders, eliminating deep, dark crevices while maintaining soil drainage.

