
Gardening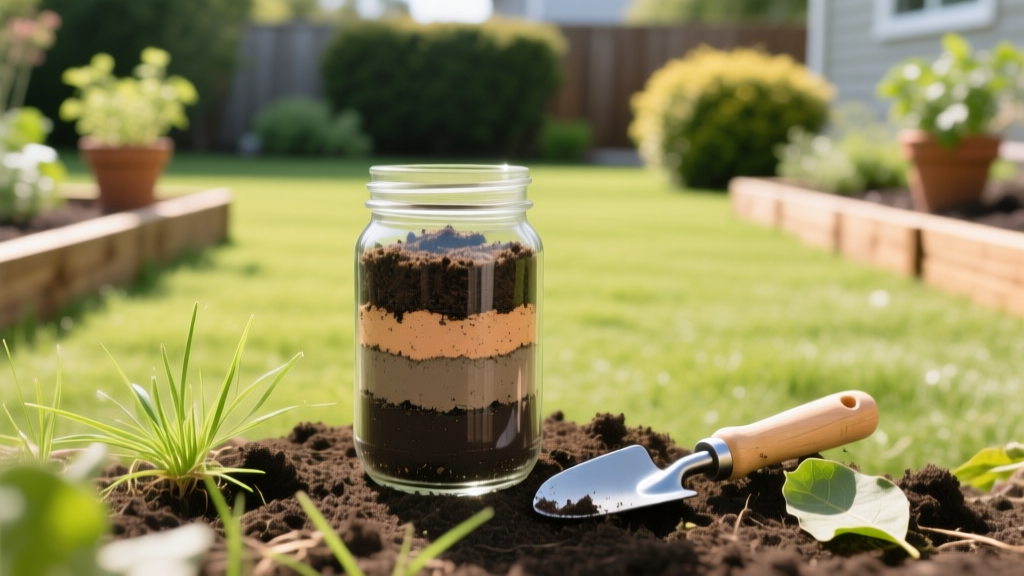
DIY Soil Jar Test: Diagnose Drainage and Plant Growth Problems
The Hidden Culprit Behind Stunted Growth and Poor Drainage
When garden beds chronically fail to drain after heavy rain, or when vegetable crops wilt despite regular watering, homeowners often blame fertilizer deficiencies or pests. However, the root cause is almost always physical soil structure. Before investing hundreds of dollars in soil conditioners, gypsum, or commercial topsoil, you must accurately diagnose your soil's physical makeup. The soil jar test (also known as the Mason jar test) is the most reliable, zero-cost diagnostic tool for determining the exact ratio of sand, silt, and clay in your garden beds. By understanding this ratio, you can transition from blind guesswork to targeted, science-backed soil remediation.
The Physics of Particle Settling: Why the Soil Jar Test Works
The soil jar test relies on Stokes' Law, a fluid dynamics principle that calculates the settling velocity of spherical particles in a fluid. In soil science, particle size dictates how quickly minerals drop out of suspension when mixed with water:
- Sand (0.05 to 2.0 mm): The largest and heaviest particles. They plummet to the bottom almost immediately.
- Silt (0.002 to 0.05 mm): Medium-sized particles that feel like flour when dry. They settle out over a few hours.
- Clay (Less than 0.002 mm): Microscopic, plate-like particles that remain suspended in water for days due to their low mass and electrostatic repulsion.
According to the USDA Natural Resources Conservation Service (NRCS), the relative proportions of these three particles determine your soil's textural class, which directly governs water infiltration rates, cation exchange capacity (CEC), and root penetration resistance.
⚠️ Critical Diagnostic Warning: The Dispersing Agent
Clay particles naturally clump together (flocculate) into larger aggregates due to electrical charges. If you simply shake soil and water, the clay clumps will settle quickly alongside the silt, giving you a false reading of high silt and low clay. You must add a chemical dispersing agent to break these bonds. Use 1 tablespoon of Calgon (sodium hexametaphosphate) or non-sudsing powdered dishwasher detergent per quart of water. Skipping this step invalidates the entire test.
Step-by-Step Diagnostic Protocol
Follow this exact methodology to ensure your sample is representative and your layers are clearly defined.
- Sample Collection: Dig down 6 to 8 inches in your garden bed (below the mulch and topsoil layer). Collect soil from 3 to 4 different spots in the bed and mix them in a bucket to create a composite sample. Remove all rocks, roots, and debris.
- Jar Preparation: Fill a clear, straight-sided 1-quart glass jar exactly one-third full with your composite soil sample. Straight sides are mandatory; curved jars distort visual measurements.
- Add Liquids and Dispersant: Fill the jar almost to the top with water, leaving 1 inch of headspace. Add 1 tablespoon of your chosen dispersing agent (Calgon or powdered dish detergent).
- Agitation: Secure the lid tightly and shake vigorously for a full 3 to 5 minutes. The goal is to completely break apart all soil aggregates until the mixture resembles a uniform, muddy milkshake.
- Initial Settle: Set the jar on a flat, level surface where it will not be bumped or vibrated for the next 48 hours.
Decoding Your Results: Settling Times and Layer Identification
Patience is the primary requirement for an accurate soil jar test. Do not attempt to read the results until the 48-hour mark has passed. Use a flexible ruler to measure the thickness of each distinct band in millimeters.
| Soil Fraction | Settling Time | Visual Characteristics |
|---|---|---|
| Organic Matter | Floats immediately | Dark, fibrous material resting on the water surface. |
| Sand | 1 to 2 minutes | Gritty, light-colored bottom layer with a sharp, defined top edge. |
| Silt | 2 to 4 hours | Smooth, medium-brown middle layer resting directly on the sand. |
| Clay | 24 to 48 hours | Fine, dense, light-grey or tan top layer. Water above it should be mostly clear. |
Calculating Your Percentages
Ignore the floating organic matter and the water at the top. Measure only the solid settled layers. Add the thickness of the sand, silt, and clay layers together to get your Total Settled Height.
Formula: (Thickness of Specific Layer ÷ Total Settled Height) × 100 = Percentage
For example, if your total settled soil is 100mm thick, and the sand layer is 40mm, your soil is 40% sand. Plot these three percentages on the University of Minnesota Extension's Soil Texture Triangle to find your exact soil classification (e.g., Sandy Loam, Silty Clay).
Targeted Solutions Based on Your Jar Test Diagnosis
Once you have diagnosed your soil texture, you can apply specific amendments to correct structural failures. Avoid the common beginner mistake of treating all poor soils the same way.
Diagnosis: Heavy Clay (Greater than 40% Clay)
Symptoms: Water pools for hours after rain; soil cracks deeply when dry; roots suffocate.
The Trap: Never add sand to heavy clay. Unless you add sand at a 1:1 ratio by volume (which is physically and financially impossible for most garden beds), the sand grains will simply act as aggregate, creating a concrete-like substance.
The Solution:
- Flocculation: Apply pelletized gypsum (calcium sulfate) at a rate of 40 lbs per 1,000 square feet. The calcium ions replace sodium on the clay particles, causing them to clump together and create macro-pores for drainage.
- Organic Integration: Top-dress with 2 to 3 inches of coarse, unfinished compost (like leaf mold or pine bark fines) annually. Earthworms will pull this organic matter down, physically prying the clay plates apart over time.
Diagnosis: Excessive Sand (Greater than 75% Sand)
Symptoms: Water and liquid fertilizers drain straight through; plants wilt rapidly in summer heat; nutrients leach away.
The Solution:
- Moisture Retention: Incorporate biochar (charged with compost tea) or sphagnum peat moss. Biochar acts as a microscopic coral reef, holding water and nutrients in its porous structure indefinitely, unlike peat which breaks down in 3 to 5 years.
- Fertilizer Strategy: Switch from synthetic, water-soluble fertilizers to slow-release, organic granular fertilizers (like feather meal or kelp meal) that break down gradually, matching the leaching rate of the sand.
Advanced Troubleshooting: What the Jar Test Misses
While the soil jar test is the gold standard for diagnosing physical texture, it provides zero data regarding soil chemistry. A perfect sandy loam will still fail to support plant life if the pH is locked at 4.5 or if heavy metals are present.
"Texture dictates how water moves, but chemistry dictates what the plant can actually eat. Use the jar test to fix your drainage and physical bed structure, but always follow up with a university lab soil test for pH, phosphorus, potassium, and micronutrient baselines."
— Soil Health Management Principles, Cornell University Cooperative Extension
If your jar test reveals a healthy loam (roughly 40% sand, 40% silt, 20% clay) but your plants are still exhibiting chlorosis (yellowing leaves) or stunted growth, stop amending the physical soil. Instead, send a sample to a local agricultural extension lab (typically $20 to $35) to test for pH imbalances, calcium-to-magnesium ratios, and baseline NPK levels. By combining the physical diagnostics of the soil jar test with chemical lab data, you eliminate all variables and create a precision environment for root development.

