
Gardening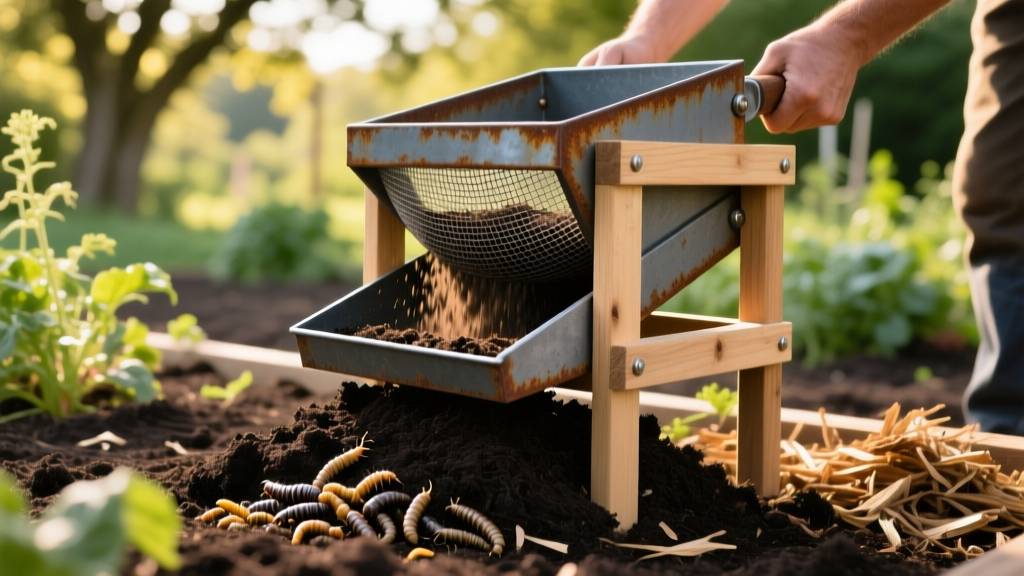
Build a Heavy-Duty DIY Soil Sifter for Organic Pest Control
Organic gardening demands rigorous physical and mechanical pest control strategies when chemical nematicides and synthetic grub killers are off the table. Soil-borne pests like Japanese beetle larvae, cutworms, and wireworms can decimate root systems overnight, while dormant weed seeds lay in wait for spring moisture. A heavy-duty diy soil sifter is one of the most effective, non-toxic tools for physically extracting these threats from your growing medium while simultaneously aerating compost and topsoil.
By integrating mechanical sifting into your spring bed preparation and compost harvesting routines, you disrupt pest life cycles and reduce weed pressure without introducing a single synthetic compound to your soil food web.
The Science of Physical Pest Removal in Organic Soil
Integrated Pest Management (IPM) relies heavily on mechanical controls to reduce pest populations below economic injury levels. According to the Environmental Protection Agency's guidelines on safe pest control, physical removal is a cornerstone of organic compliance. When you pass garden soil through a 1/2-inch mesh screen, you physically separate the soil matrix from the macro-organisms living within it.
Japanese beetle grubs (Popillia japonica) typically overwinter 2 to 6 inches below the soil surface. Cutworms (Agrotis ipsilon) pupate in shallow soil cells. Sifting the top 8 inches of your raised beds in early spring mechanically exposes and extracts these larvae. Once collected, they can be disposed of in a bucket of soapy water—an entirely chemical-free eradication method that prevents the next generation of flying adults from emerging.
Materials and Cost Breakdown for a 3-Tier Sifter
To maintain strict organic standards, your sifter materials must not leach harmful chemicals into your soil. Avoid pressure-treated lumber (which contains copper azole or micronized copper) and opt for naturally rot-resistant woods. Below is the exact bill of materials for a 24-inch by 36-inch heavy-duty sifter designed to fit snugly over a standard contractor wheelbarrow.
| Material | Specification | Quantity | Estimated Cost |
|---|---|---|---|
| Frame Lumber | 2x4 Rough-Sawn Cedar or Hemlock (Untreated) | 2 boards (8 ft length) | $24.00 |
| Primary Mesh | 1/2-inch 19-Gauge Galvanized Hardware Cloth | 1 roll (36 in x 10 ft) | $22.00 |
| Fasteners (Frame) | 3-inch Exterior-Grade Star-Drive Wood Screws | 1 box (1 lb) | $8.00 |
| Fasteners (Mesh) | 3/8-inch Galvanized Poultry Netting Staples | 1 box | $6.00 |
| Corner Braces | 3-inch Zinc-Plated Steel L-Brackets | 4 pieces | $5.00 |
| Total | $65.00 |
Step-by-Step Construction: The Heavy-Duty Frame
A flimsy sifter will bow under the weight of wet soil, causing the mesh to detach and allowing pests to slip through the gaps. Follow these precise construction steps to ensure structural rigidity.
- Cut the Frame Components: Cut two pieces of 2x4 cedar to exactly 36 inches. Cut two pieces to exactly 21 inches. This accounts for the 1.5-inch thickness of the overlapping boards, resulting in a perfect 24x36-inch outer dimension.
- Assemble the Outer Box: Apply a bead of exterior-grade polyurethane construction adhesive to the end grains of the 21-inch pieces. Clamp them between the 36-inch pieces to form a rectangle. Pre-drill pilot holes to prevent the cedar from splitting, then drive two 3-inch screws into each corner joint.
- Reinforce the Corners: Screw the steel L-brackets into the inside corners. This prevents the frame from racking (twisting out of square) when you aggressively shake it over a wheelbarrow.
- Add a Center Tensioner: Cut a 21-inch piece of 2x4 and install it exactly in the middle of the 36-inch spans. This center cross-brace is critical; it reduces the unsupported mesh span from 36 inches to 18 inches, eliminating the sagging that plagues most homemade sifters.
- Stretch and Staple the Mesh: Unroll the 1/2-inch hardware cloth over the frame, leaving a 2-inch overhang on all sides. Pro-Tip: Use a scrap piece of 2x4 as a lever to pull the mesh drum-tight before stapling. Drive galvanized staples every 2 inches along the perimeter and directly over the center tensioner.
- Trim and Cap: Use tin snips to trim the excess mesh flush with the outer edge of the frame. To protect your hands from sharp wire ends, rip a 1/2-inch thick strip of cedar and screw it over the mesh perimeter as a cap.
Mesh Selection Matrix for Different Organic Targets
The effectiveness of your diy soil sifter depends entirely on the aperture size of the mesh relative to the target pest or weed seed. While 1/2-inch hardware cloth is the standard for general bed prep, serious organic growers should build interchangeable mesh screens that slide into a master frame.
| Mesh Size | Target Pests / Debris | Target Weed Seeds | Best Use Case |
|---|---|---|---|
| 1/2-inch (12.7mm) | Japanese beetle grubs, June bug larvae, cutworms, rocks, large root masses. | None (seeds will pass through). | Spring raised bed turnover, breaking up compacted clay clods, initial compost screening. |
| 1/4-inch (6.35mm) | Wireworms, small root-knot nematode cysts (visible clusters), symphylans. | Large seeds: Morning glory, bindweed, wild cucumber. | Refining compost for seed-starting mixes, secondary pest screening in heavily infested beds. |
| 1/8-inch (3.17mm) | Soil-dwelling mites, flea beetle pupae. | Small seeds: Purslane, crabgrass, pigweed, lambsquarters. | Creating ultra-fine potting soil, aggressive weed seed bank depletion before planting carrots or radishes. |
Integrating the Sifter into Your Chemical-Free Routine
Building the tool is only half the battle; deploying it strategically is what yields pest-free organic harvests.
Spring Grub Eradication Workflow
Three weeks before your last frost date, run the top 6 inches of your vegetable bed soil through the 1/2-inch sifter. Have a 5-gallon bucket filled with 2 gallons of water and 2 tablespoons of castile soap ready. As grubs and pupae roll off the mesh, pick them out and drop them into the soapy water. The soap breaks the surface tension, ensuring the pests drown instantly without the need for chemical insecticides.
Compost Harvesting and Pathogen Reduction
When harvesting finished compost from your bins, sifting removes un-decomposed woody material that can harbor fungal gnats and earwigs. According to the USDA Natural Resources Conservation Service, maintaining uniform soil structure is vital for water infiltration and root health. Sifting ensures a homogenous, crumbly texture that promotes vigorous root growth and beneficial microbial activity, naturally outcompeting soil-borne pathogens.
⚠️ Organic Microbiome Warning: Do not sift your soil to a fine powder every single season. Over-sifting destroys soil aggregates and exposes protected organic matter to rapid oxidation. Reserve the 1/8-inch and 1/4-inch screens strictly for seed-starting mixes and targeted weed-seed removal. Use the 1/2-inch screen for general bed prep to preserve larger soil aggregates and earthworm populations.
Troubleshooting Common Sifter Failures
- Mesh Detaching Under Load: Wet soil is incredibly heavy. If the mesh pulls away from the wood, your staples are likely too short or the wood is too soft. Fix: Switch to 1/2-inch galvanized staples and add a bead of exterior polyurethane glue between the mesh and the wood before re-stapling.
- Wood Rotting at the Corners: Even cedar will rot if left sitting in wet mud. Fix: Store the sifter vertically against a fence, or attach four 2-inch rubber furniture bumpers to the bottom corners to elevate it slightly off damp ground during use.
- Clay Soil Clogging the Mesh: Heavy clay will blind (clog) the screen immediately. Fix: Allow the soil to dry to a moisture content where it crumbles in your hand (roughly 20% moisture) before sifting. Never attempt to sift saturated clay.
FAQ: Soil Sifting for Organic Growers
Will sifting kill my beneficial earthworms?
A 1/2-inch mesh will catch mature earthworms. When you spot them on the screen, gently return them to the wheelbarrow of sifted soil or directly back into the garden bed. The goal is to remove destructive larvae, not to sterilize the soil of beneficial macro-fauna.
Can I use chicken wire instead of hardware cloth?
No. Chicken wire is too flexible and has hexagonal apertures that are too large (often 1 inch or more), allowing smaller grubs and cutworms to pass through. Furthermore, the thin gauge of chicken wire will sag and deform under the weight of a single shovel-load of wet topsoil. Always use welded, 19-gauge hardware cloth.
How does sifting help with organic nematode applications?
If you are applying beneficial entomopathogenic nematodes (like Heterorhabditis bacteriophora) for organic grub control, the soil must be free of large clods and debris to ensure the nematode solution penetrates evenly. Sifting the top 3 inches of soil prior to application creates the perfect, uniform seedbed for these microscopic biological controls to thrive.

