
Gardening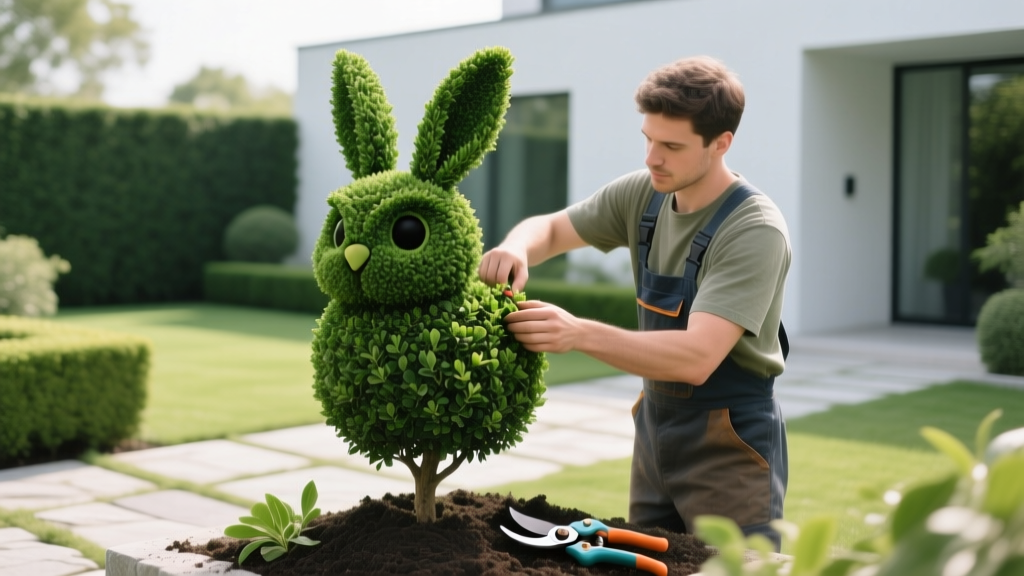
How to Make Topiary Animals From Plants: A Beginner Guide
The Art of Living Sculpture: Starting Your Topiary Journey
Transforming ordinary shrubs into whimsical animal shapes is one of the most rewarding projects in landscape design. While estate gardens often feature massive, freehand-clipped peacocks and hounds, beginners can achieve stunning results using the wire-frame training method. This technique guides the natural growth of a plant into a predefined skeleton, eliminating the guesswork of freehand pruning. As of 2026, the barrier to entry is lower than ever, with pre-formed frames and dwarf cultivars making it possible to cultivate a living menagerie on a standard suburban patio or garden bed.
Selecting the Right Plant Species for Animal Topiary
The success of your topiary animal hinges entirely on choosing a plant with small leaves, dense branching habits, and a high tolerance for frequent shearing. Large-leaf plants like laurel or rhododendron will look ragged when cut, as the shears will slice directly through the foliage, leaving brown, necrotic edges.
| Species | Common Name | USDA Zones | Leaf Size | Growth Rate |
|---|---|---|---|---|
| Buxus sempervirens | Common Boxwood | 5-8 | 0.5 - 1 inch | Slow (3-6 in/yr) |
| Taxus baccata | English Yew | 6-7 | 1 - 1.5 inches | Slow (4-8 in/yr) |
| Ligustrum japonicum | Japanese Privet | 7-10 | 2 - 3 inches | Fast (12-24 in/yr) |
| Rosmarinus officinalis | Rosemary | 8-10 | 0.5 - 1 inch | Moderate (6-12 in/yr) |
For beginners in temperate climates, Buxus sempervirens 'Suffruticosa' (Dutch Boxwood) is the gold standard. Its naturally compact habit requires less aggressive pruning, reducing the risk of accidentally cutting into the 'dead zone' where the plant cannot regenerate new buds.
Sourcing and Building the Wire Frame Skeleton
You have two options for the armature: building it yourself or buying a pre-formed frame. For complex animal shapes (like a sitting rabbit or a standing bear), purchasing a professionally welded frame is highly recommended to ensure structural integrity and anatomical proportion.
Pro-Tip: Wire Gauge Matters
Always select 12-gauge or 14-gauge galvanized steel wire. Avoid chicken wire or PVC-coated craft wire; the former lacks the rigidity to hold a heavy, wet shrub during windstorms, and the latter will become brittle and shatter under UV exposure within two seasons.
Always select 12-gauge or 14-gauge galvanized steel wire. Avoid chicken wire or PVC-coated craft wire; the former lacks the rigidity to hold a heavy, wet shrub during windstorms, and the latter will become brittle and shatter under UV exposure within two seasons.
If you are sourcing a frame in 2026, expect to pay between $65 and $180 for a high-quality, 3-foot-tall galvanized animal frame from specialized horticultural suppliers. Ensure the frame features a split-back design or an open bottom, which allows you to slip the cage directly over an established potted shrub without having to thread the plant through a narrow opening.
Step-by-Step: Training and Securing the Plant
Training a plant over a frame is a multi-season process. Do not expect immediate results; you are guiding growth, not forcing it.
- Position the Frame: Place your potted shrub (ideally a 3-gallon or 5-gallon size) in its final location. Slide the wire frame over the plant. Anchor the frame to the ground using two 18-inch, 3/8-inch diameter steel rebar stakes driven through the bottom loops of the frame to prevent it from tipping in high winds.
- Weave and Tie: Gently pull the longest, most pliable branches toward the outside of the wire frame. Secure them using 2mm biodegradable jute twine or green floral tape. Use a figure-8 knot to tie the stem to the wire, leaving a small buffer of space so the stem can expand in girth without being strangled.
- Initial Structural Prune: Using sharp bypass pruners, remove any inward-growing branches that rub against the center of the frame. This improves airflow and prevents fungal diseases like Volutella blight, which thrives in the humid microclimate inside a dense topiary.
- Pinch the Tips: To encourage lateral branching (which creates the dense 'fur' of your animal), pinch off the terminal buds of the branches you just tied to the frame. This breaks apical dominance and forces the plant to push out side shoots.
Essential Pruning Tools and Maintenance Schedule
Maintaining the crisp outline of a topiary animal requires the right tools. Dull blades will crush the plant's vascular tissue, leading to dieback.
- Bypass Pruners: The Felco 2 Classic or Okatsune 101 are industry standards. Use these for selective pruning and removing thicker, woody stems (up to 1/2 inch).
- Hedge Shears: For the final 'haircut' to smooth the animal's silhouette, use lightweight shears with 8-inch to 10-inch blades, such as the ARS HS-KR1000. Avoid heavy, long-bladed shears, which make it difficult to navigate the tight curves of an animal's ears or snout.
Avoid the 'Dead Zone'
Never shear back into old, brown wood that lacks visible green foliage or dormant buds. Conifers like Yew can regenerate from old wood, but broadleaf evergreens like Boxwood and Privet often cannot. Cutting too deep will leave permanent bald spots on your topiary animal.
Never shear back into old, brown wood that lacks visible green foliage or dormant buds. Conifers like Yew can regenerate from old wood, but broadleaf evergreens like Boxwood and Privet often cannot. Cutting too deep will leave permanent bald spots on your topiary animal.
Timing: According to the Royal Horticultural Society, the primary pruning should occur in late spring after the first flush of growth has hardened off slightly. A secondary, lighter trim in early autumn (at least six weeks before your first expected frost) will tidy the shape for winter. Never prune in late fall, as the tender new growth stimulated by cutting will be killed by freezing temperatures.
Troubleshooting Common Topiary Failures
Even with careful planning, living sculptures can encounter issues. Use this diagnostic matrix to identify and correct problems early.
| Symptom | Probable Cause | Actionable Fix |
|---|---|---|
| Browning leaf edges and dieback | Shearing with dull blades or pruning in hot, dry weather | Sharpen blades immediately; restrict pruning to cool, overcast mornings. |
| Stems snapping at the wire tie | Girdling from zip-ties or wire twisting too tightly | Cut all plastic ties; replace with loose figure-8 jute twine loops. |
| Orange/brown staining on lower stems | Rust bleeding from non-galvanized iron frames | Remove frame, sand and paint with rust-inhibiting enamel, or replace with galvanized steel. |
| Thin, leggy growth at the base | Top-heavy canopy shading out the lower branches | Prune the top slightly narrower than the base (a subtle A-line shape) to allow sunlight penetration. |
Frequently Asked Questions
Can I use vines instead of shrubs for topiary animals?
Yes, but the technique changes entirely. This is known as 'stuffed topiary.' You fill the wire frame with a mix of long-fiber sphagnum moss and a soilless potting mix, then plant creeping fig (Ficus pumila) or English ivy directly into the moss. While this yields faster visual results (often within one season), stuffed topiaries require daily watering in the summer and are highly susceptible to drying out, making them much higher maintenance than trained shrub topiaries.
How do I fertilize a topiary animal without causing rampant, unmanageable growth?
Avoid high-nitrogen liquid fertilizers, which push rapid, soft, and leggy growth that ruins the sculpted shape. Instead, apply a slow-release granular fertilizer with an NPK ratio of 10-6-4 in early spring. For a standard 3-gallon boxwood topiary, scatter exactly 1/4 cup of granules evenly over the soil surface, keeping it 2 inches away from the main trunk to prevent root burn.
How long does it take to fully cover a wire frame?
Starting with a well-branched 3-gallon shrub, expect 2 to 3 growing seasons to achieve full, opaque coverage of a standard 3-foot animal frame. Fast-growing species like Japanese Privet may cover the frame in a single season, but they will require pruning every 4 to 6 weeks during the summer to maintain the animal's distinct features.

