
Gardening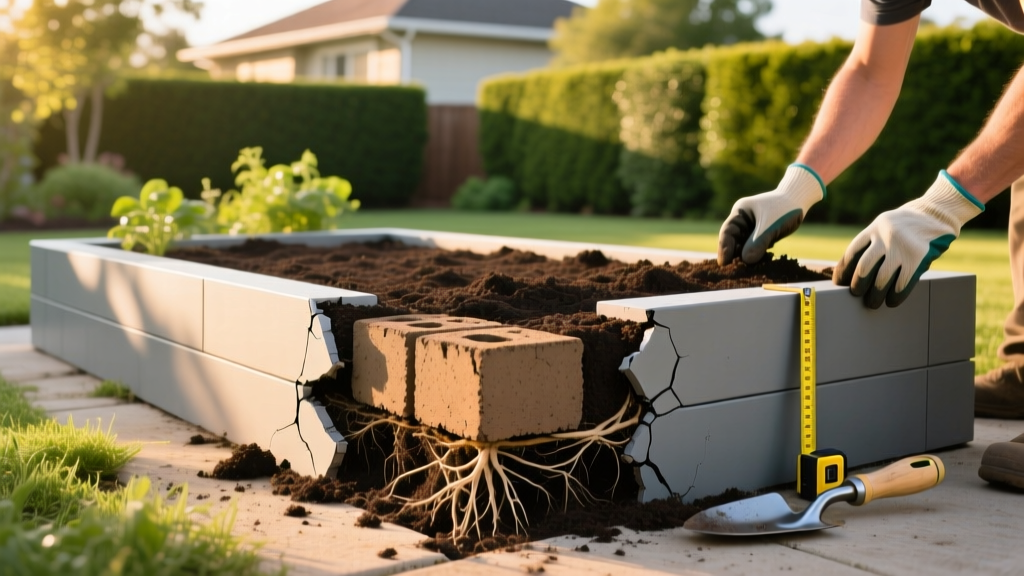
Diagnose and Fix Bulging Gardening Blocks in Raised Beds
Modular gardening blocks—whether solid concrete, hollow cinder, or composite stone—offer a clean, mortarless way to construct raised beds and low retaining walls. However, when structural or chemical failures occur, they compromise both the hardscape integrity and the soil ecosystem. A bowed wall, a sunken corner, or chlorotic plants are not isolated incidents; they are symptoms of specific physical and chemical imbalances. Below is a diagnostic framework for identifying and resolving the most common failures associated with block-based garden infrastructure.
Hydrostatic Pressure: Diagnosing Bulging and Bowed Walls
Symptom: The middle of the block wall bows outward, or individual blocks push forward after heavy rainfall or spring thaws.
Root Cause: Hydrostatic pressure. Saturated soil weighs significantly more than dry soil (water adds 62.4 lbs per cubic foot). Without an escape route, this trapped water exerts lateral force against the flat face of the gardening blocks, eventually overcoming the friction holding them in place.
Root Cause: Hydrostatic pressure. Saturated soil weighs significantly more than dry soil (water adds 62.4 lbs per cubic foot). Without an escape route, this trapped water exerts lateral force against the flat face of the gardening blocks, eventually overcoming the friction holding them in place.
The Structural Solution: Retrofitting Drainage
If your wall is already built and bulging, you must relieve the pressure before the wall collapses. You cannot simply push the blocks back into place without addressing the water.
- Excavate the Backfill: Remove the soil directly behind the bulging section to a depth of 12 inches.
- Install a Gravel Curtain: Replace the excavated soil with 3/4-inch crushed angular gravel. Do not use round pea gravel, which compacts poorly and restricts water flow.
- Add a Weep System: If your blocks are solid, you must drill 1/2-inch weep holes through the bottom course of blocks every 4 feet. If using hollow cinder blocks, ensure the bottom cores are filled with gravel and leave the top cores open or covered with a permeable geotextile fabric to act as vertical French drains.
- Separate Soil and Gravel: Line the trench between your garden soil and the new gravel curtain with a non-woven geotextile landscape fabric. This prevents fine soil particles from migrating into the gravel and clogging the drainage path over time.
Frost Heave and Base Failure: Diagnosing Shifting Blocks
Gardening blocks rely entirely on gravity and base friction. When blocks sink on one side or push upward unevenly in the spring, the failure is almost always at the base trench.
Why Topsoil and Sand Bases Fail
Many DIY guides suggest leveling blocks on a bed of sand or directly on compacted topsoil. In regions with freezing winters, clay-heavy soils expand by up to 15% when water freezes. Sand, while drainable, lacks the mechanical interlock required to resist lateral shifting when wet. According to structural guidelines from the Fine Gardening archives, a proper base must distribute the load and remain impervious to frost expansion.
The Base Prep Protocol
To permanently fix a shifting wall, you must rebuild the foundation using the following specifications:
- Trench Depth: Excavate a minimum of 6 to 8 inches below the frost line or local topsoil layer.
- Material: Use 3/4-inch minus crushed stone (often called crusher run or road base). The 'minus' designation means it includes stone dust, which locks the aggregate together into a concrete-like slab when compacted.
- Compaction: Lay the gravel in 2-inch lifts (layers). Run a mechanical plate compactor over each lift. Hand-tamping is insufficient for achieving the 95% Proctor density required to prevent frost heave.
Alkalinity Leaching: Diagnosing Yellowing Plants Near Edges
Symptom: Acid-loving plants (blueberries, azaleas, potatoes) planted within 6 inches of the block wall exhibit interveinal chlorosis (yellow leaves with green veins) or stunted growth.
Root Cause: Concrete and cinder blocks are highly alkaline. As rain and irrigation water wash over the blocks, it dissolves calcium hydroxide (free lime) from the concrete matrix, leaching it into the adjacent soil and artificially raising the soil pH to 7.5 or higher.
Root Cause: Concrete and cinder blocks are highly alkaline. As rain and irrigation water wash over the blocks, it dissolves calcium hydroxide (free lime) from the concrete matrix, leaching it into the adjacent soil and artificially raising the soil pH to 7.5 or higher.
When soil pH exceeds 7.0, essential micronutrients like iron and manganese become chemically locked up and unavailable to plant roots, regardless of how much fertilizer you apply. The University of Minnesota Extension emphasizes that managing soil pH is critical for raised bed productivity, especially when using masonry materials.
Chemical and Physical Interventions
You have two options to stop concrete leaching: physical isolation or chemical buffering.
Option 1: Physical Isolation (The EPDM Liner)
Cheap plastic sheeting (polyethylene) degrades under UV exposure and soil microbes within 2 to 3 years. Instead, staple a 60-mil EPDM pond liner to the interior face of the gardening blocks before filling the bed with soil. EPDM is highly resistant to punctures, temperature fluctuations, and chemical breakdown, providing a permanent barrier between the alkaline concrete and your soil ecosystem.
Option 2: Chemical Buffering (Elemental Sulfur)
If the bed is already planted and you cannot install a liner, you must lower the soil pH. Apply pelleted elemental sulfur to the soil. Soil bacteria oxidize the sulfur into sulfuric acid, neutralizing the leached lime. As a general rule, applying 1 pound of elemental sulfur per 100 square feet will lower the pH by approximately 1.0 point over 6 to 8 months. Retest your soil pH annually using a calibrated digital meter, not cheap color-strip kits, which are highly inaccurate in buffered soils.
Material Comparison: Choosing the Right Block for Your Soil
Not all gardening blocks interact with soil and water in the same way. Use this matrix to diagnose whether your current block material is appropriate for your specific garden application.
| Block Material | Weight / Stability | Drainage Requirement | pH Impact on Soil | Best Application |
|---|---|---|---|---|
| Solid Poured Concrete | Very High (Gravity dependent) | Requires weep holes | High (Raises pH) | Alkaline-loving crops, ornamental retaining |
| Hollow Cinder Block | Moderate (Needs core filling) | Excellent (if cores are gravel-filled) | High (Raises pH) | Budget raised beds, vertical herb pockets |
| Composite / Resin Stone | Low (Requires interlocking pins) | Moderate (Water flows through joints) | Neutral (No leaching) | Acid-loving plants, temporary or rental beds |
Joint Intrusion: Weeds and Ant Colonies
The mortarless joints between gardening blocks are prime real estate for wind-blown weed seeds and carpenter ants seeking dry, protected nesting sites. Ant tunneling beneath the base course can wash away your gravel foundation during heavy rains, leading to sudden sinkholes.
The Polymeric Sand Fix
Do not use standard mortar to seal the joints of a raised garden bed; it will crack under frost heave and prevent necessary lateral moisture evaporation. Instead, use polymeric jointing sand. Sweep the sand deeply into the top 2 inches of the block joints, mist it lightly with a hose to activate the polymer binders, and let it cure for 24 hours. This creates a flexible, water-resistant seal that blocks weeds and ants while allowing the lower, unsealed joints to continue functioning as passive weep holes for soil drainage.

