
Gardening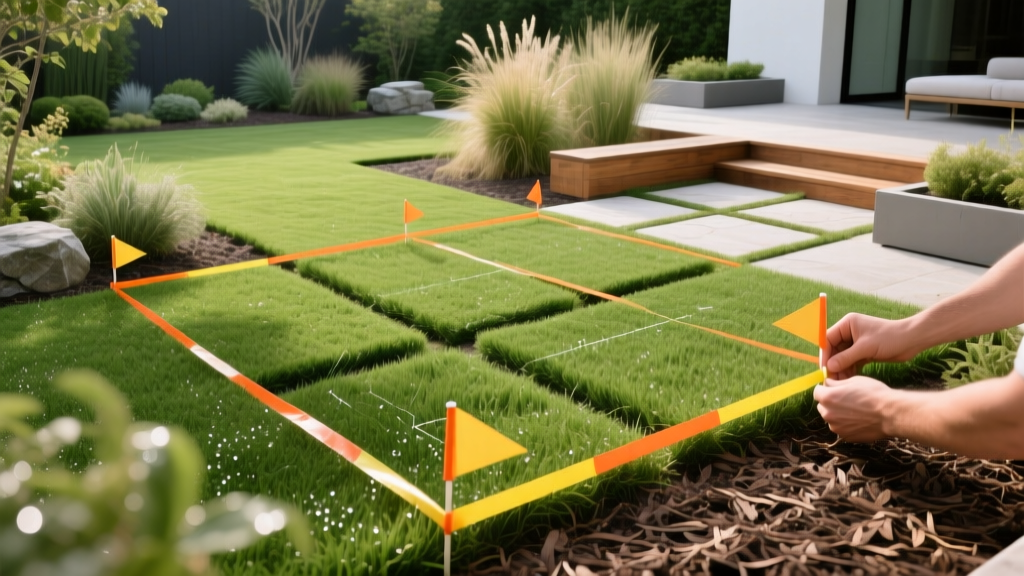
Flagging Garden Beds: A Step-by-Step Mapping and Layout Guide
The Hidden Costs of Skipping the Flagging Phase
Breaking ground on a new garden bed or landscape renovation without a physical mapping strategy is a gamble that frequently ends in expensive repairs. Flagging your garden layout before you dig is the single most effective way to visualize spatial relationships, route subsurface infrastructure, and protect existing utilities. When homeowners skip flagging garden beds and rely solely on spray paint or mental estimates, the results are often catastrophic. Severing a 1-inch PVC irrigation mainline costs an average of $350 to repair, while accidentally cutting a buried fiber-optic or electrical line can result in fines and repair bills exceeding $5,000.
Professional landscape architects use a systematic flagging protocol to translate 2D blueprints into 3D physical space. This guide details the exact materials, color-coding standards, and step-by-step techniques required to map your garden beds, irrigation zones, and low-voltage lighting with precision.
⚠️ CRITICAL SAFETY WARNING: Before driving any flag stake deeper than 4 inches into the soil, you must contact your local utility marking service. In the United States, dial 811 or submit an online request at least 3 to 5 business days before your project begins. Utility locators will mark public lines for free, but you remain responsible for mapping and flagging private lines (like secondary irrigation or landscape lighting) yourself.
Selecting the Right Marking Flags for Soil Conditions
Not all landscape flags are created equal. Choosing the wrong stem material or flag dimension will result in blowouts, lost markers, and inaccurate layout lines. For comprehensive garden flagging, you need a mix of wire-stem and wood-stake flags.
- Standard Wire-Stem Flags (4x5 inch vinyl, 11-gauge steel wire): Ideal for soft loam and planting beds. The 11-gauge wire provides enough rigidity to penetrate compacted topsoil without bending. Brands like Presco and A.M. Leonard offer UV-resistant vinyl that won't fade during a multi-week installation phase. Expect to pay $15 to $22 per 100-pack.
- Wood-Stake Flags (36-inch pine stake, 4x6 inch vinyl): Essential for flagging garden perimeters in tall grass, heavy clay, or rocky soil where wire stems will bend or snap. The 36-inch length also keeps the flags visible above mature groundcovers and ornamental grasses. These typically cost $35 to $45 per 50-pack.
- Inverted Marking Paint: Use water-based, non-toxic inverted marking paint (such as Rust-Oleum Professional Inverted Marking Paint, approx. $8 per can) to connect the flags. Paint lines degrade in 2-4 weeks, providing a temporary but highly visible guide for trenching and edging.
Adapting APWA Color Codes for Residential Landscaping
The American Public Works Association (APWA) established a uniform color code for subsurface utilities. While designed for municipal construction, adapting this system for residential garden flagging prevents confusion when multiple contractors (irrigation, electric, planting) are working on the same site.
| Flag Color | Landscape Application | Specific Use Case |
|---|---|---|
| White | Proposed Excavation / Bed Edges | Outlining the physical perimeter of new garden beds and hardscape patios. |
| Blue | Potable Water / Irrigation Mains | Marking the route of PVC mainlines and drip irrigation supply tubes. |
| Red | Low-Voltage Electrical | Routing 12V/15V landscape lighting wire and transformer locations. |
| Green | Drainage and Sewer | Mapping French drains, dry creek beds, and downspout extensions. |
| Pink | Temporary Survey / Measurements | Marking property lines, grade stakes, and tree center-points. |
Step-by-Step Flagging Protocol for Garden Installation
Follow this sequential workflow to ensure your subsurface infrastructure and planting zones do not conflict. For detailed guidance on planning the water delivery systems you are about to flag, consult the Oregon State University Extension guide on drip irrigation design, which emphasizes mapping emitter locations before trenching.
- Establish the Perimeter (White Flags): Lay a heavy rubber garden hose to define the curves of your new garden bed. Once satisfied with the shape, place white flags every 3 to 4 feet along the outside edge of the hose. Remove the hose and connect the flags with white inverted paint.
- Map the Irrigation Mainline (Blue Flags): Route your blue flags from the water source (spigot or backflow preventer) to the center of the garden bed. Keep mainlines at least 6 inches away from the white perimeter flags to prevent edge-trenching accidents. Place blue flags every 5 feet along the route.
- Delineate Drip Zones (Blue Flags with Tape): For individual plant emitters, use blue flags wrapped with a small piece of blue tape to indicate the exact center of the root ball for trees and shrubs. According to the EPA WaterSense guidelines, precise emitter placement at the dripline reduces water waste by up to 30% compared to broadcast spraying.
- Route Low-Voltage Lighting (Red Flags): Map the path for your landscape lighting wire. Red flags should be placed at every light fixture location and at all wire splices. Ensure red flags cross blue irrigation flags at a 90-degree angle to minimize the risk of cutting both systems if future digging occurs.
- Mark Drainage Gradients (Green Flags): If installing a French drain or dry well, use green flags to mark the trench path, ensuring a minimum 1% slope (1 inch of drop per 8 feet of run) away from foundations.
Advanced Techniques: Offset Flagging and Root Zone Mapping
When working in established landscapes, standard perimeter flagging is insufficient. You must protect the existing root systems of mature trees while installing new garden beds nearby.
Offset Flagging for Trenching Clearance
Never place flags directly on the cut line if you are using a mechanical bed edger or a mini-excavator. The machine's tracks or the operator's feet will knock the flags out of alignment. Instead, use the offset method: place your flags exactly 6 inches outside the actual paint line. This creates a physical buffer zone that protects your markers from being destroyed during the trenching process while still providing a clear visual guide for the operator.
Drip Line Hub-and-Spoke Mapping
When flagging garden beds around existing trees, you must identify the Critical Root Zone (CRZ). Drive a pink flag at the base of the trunk (the hub). Measure the diameter of the trunk at breast height (DBH) in inches, and multiply by 1.5 to find the CRZ radius in feet. Place pink flags at the end of this radius in a circle around the tree (the spokes). Do not route heavy irrigation mains or dig drainage trenches inside this pink-flagged circle, as severing structural roots will destabilize the tree and invite pathogenic fungi.
Pro Tip: In high-wind areas or regions prone to sudden frost heave, wire-stem flags will pop out of the ground overnight. If your flagging layout needs to survive for more than two weeks before installation begins, switch to 36-inch wood stakes for all perimeter and mainline markers, and drive them at least 12 inches into the soil.
Transitioning from Flags to Physical Edging and Trenching
Once your flagging garden layout is complete and all utility locators have marked the site, you are ready to break ground. Use a flat spade to cut along the painted lines connecting your white flags. For irrigation and lighting trenches, use a sharp trenching shovel or a mechanical walk-behind trencher, keeping the blade strictly aligned with the painted lines between your blue and red flags. As you dig and lay the pipe or wire, pull the flags immediately behind you to prevent them from falling into the open trench and becoming buried. By treating the flagging phase as a mandatory engineering step rather than an optional sketch, you guarantee a landscape installation that is both visually precise and structurally sound for decades.

