
Gardening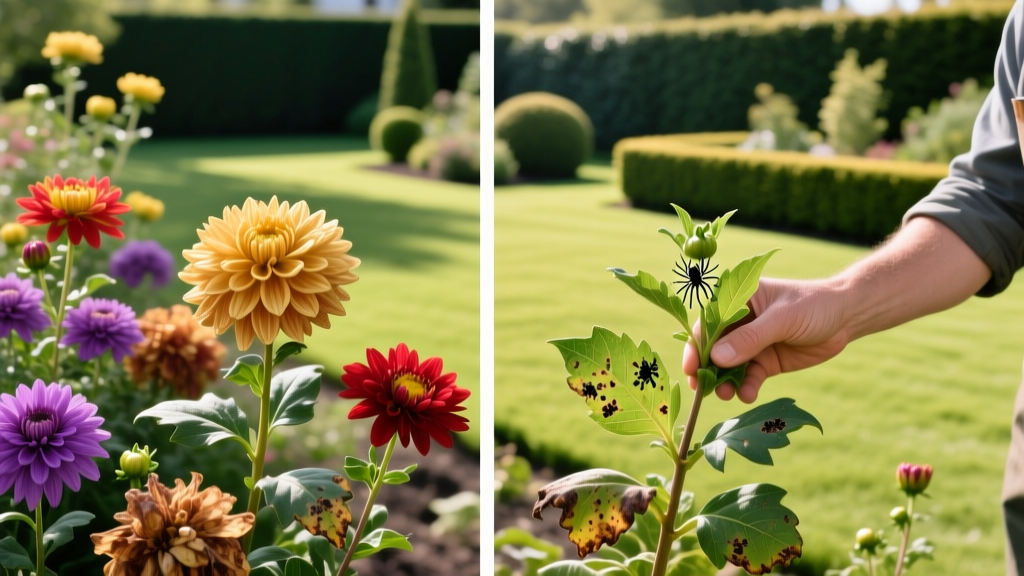
Garden Mums Plants Turning Brown: Diagnosis & Solutions
Chrysanthemums (Chrysanthemum × morifolium) are the undisputed heavyweights of the autumn garden, but they are notoriously finicky when their environmental requirements are not met. When garden mums plants begin turning brown, wilting, or dropping buds prematurely, the underlying cause is rarely a single factor. It is usually a compounding failure of soil drainage, fungal pressure, or improper nutrient timing. Rather than applying a generic fertilizer or increasing water, accurate diagnosis requires matching specific visual symptoms to their exact physiological or pathological triggers.
Rapid Diagnostic Matrix for Declining Mums
Use this triage table to identify the primary stressor affecting your chrysanthemums before applying any chemical or cultural treatments.
| Visual Symptom | Primary Suspect | Immediate Corrective Action |
|---|---|---|
| Dark brown/black leaf spots with yellow halos | Septoria Leaf Spot | Remove affected foliage; apply Chlorothalonil fungicide. |
| Lower leaves yellowing and dropping; mushy stems | Pythium Root Rot | Reduce watering; improve soil aeration with perlite. |
| Sticky residue on leaves; curled new growth | Chrysanthemum Aphids | Spray with 2% insecticidal soap or Spinosad. |
| Crispy, bleached petal edges; bud drop | Thrips or Fertilizer Burn | Leach soil with heavy watering; apply Neem oil at dusk. |
| Gray, fuzzy mold on flower heads | Botrytis Blight | Deadhead immediately; increase plant spacing to 18 inches. |
Fungal and Bacterial Pathogens: The Browning Culprits
Fungal diseases are the most common reason garden mums plants develop necrotic (dead) brown tissue, particularly in late summer when humidity spikes and nighttime temperatures drop into the 60s. The two most aggressive pathogens are Septoria chrysanthemi and Botrytis cinerea.
Managing Septoria Leaf Spot
Septoria manifests as small, dark brown to black lesions on the lower leaves, often surrounded by a distinct yellow halo. As the disease progresses upward, the leaves turn entirely brown and drop off, leaving the plant with a bare, woody base. According to Penn State Extension, Septoria overwinters in plant debris, making fall cleanup critical. If the infection is active, treat the plant with a fungicide containing Chlorothalonil (e.g., Bonide Fung-onil) or Myclobutanil. Apply every 7 to 10 days until new growth emerges cleanly, ensuring you coat the undersides of the leaves where spores germinate.
Combating Botrytis Blight
Often called gray mold, Botrytis attacks the flower buds and petals, turning them water-soaked and brown before covering them in a fuzzy gray spore mat. This thrives in poor air circulation. If your mums are planted closer than 18 inches apart, the microclimate traps moisture against the foliage. Prune out the center of dense clumps to create a 'chimney' for airflow, and switch from overhead watering to drip irrigation or soaker hoses.
Root Zone Failures: Moisture and Soil Chemistry
Mums possess shallow, fibrous root systems that are highly susceptible to both desiccation and asphyxiation. The most frequent cultural mistake is treating them like deep-rooted perennials.
⚠️ Warning: The 'Wet Feet' Syndrome
If your mum's lower leaves are turning yellow and dropping, but the soil feels moist 2 inches down, you are likely dealing with Pythium or Fusarium root rot. Mums require a soil pH between 5.8 and 6.2. If your soil pH exceeds 6.8, iron and manganese become locked out, causing interveinal chlorosis (yellowing between green veins) that mimics water stress. Test your soil pH before adding more water or fertilizer.
To correct chronic drainage issues in heavy clay soils, do not simply add sand, which creates a concrete-like matrix. Instead, top-dress the root zone with a 2-inch layer of pine bark fines and horticultural perlite (in a 50/50 mix), gently scratching it into the top inch of soil. This increases macroporosity, allowing oxygen to reach the fibrous roots while shedding excess surface water.
Pest Vectors Sapping Plant Vigor
Insect damage on chrysanthemums often goes unnoticed until the plant's structural integrity fails. The UMass Extension Greenhouse & Floriculture program identifies three primary vectors that cause browning, stippling, and deformation:
- Chrysanthemum Aphids (Macrosiphoniella sanborni): Unlike common green aphids, these are dark brown to black and cluster densely on the upper stems and bud clusters. They excrete honeydew, which rapidly cultivates black sooty mold, blocking photosynthesis and causing the leaves beneath to turn brown and die. Treat with a 2% insecticidal soap spray, applied in the early evening to avoid leaf burn.
- Spider Mites: These microscopic arachnids thrive in hot, dry, dusty conditions. They pierce the leaf cells, causing a bronzed or stippled brown appearance. Look for fine webbing between the leaf petioles and the stem. Miticides containing Abamectin or Bifenazate are highly effective, though a strong blast of water to the leaf undersides every three days can disrupt their life cycle organically.
- Chrysanthemum Thrips: Thrips rasp the surface of petals and leaves, leaving behind silvery-brown streaks and causing buds to deform and drop before opening. Because they hide deep inside the flower heads, systemic insecticides like Imidacloprid (applied as a soil drench in early August) offer the best protection.
Overwintering and Bud-Set Failures
Many gardeners purchase 'florist mums' in September, plant them, and watch them die over the winter, assuming all mums are hardy. Florist mums are bred for greenhouse bloom production, not root hardiness. True hardy garden mums (often labeled as Belgian mums or fall-hardy varieties) require specific cultural triggers to survive winter and set buds for the following year.
The Pinching Schedule
If your mums are lush and green but fail to produce buds, you likely pruned them too late. Mums are photoperiodic; they initiate flower buds when nights reach 10 hours of darkness. Pruning removes these nascent buds.
- Spring Pinching: When plants reach 6 inches tall in May, pinch off the top 1 inch of growth to encourage lateral branching.
- Summer Pinching: Repeat in mid-June when lateral branches reach 6 inches.
- The Hard Stop: Cease all pruning by July 4th (or July 15th in USDA Zones 6 and below). Any pinching after this date will remove the developing flower buds, resulting in a green, non-blooming plant in autumn.
Winter Mulching Protocol
Do not mulch mums with shredded leaves or wood chips in the fall; these materials mat down and trap moisture against the crown, inviting crown rot. Instead, wait until the ground freezes hard (usually late December in Zone 5), then apply a 4-inch layer of loose straw or evergreen boughs. This prevents the 'frost heave' cycle, where alternating freezing and thawing pushes the shallow roots out of the soil, exposing them to desiccating winter winds. According to the Old Farmer's Almanac, removing this mulch gradually in early April as the soil thaws is critical to prevent smothering the new spring shoots.
Frequently Asked Questions
Why are my mum blooms turning brown and crispy on the edges?
This is typically caused by thrips damage, late-season frost, or inconsistent watering during the bud-development phase. If the soil dries out completely while buds are swelling, the plant will abort the flowers, causing the petals to turn papery and brown.
Can I revive a mum plant that has completely wilted from drought?
Yes, if the stems are still pliable and green inside. Submerge the entire pot in a bucket of water for 30 minutes until the soil is saturated, or if planted in the ground, apply a slow, deep soaking with a root-feeder probe. Do not apply fertilizer to a drought-stressed plant, as the salts will burn the compromised roots.

