
Gardening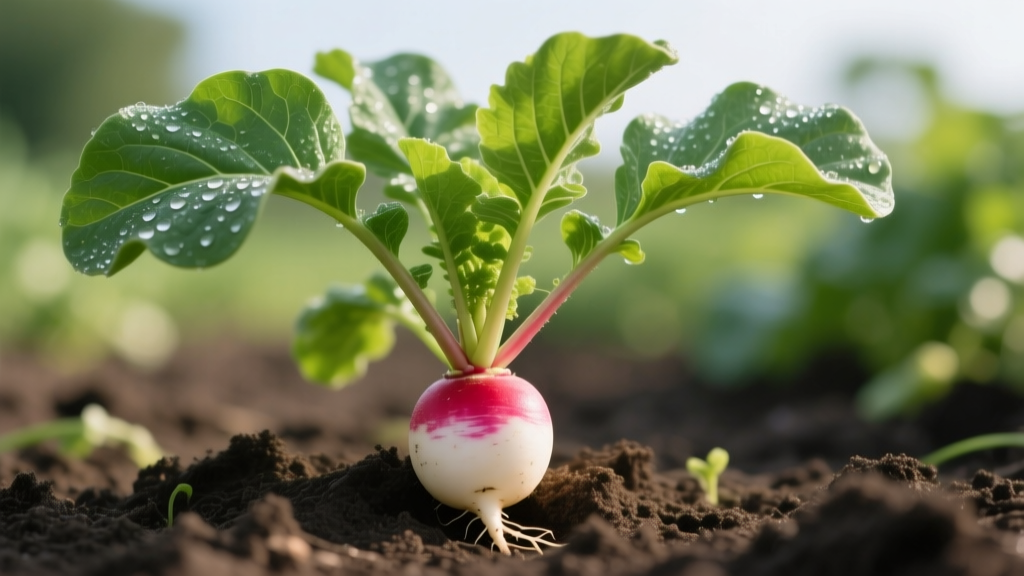
How to Grow a Radish Plant: 30-Day Seed to Harvest Guide
The Sprinter of the Vegetable Garden
When learning how to grow a radish plant (*Raphanus sativus*), you are signing up for the fastest turnaround in the home garden. Unlike tomatoes or peppers that demand months of nurturing, spring radishes transition from seed to harvest in as little as 22 to 30 days. However, their rapid growth cycle leaves zero margin for error. A delay in thinning, a spike in temperature, or inconsistent watering can instantly transform a crisp, peppery root into a pithy, split, or overly pungent disappointment.
This guide bypasses generic advice and provides the exact agronomic parameters, soil chemistry requirements, and troubleshooting frameworks needed to cultivate perfect radishes in both spring and fall windows.
Selecting Cultivars for Your Growing Window
Radishes are strictly divided into two categories: spring (short-season) and winter (long-season). Planting a winter variety in the heat of late spring will result in immediate bolting, while planting a spring variety in the cooling days of autumn often yields undersized roots. Match your seed selection to your current thermal window.
| Cultivar | Type | Days to Maturity | Optimal Season | Flavor & Texture Profile |
|---|---|---|---|---|
| 'Cherry Belle' | Spring | 22-27 days | Early Spring / Early Fall | Mild, crisp, classic peppery bite |
| 'French Breakfast' | Spring | 25-28 days | Spring / Fall | Sweet, tender, oblong shape with white tip |
| 'Watermelon' | Winter | 60-65 days | Mid-Summer to Fall Harvest | Sweet, less pungent, striking magenta interior |
| 'Daikon' | Winter | 60-70 days | Late Summer to Fall Harvest | Mild, dense, excellent for roasting or pickling |
Soil Chemistry and Bed Preparation
Radishes are root crops, meaning their success is entirely dictated by subterranean conditions. They require loose, well-draining loam with a pH between 6.0 and 7.0. If your soil pH drops below 6.0, the roots will struggle to uptake phosphorus, resulting in stunted bulb development.
Warning: The Nitrogen Trap
Never amend a radish bed with fresh manure or high-nitrogen fertilizers (like a 10-10-10 synthetic blend). Excess nitrogen forces the plant to produce massive, lush green tops at the direct expense of the root bulb. Furthermore, fresh manure introduces soil-borne pathogens and causes the taproot to fork and deform as it navigates dense pockets of organic matter.
Never amend a radish bed with fresh manure or high-nitrogen fertilizers (like a 10-10-10 synthetic blend). Excess nitrogen forces the plant to produce massive, lush green tops at the direct expense of the root bulb. Furthermore, fresh manure introduces soil-borne pathogens and causes the taproot to fork and deform as it navigates dense pockets of organic matter.
Instead, prepare your bed two weeks before sowing by working in a 2-inch layer of fully composted leaf mold or a low-nitrogen, phosphorus-heavy organic fertilizer (such as a 2-5-3 NPK ratio). Phosphorus is the primary driver of root expansion. According to the University of Minnesota Extension, ensuring adequate phosphorus levels is critical for uniform bulb initiation.
Precision Sowing and Thinning Protocols
Radishes possess a delicate taproot that will instantly fork or stunt if disturbed. Therefore, they must be direct-sown; never start radishes in seedling trays for later transplanting.
- Timing: Sow spring varieties as soon as the soil can be worked and temperatures consistently reach 45°F (7°C). For a continuous harvest, practice succession planting by sowing a new 10-foot row every 7 days until daytime temperatures exceed 75°F.
- Depth: Use a dibber or the edge of a hoe to create a trench exactly 1/2 inch deep. Sowing deeper than 3/4 inch will prevent the bulb from swelling properly at the soil line.
- Spacing: Drop seeds 1 inch apart. While this seems close, it accounts for germination failures.
- The Critical Thin: Once the seedlings develop their first set of true leaves (about 7 to 10 days post-germination), thin them ruthlessly to 2 inches apart. Overcrowding is the number one cause of 'all leaves, no roots' in home gardens.
Moisture Management and the Osmotic Pressure Rule
Radishes are comprised of roughly 95% water. Their growth rate is directly tied to soil moisture consistency. You must provide exactly 1 inch of water per week.
The most common failure mode in radish cultivation is root splitting. This occurs due to osmotic pressure imbalances. If a radish experiences a dry spell followed by a sudden, heavy watering (or a massive rainstorm), the root's internal cells absorb water and expand much faster than the rigid outer skin can stretch, causing the skin to rupture. To prevent this, apply a 1-inch layer of fine straw or grass clippings (untreated) immediately after thinning to lock in soil moisture and buffer against rapid evaporation.
Pest Defense: Beating the Flea Beetle
The crucifer flea beetle (*Phyllotreta cruciferae*) is the primary antagonist of young radishes. These tiny, black, jumping insects chew dozens of shotgun-hole patterns into the leaves, severely reducing the plant's photosynthetic capacity and stunting root growth.
Do not wait for damage to appear. The moment you finish sowing and watering your row, cover it with a lightweight floating row cover (such as Agribon-15 or a 0.5-ounce spunbonded polyester fabric). Bury the edges of the fabric 3 inches deep in the soil to create an impenetrable physical barrier. Because radishes do not require pollination to form roots, you can leave the cover in place until harvest day.
Troubleshooting Matrix: Diagnosing Crop Failures
When your radishes fail to meet expectations, use this diagnostic framework to identify the exact environmental or cultural misstep.
- Symptom: Lush, massive green tops but tiny, pencil-thin roots.
Cause: Excess soil nitrogen, failure to thin seedlings to 2 inches, or sowing in temperatures above 75°F (causing the plant to bolt to seed instead of swelling).
Fix: Reduce fertilizer inputs, thin aggressively at the true-leaf stage, and restrict spring sowing to early, cool weeks. - Symptom: Roots are incredibly spicy, tough, or pithy (hollow inside).
Cause: Slow growth due to underwatering, or leaving the radish in the ground past its maturity date.
Fix: Maintain 1 inch of water weekly and harvest 'Cherry Belle' exactly when the shoulder of the root pushes above the soil line at 1 inch in diameter. - Symptom: Deformed, forked, or hairy taproots.
Cause: Planting in heavy, unamended clay soil, using fresh manure, or root-knot nematodes.
Fix: Amend heavy soils with 30% compost by volume to improve friability, and rotate crops to avoid nematode buildup.
Harvesting and Post-Harvest Handling
Spring radishes do not hold well in the ground once they reach maturity. A 'Cherry Belle' left in the soil for just 5 days past its 25-day maturity window will become spongy and hollow. Harvest by grasping the base of the greens and pulling straight up. If the soil is compacted, use a hand trowel to loosen the side of the root first to avoid snapping the taproot.
Immediately upon harvest, clip the green tops off, leaving about 1/4 inch of stem attached to the bulb. The leaves will continue to draw moisture and nutrients out of the root in the refrigerator, causing the radish to soften within 48 hours. Store the un-washed bulbs in a perforated plastic bag in your crisper drawer, where they will retain their crispness for up to three weeks. The Clemson University Home & Garden Information Center notes that the severed greens are highly edible and can be sautéed or blended into pesto, ensuring zero waste from your rapid-yield crop.

