
Gardening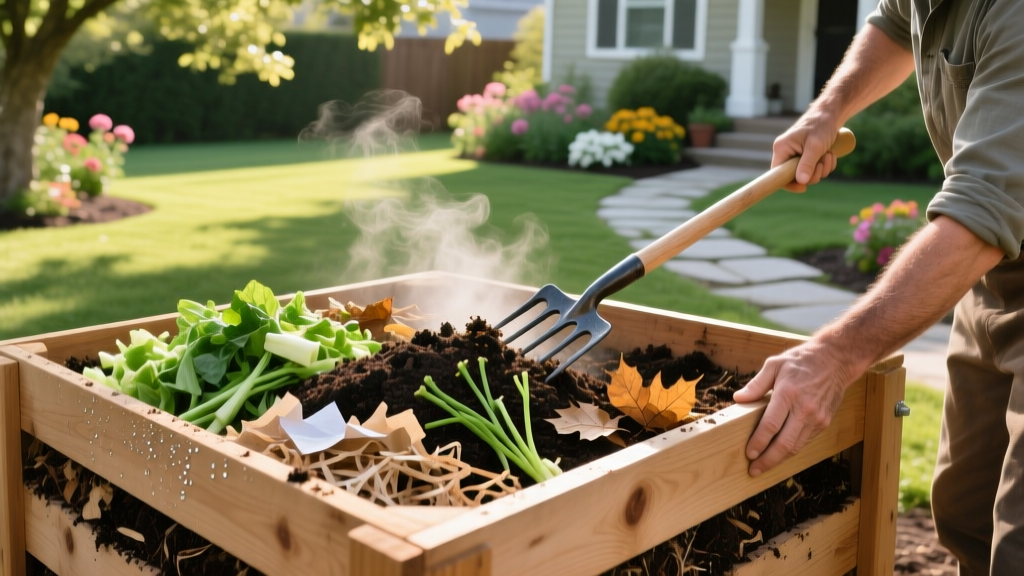
How Can We Make Compost at Home: Advanced Hot Pile Guide
The Science of Thermophilic Composting
Most homeowners fail at composting because they practice passive, cold composting. This method takes 12 to 18 months, often harbors viable weed seeds, and fails to break down complex lignins. When gardeners ask how can we make compost efficiently and safely, the answer lies in thermophilic (hot) composting. By manipulating the carbon-to-nitrogen (C:N) ratio, moisture, and oxygen levels, you can accelerate decomposition and generate internal temperatures between 135°F and 160°F (57°C to 71°C). According to the U.S. Environmental Protection Agency (EPA), maintaining these elevated temperatures is critical for destroying plant pathogens, nematodes, and weed seeds while accelerating the breakdown of organic matter into stable humus.
The hot composting process relies on a predictable microbial succession. It begins with mesophilic bacteria that rapidly consume easily available sugars and starches, generating enough heat to transition the pile to the thermophilic phase. Thermophilic bacteria and actinomycetes then take over, breaking down complex proteins and cellulose. Finally, as the fuel source depletes, the pile cools and fungi dominate the curing phase. Understanding this biological timeline is the key to producing premium soil amendments in just 45 to 60 days.
Target Thermophilic Metrics:
• Ideal C:N Ratio: 25:1 to 30:1 (by weight)
• Core Temperature: 135°F - 155°F (Pathogens die at 131°F after 3 days; weed seeds die at 145°F)
• Moisture Content: 50% - 60% (The 'squeeze test' yields 1-2 drops of water)
• Minimum Volume: 27 cubic feet (3x3x3 feet) to retain thermal mass
• Ideal C:N Ratio: 25:1 to 30:1 (by weight)
• Core Temperature: 135°F - 155°F (Pathogens die at 131°F after 3 days; weed seeds die at 145°F)
• Moisture Content: 50% - 60% (The 'squeeze test' yields 1-2 drops of water)
• Minimum Volume: 27 cubic feet (3x3x3 feet) to retain thermal mass
Sourcing the Right Carbon and Nitrogen
The phrase 'browns and greens' is an oversimplification that leads to imbalanced piles. To achieve a precise 30:1 C:N ratio, you must understand the specific chemical makeup of your inputs. Nitrogen-rich materials (greens) provide the amino acids necessary for microbial reproduction, while carbon-rich materials (browns) supply the energy (carbohydrates) and structural bulking agents required for aeration.
| Material | C:N Ratio | Moisture % | Preparation Requirement |
|---|---|---|---|
| Fresh Grass Clippings | 17:1 | 80% | Dry for 24 hours to prevent anaerobic matting |
| Coffee Grounds | 20:1 | 70% | Break up clumps; mix thoroughly with browns |
| Shredded Corrugated Cardboard | 350:1 | 10% | Remove tape; soak in water for 2 hours before adding |
| Dry Autumn Leaves | 60:1 | 20% | Shred with a lawnmower to 1-inch pieces |
| Aged Horse Manure | 20:1 | 65% | Ensure it is aged; fresh manure can burn plants |
Note: Avoid using pine needles in large quantities (C:N 60:1) as their high terpene content and acidity can inhibit bacterial activity. Similarly, never use wood treated with chemical preservatives or glossy magazine paper.
Step-by-Step: Building the 3x3x3 Thermophilic Core
To answer the practical side of how can we make compost at scale, you need the right infrastructure. While commercial tumblers like the Jora JK270 (retailing around $350) offer convenience, a 3-bin pallet system built from untreated, heat-treated (HT) wooden pallets is the most cost-effective and efficient setup for hot composting. Avoid pallets stamped with 'MB' (methyl bromide), as this toxic fumigant will leach into your soil.
- Prep the Base: Lay down a 4-inch layer of coarse woodchips or corn stalks at the bottom of your bin to ensure passive air intake from below.
- Pre-mix Inputs: Do not build the pile in distinct layers. Instead, mix your carbon and nitrogen materials on a tarp before adding them to the bin. This ensures microbes have immediate access to both food sources.
- Hydrate During Assembly: As you add the mixed materials into the bin, water every 6-inch layer with a hose equipped with a spray nozzle. Stop when the material looks like a wrung-out sponge.
- Cap the Pile: Finish with a 2-inch layer of pure carbon (dry leaves or straw) to insulate the top, retain moisture, and filter odors.
Monitoring and the 48-Hour Turn Schedule
A hot pile requires active management. Invest in a 20-inch stainless steel compost thermometer (such as the REOTEMP model, typically $35-$45) to monitor the core temperature. Insert the probe into the center of the pile at varying angles. Within 48 to 72 hours of building, the core should hit 130°F.
Expert Insight: Do not turn the pile every day. Frequent turning releases heat and dries out the core. Only turn the pile when the core temperature drops below 120°F, indicating that the thermophilic bacteria in the center have exhausted their immediate food supply and need fresh material from the cooler outer edges.
When turning, use a pitchfork to move the outer, cooler material into the center of the new pile, and place the hot center material on the outside. This 'inversion' ensures all organic matter is exposed to the pathogen-killing temperatures of the thermophilic phase.
Troubleshooting Matrix: Diagnosing Pile Failure
Even experienced gardeners encounter biological imbalances. Use this diagnostic matrix to correct issues before the pile goes fully anaerobic.
| Symptom | Underlying Cause | Immediate Corrective Action |
|---|---|---|
| Sharp ammonia odor | Excess nitrogen (C:N ratio below 20:1); bacterial overpopulation. | Mix in 3 parts shredded, pre-soaked cardboard; turn pile immediately. |
| Rotten egg / sulfur smell | Anaerobic conditions due to compaction or excess moisture. | Turn pile aggressively; fold in dry 1/2-inch woodchips to restore porosity. |
| Pile is cold in the center | Insufficient mass, lack of nitrogen, or moisture below 40%. | Perform squeeze test; add water or fresh grass clippings; ensure 27 cu ft volume. |
| White, ash-like webbing | Actinomycetes bacteria (normal) OR severe localized drying. | If dry, mist with water while turning. If moist, allow the process to continue. |
Curing and the Radish Seed Bioassay
Once the pile no longer heats up above 110°F after a thorough turning, the active composting phase is complete. However, the material is not yet ready for the garden. It must undergo a 30-day curing phase where mesophilic organisms and fungi stabilize the humus and break down any residual phytotoxic organic acids.
According to Penn State Extension, applying immature compost can stunt plant growth due to oxygen competition and residual ammonia. To scientifically verify your compost's maturity before applying it to sensitive vegetable beds, perform a simple Radish Seed Bioassay:
- Fill two small pots with your finished compost, and two pots with a sterile commercial potting mix (the control).
- Plant 10 radish seeds in each pot at a depth of 1/4 inch.
- Water equally and place in a sunny window for 7 days.
- The Verdict: If the compost seeds germinate at a rate of 80% or higher compared to the control, and the seedlings show no signs of stunting or yellowing (chlorosis), your compost is fully mature and safe for all garden applications. If germination is poor or seedlings die, the compost requires another 2 to 3 weeks of curing and aeration.
By mastering these biological controls and utilizing precise diagnostic testing, you transform yard waste into a highly structured, microbially active soil amendment that vastly outperforms commercial bagged products in both nutrient retention and soil structure improvement.

