
Gardening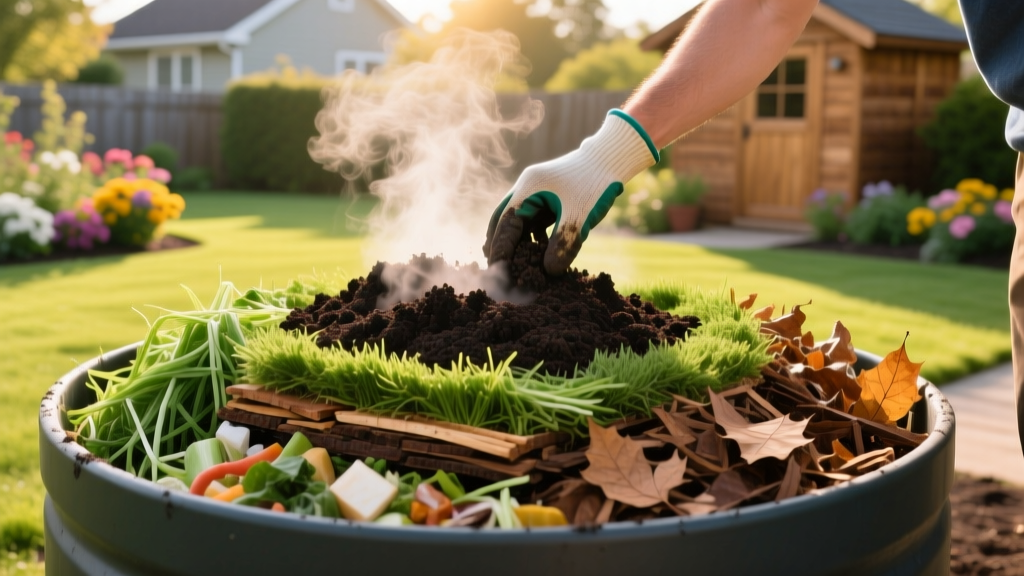
How Do I Make Compost Fast? The 18-Day Hot Pile Method
The Science of Rapid Decomposition
When gardeners ask, "how do I make compost that is ready in weeks rather than months?", the answer lies in the Berkeley 18-day hot composting method. Unlike passive cold piles that take 12 to 18 months to break down and often harbor weed seeds or pathogens, a properly managed hot pile leverages microbial thermodynamics to produce rich, pathogen-free humus in under three weeks. As a foundational soil amendment, hot compost improves soil cation exchange capacity (CEC) and water retention far more effectively than partially decomposed cold mulch.
According to the U.S. Environmental Protection Agency, successful hot composting requires balancing four key variables: carbon, nitrogen, oxygen, and moisture. Missing the exact metrics on any of these four pillars will stall the microbial activity required to reach the 135°F to 160°F (57°C to 71°C) thermophilic range.
Calibrating the Carbon-to-Nitrogen (C:N) Ratio
Microorganisms require carbon for energy and nitrogen for cellular reproduction. The ideal starting ratio for a hot pile is 30 parts carbon to 1 part nitrogen (30:1) by weight. If the ratio is too high in carbon, decomposition stalls. If it is too high in nitrogen, the pile will off-gas ammonia, losing valuable nutrients to the atmosphere.
Rather than guessing, use this reference matrix to calculate your initial mix. For optimal results, combine at least three different carbon sources and two different nitrogen sources to ensure a diverse microbial inoculum.
| Material Type | Classification | Approximate C:N Ratio | Preparation Requirement |
|---|---|---|---|
| Shredded Corrugated Cardboard | Carbon (Brown) | 350:1 | Shred to 1-inch strips, remove tape |
| Dried Oak Leaves | Carbon (Brown) | 60:1 | Mow over or shred to prevent matting |
| Pine Needles | Carbon (Brown) | 80:1 | Limit to 10% of total volume (acidic) |
| Fresh Grass Clippings | Nitrogen (Green) | 17:1 | Mix thoroughly to prevent anaerobic clumping |
| Coffee Grounds | Nitrogen (Green) | 20:1 | Use directly; excellent microbial food source |
| Vegetable Kitchen Scraps | Nitrogen (Green) | 15:1 | Chop into 1-inch pieces for faster breakdown |
Sizing and Building the Thermal Mass
The most common reason a compost pile fails to heat up is inadequate volume. A hot pile requires a minimum critical mass to insulate the core microbes from ambient air temperatures.
⚠️ Critical Volume Warning: Your pile must be at least 1 cubic meter (3 feet x 3 feet x 3 feet, or 27 cubic feet) at the time of construction. Do not build the pile incrementally; you must stockpile your materials and construct the entire 27-cubic-foot volume on a single day to trigger the thermophilic phase.
Construction should follow a pre-mixed approach rather than a lasagna layering method. Layering creates distinct anaerobic zones between dense materials. Instead, mix your carbon and nitrogen materials thoroughly on a tarp before adding them to the bin.
The Moisture Squeeze Test
Water acts as the transport medium for nutrients and microbes. The target moisture content is 40% to 60%. To verify this without expensive laboratory equipment, perform the squeeze test: grab a handful of the mixed compost material (wearing gloves) and squeeze it tightly. If water streams out, it is too wet (add dry shredded cardboard). If the material crumbles and falls apart when you open your hand, it is too dry (add water). If a single drop or two of water appears between your fingers and the material holds its shape like a wrung-out sponge, the moisture is perfect.
Temperature Tracking and the 18-Day Turning Protocol
To execute the 18-day method, you need a reliable monitoring tool. Invest in a long-stem compost thermometer, such as the REOTEMP 20-inch Backyard Compost Thermometer (typically priced between $35 and $45 in 2026). Insert the probe into the exact center of the pile to read the core temperature.
The Cornell Waste Management Institute outlines that thermophilic bacteria dominate the pile once temperatures exceed 104°F (40°C). Follow this strict turning schedule to manage oxygen depletion and heat distribution:
- Days 1 to 4 (The Heating Phase): Do not touch the pile. The core temperature should rapidly climb from ambient to 135°F+. The mesophilic bacteria are consuming the easily accessible sugars and multiplying exponentially.
- Day 5 (First Turn): Use a pitchfork to move the outer 6 inches of the pile into the new center, and move the hot center material to the outside edges. This introduces oxygen and ensures all material is sanitized by the heat.
- Days 6 to 18 (Maintenance Phase): Turn the pile every 48 hours (Days 7, 9, 11, 13, 15, 17). After turning, the temperature will temporarily drop but should rebound to 130°F+ within 12 hours as oxygen fuels a new bacterial bloom.
- Day 18 (Completion): The pile should no longer reheat after turning. The material will be dark brown, crumbly, and smell like rich forest soil.
Troubleshooting Common Compost Failures
Even with precise calculations, environmental variables can disrupt the process. Use this diagnostic matrix to correct failures in real-time.
| Symptom | Probable Cause | Corrective Action |
|---|---|---|
| Pile smells like ammonia or rotting garbage | Excess Nitrogen (Low C:N Ratio) or Anaerobic Conditions | Mix in 5 gallons of shredded, dry corrugated cardboard. Turn the pile immediately to introduce oxygen. |
| Core temperature never exceeds 100°F | Excess Carbon, Low Moisture, or Inadequate Volume | Check moisture via squeeze test. Add nitrogen-rich grass clippings or blood meal. Ensure pile is at least 3x3x3 feet. |
| Pile is hot but attracts rodents or flies | Exposed food scraps or meat/dairy contamination | Never add meat or dairy. Bury kitchen scraps at least 8 inches deep within the pile and cover with a carbon cap of dry leaves. |
| White, ashy mold appearing on materials | Actinomycetes (usually indicates low moisture) | This is a natural decomposer, but if excessive, the pile is too dry. Water the pile thoroughly while turning. |
Curing and Application as a Soil Amendment
Once the 18-day active phase is complete, the compost is not yet ready for direct root contact. It must undergo a curing phase. During curing, mesophilic organisms return, and the pH stabilizes to a neutral 6.5 to 7.0 range. Place the compost in a separate pile or large tote, keep it lightly moist, and let it cure for 30 to 60 days.
"Uncured compost can tie up soil nitrogen as it continues to decompose, and it may contain organic acids that inhibit seed germination. Always perform a bioassay before applying fresh compost to sensitive garden beds." — University of Wisconsin-Madison Extension
The Radish Seed Bioassay
To verify your compost is fully cured and safe for seed starting, conduct a simple bioassay. Fill a small pot with your finished compost and plant 10 radish seeds. Fill a second pot with standard, sterile potting soil and plant 10 radish seeds. Water both equally. If the germination rate in the compost pot is within 80% of the potting soil pot, and the seedlings show no signs of stunting or yellowing, your compost is fully cured and ready to be integrated into your garden beds at a rate of 1 to 2 inches top-dressed annually.

