
Gardening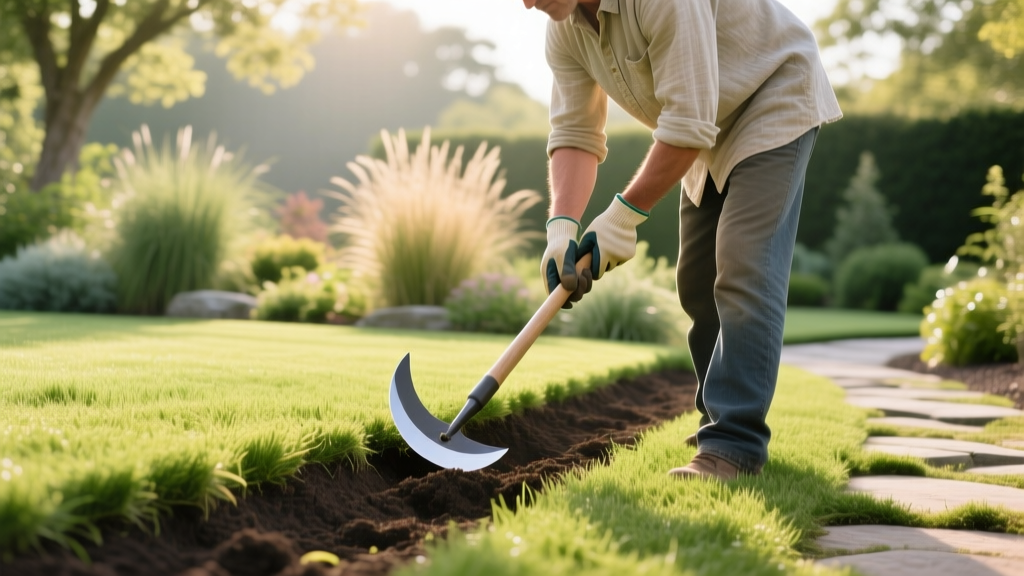
How to Edge a Garden: Step-by-Step Trenching & Tool Guide
The Science of the Garden Edge: Why Trenching Matters
Knowing how to edge a garden properly is the single most effective way to elevate a landscape from amateur to professional. However, edging is not merely an aesthetic exercise; it is a critical lawn maintenance procedure designed to manage plant biology. Turfgrasses, particularly aggressive warm-season varieties like Bermudagrass (Cynodon dactylon) and Zoysia, spread via underground rhizomes and above-ground stolons. Without a physical void or barrier, these rhizomes will infiltrate your garden beds, choking out perennials and turning your mulch into a tangled mat of grass roots.
According to turfgrass researchers at NC State Extension, Bermudagrass rhizomes can penetrate soil to depths of 6 inches or more, making shallow, superficial edging completely ineffective against invasion. A properly executed garden edge creates a 'micro-climate' boundary that halts lateral root growth through air-pruning—when a rhizome hits the air gap of a trench, it dries out and dies back rather than crossing into the bed.
Tool Selection Matrix: Manual vs. Mechanical Edgers
Selecting the right tool depends on whether you are establishing a brand-new garden border or maintaining an existing one. Below is a comparison of the most effective edging tools for 2026 landscaping standards, including specific models and current retail pricing.
| Tool Type | Recommended Model | Best Application | Depth Control | Estimated Cost |
|---|---|---|---|---|
| Half-Moon Spade | Fiskars 46' Steel D-Handle | Creating new curved borders | Manual (4-6 inches) | $35 - $45 |
| Trenching Spade | Radius Garden 206 PRO Ergonomic | Cleaning deep, narrow trenches | Manual (up to 8 inches) | $50 - $65 |
| Power Stick Edger | Worx WG896 12 Amp Electric | Maintaining straight, existing lines | Adjustable (1-3 inches) | $110 - $130 |
| Gas Rotary Edger | McLane 101-5.5GT-9 | Large properties, heavy clay soils | Adjustable (1-4 inches) | $450 - $600 |
Pro Tip: If you are working with heavy clay soil, avoid power stick edgers for the initial cut. The high-torque blades tend to glaze the clay walls, creating a waterproof seal that causes the trench to fill with water and collapse. Use a manual trenching spade for clay soils to keep the soil structure fractured and porous.
Step-by-Step: Cutting the Perfect V-Trench (Manual Method)
The 'British V-Trench' is the gold standard for garden edging. It requires no plastic or metal inserts, relies on air-pruning to stop grass, and provides a sharp, elegant shadow line. The Royal Horticultural Society (RHS) recommends this method for its longevity and low environmental impact compared to plastic barriers.
Step 1: Map the Boundary
Lay a flexible garden hose along the desired edge line. Avoid tight, erratic curves; turf mowers cannot navigate radii tighter than 18 inches. Once satisfied, use a can of inverted marking paint to trace the hose line onto the turf.
Step 2: The Vertical Lawn Cut
Using your half-moon spade or flat spade, stand on the garden bed side facing the lawn. Drive the blade straight down into the soil along the painted line to a depth of exactly 6 inches. This vertical wall is the 'stop sign' for grass rhizomes. Ensure the cut is perfectly plumb (90 degrees).
Step 3: The Angled Bed Cut
Move 4 to 6 inches back into the garden bed. Angle your spade at 45 degrees, aiming the blade down to meet the bottom of your initial vertical cut. This removes a triangular wedge of soil.
Step 4: Extract and Clean the Wedge
Pry out the soil wedge. Use a hand trowel or a specialized trenching spade to clean out loose debris from the bottom of the trench. The base of the V should be narrow and clean. Pile the extracted topsoil into the garden bed to improve drainage and mulch depth, or compost it.
Step 5: Define the Lip
The lawn side of the trench should sit slightly higher (about 1/2 inch) than the garden bed side. This 'lip' prevents mulch from washing into the lawn during heavy rainfall and stops surface stolons from creeping over the top.
Step-by-Step: Using a Power Edger for Existing Borders
If you are maintaining an edge that was established in previous seasons, a mechanical power edger saves immense physical labor. However, power edgers do not create deep V-trenches; they clean out the bottom of existing shallow trenches.
- Set the Depth Gauge: Adjust the edger's depth wheel to 2 inches. Going deeper with a rotary blade risks severing the shallow feeder roots of nearby ornamental shrubs and trees.
- Align the Guide Wheel: Place the guide wheel on the hardscape or the lawn side, ensuring the blade tracks exactly in the center of the existing trench.
- Engage at an Angle: Tilt the machine slightly toward the lawn side (about 10 degrees). This undercuts the grass lip, creating a clean overhang that hides the soil line.
- Clear the Debris: Power edgers throw soil aggressively. Wear ANSI-rated safety glasses and follow up immediately with a leaf blower to clear the ejected soil from the turf canopy before it settles and smothers the grass.
Warning: Never use a power edger near shallow irrigation lines or low-voltage landscape lighting wires. Always call 811 to have underground utilities marked before cutting trenches deeper than 4 inches in unfamiliar territory.
Troubleshooting Edge Failures: Soil Types and Aggressive Grasses
Even a perfectly cut V-trench can fail if environmental variables are ignored. Here is how to adapt your edging strategy based on specific landscape challenges.
Challenge 1: Heavy Clay Soil Collapse
Clay soils lack structural integrity when wet, causing the vertical lawn wall of your trench to slough off and fill the gap. The Fix: Widen the top of the trench to 8 inches and steepen the bed-side angle to 60 degrees. After cutting, apply a 1-inch layer of coarse builder's sand to the vertical lawn wall. The sand acts as a structural facing, preventing the clay from sticking to spades during future maintenance and reducing surface tension collapse.
Challenge 2: Bermudagrass and Kikuyu Invasion
As noted by turf scientists, some warm-season grasses possess rhizomes that can dive under a standard 6-inch trench and surface inside the garden bed. The Fix: A void trench alone will not stop these species. You must install a physical root barrier. Purchase 10-gauge Corten steel landscape edging (such as Colmet brand) or heavy-duty 80-mil HDPE poly edging. Dig an 8-inch deep trench, insert the barrier so it sits 2 inches above the soil grade (to block stolons), and backfill firmly. The steel will rust into a stable, attractive patina, while the HDPE remains invisible.
Seasonal Maintenance Schedule
To maintain a crisp edge without exhausting your soil reserves, follow this seasonal cadence:
- Early Spring (March/April): Perform the heavy manual V-trenching. The soil is moist, making cutting easier, and the grass is just beginning its rhizome expansion.
- Early Summer (June): Use a power edger or a manual hand-edger to lightly shave the turf lip. Do not dig deeper; just remove the overgrowth.
- Autumn (October): Clear fallen leaves from the trench. Decaying organic matter in the trench acts as a 'bridge' for grass stolons to cross the gap and provides a medium for weed seeds to germinate.
Mastering how to edge a garden requires understanding the intersection of soil mechanics and plant biology. By selecting the correct tool for your soil type and executing the proper trench geometry, you establish a boundary that protects your garden beds and dramatically sharpens the visual lines of your entire landscape.

