
Gardening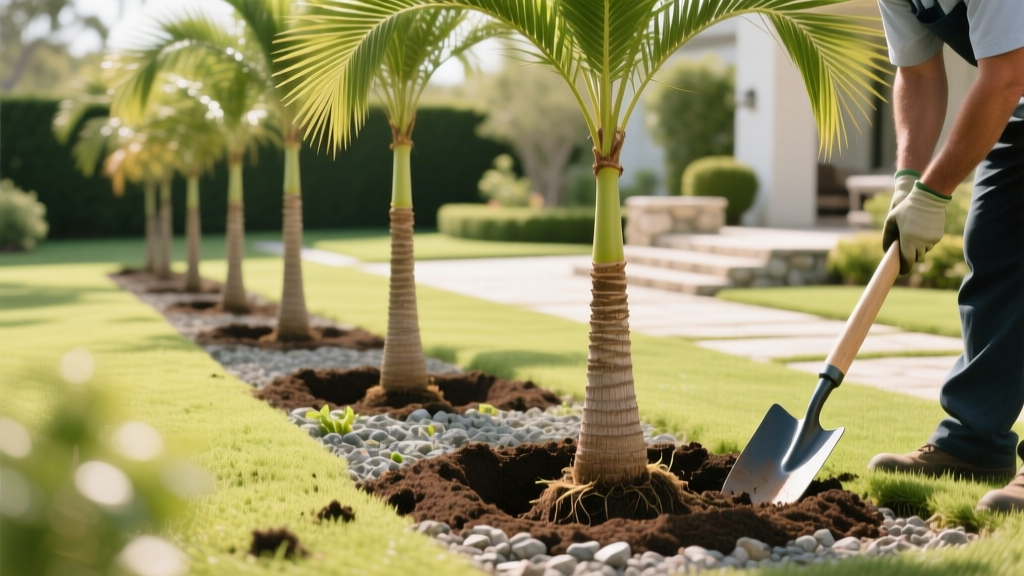
How to Plant Palms Successfully: Depth, Soil, and Spacing
Planting a palm tree is fundamentally different from planting a broadleaf tree like an oak or maple. Palms are monocots; they lack a vascular cambium and do not grow secondary wood. Their root systems do not expand outward from a central taproot but instead continuously generate from a specific area at the base of the trunk known as the Root Initiation Zone (RIZ). Understanding this biological distinction is the difference between a thriving tropical centerpiece and a $600 dead trunk. According to the University of Florida IFAS Extension, improper planting depth and poor water management account for over 80% of palm establishment failures.
The Golden Rule: Planting Depth and the Root Initiation Zone
The single most fatal mistake homeowners make when learning how to plant palms is burying the trunk. The RIZ must remain exposed to oxygen. If soil or mulch covers the RIZ, the trunk tissue will rot, cutting off the palm's ability to generate new roots and absorb water.
⚠️ CRITICAL WARNING: Never plant a palm deeper than it was growing in its nursery container. The top of the root ball should sit 1 to 2 inches above the surrounding grade. Over time, the palm will settle slightly, bringing the RIZ perfectly flush with the soil surface.
When purchasing a palm, inspect the base of the trunk. If the nursery has piled soil over the trunk flare, gently brush it away to expose the true RIZ before measuring your planting depth. A 15-gallon Queen Palm (Syagrus romanzoffiana) typically costs between $150 and $250, while a mature 30-gallon Sabal Palmetto can range from $400 to $600. Protecting this investment starts with exact depth calibration.
Site Prep: Why Native Soil Beats Amendments
Standard tree-planting advice often suggests amending backfill soil with compost or peat moss. For palms, this is a recipe for disaster. If you dig a hole in heavy clay soil and fill it with loose, sandy potting mix, you create a "bathtub effect." Water will easily enter the amended hole but will not percolate into the surrounding dense clay, effectively drowning the root ball.
Always backfill with the exact native soil you excavated. If your soil is exceptionally dense, focus on widening the hole rather than changing the soil composition. Run a percolation test before installation:
| Soil Type | Drainage Rate | Hole Width Strategy | Amendment Rule |
|---|---|---|---|
| Sandy Loam | Fast (1-2 inches/hr) | 2x root ball width | None (use native) |
| Heavy Clay | Slow (<0.5 inches/hr) | 3x to 4x root ball width | None (shatter clay walls) |
| Compacted Fill | Variable/Poor | 3x root ball width | Top-dress only after planting |
Step-by-Step Installation Protocol
Follow this exact sequence to ensure structural stability and optimal root generation. For palms over 10 feet tall, you will need heavy machinery or a crew of at least three people.
- Measure the Root Ball: Measure the height of the root ball from the bottom to the top of the soil line in the container. Dig your hole to this exact depth—no deeper. Digging too deep and adding loose soil to the bottom will cause the heavy palm to sink post-planting, burying the RIZ.
- Score the Hole Walls: If your soil is clay, use a digging bar or shovel to score and shatter the smooth walls of the excavation. Smooth clay walls act like a ceramic pot, restricting lateral root growth.
- Position the Palm: Lower the palm into the hole. Ensure the side with the most fronds or the best visual profile faces your primary viewing angle. Verify the RIZ is 1 to 2 inches above grade using a level board laid across the hole.
- Backfill and Hydrate: Shovel native soil into the gap. Every 4 inches of backfill, use a garden hose to flood the hole, washing the soil into air pockets. Do not tamp the soil with your boots; water settling is gentler and prevents root ball shifting.
- Build a Watering Berm: Construct a circular soil berm 4 inches high and 24 inches wide around the outer edge of the root ball to hold irrigation water directly over the root zone.
The 90-Day Establishment Watering Matrix
Palms require consistent, deep moisture to push new roots into the surrounding soil. Light, frequent sprinkling will only wet the top inch of soil and encourage shallow, drought-prone roots. The volume of water required scales directly with the trunk caliper (diameter measured 6 inches above the ground). The UF/IFAS Palm Nutrition and Care guidelines emphasize that establishment watering must continue for a minimum of 90 days, or until the palm produces a full flush of new, untethered fronds.
| Trunk Caliper | Water Volume per Session | Days 1-30 Frequency | Days 31-90 Frequency |
|---|---|---|---|
| 2 - 3 inches | 15 - 20 Gallons | Daily | Every 2-3 Days |
| 4 - 6 inches | 30 - 45 Gallons | Daily | Every 2-3 Days |
| 8+ inches | 60+ Gallons | Daily | Every 3-4 Days |
Bracing Techniques: The 2x4 Lumber Method
Any palm with a trunk height exceeding 8 feet requires mechanical bracing for the first 6 to 8 months. Wind rocking will snap the fragile new roots before they can anchor into the native soil.
Why Wire and Rope Fail
Never use wire, rope, or nylon straps wrapped directly around the trunk. As the palm sways, these materials will girdle the trunk, cutting through the vascular bundles and killing the tree. Furthermore, driving nails or screws directly into the living trunk tissue of a palm introduces fatal fungal pathogens, as palms cannot compartmentalize decay like hardwood trees.
The Proper 2x4 Installation
- Wrap the trunk at the bracing height (usually 6 feet up) with a thick layer of burlap or heavy felt.
- Band 2x4 wooden blocks around the burlap using steel strapping or heavy-duty zip ties. Do not nail into the trunk.
- Nail three or four 2x4 lumber braces into these wooden blocks using 16d galvanized nails.
- Drive the bottom of the 2x4 braces into the ground at a 45-degree angle, securing them with rebar stakes.
- Leave the braces in place for one full hurricane/wind season before removing.
Troubleshooting Early Failure Modes
Monitor your newly planted palm weekly. Catching these symptoms early can save the tree:
- Symptom: Center Spear Pulls Out Easily. Cause: Bud rot, usually caused by water pooling in the crown or planting the palm too deep, leading to trunk rot. Fix: Apply a copper-based fungicide drench directly into the crown immediately and verify the RIZ is not buried.
- Symptom: Older Fronds Turning Yellow/Orange. Cause: Normal transplant shock or Potassium deficiency. Palms will cannibalize older fronds to support new growth. Fix: Do not prune the yellowing fronds; the palm is reabsorbing nutrients. Apply a slow-release palm-specific fertilizer (8-2-12-4 ratio) 30 days after planting.
- Symptom: Soil Pulling Away from the Root Ball. Cause: Hydrophobic soil or insufficient watering volume. Fix: Break up the soil crust with a hand cultivator and use a soaker hose coiled directly over the root ball for 4 hours to achieve deep saturation.

