
Gardening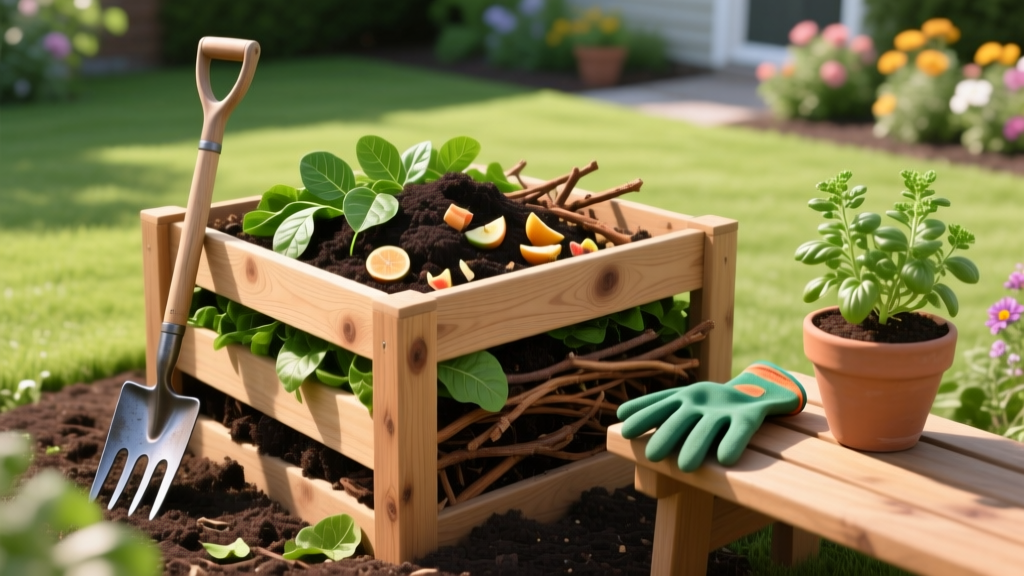
How to Start a Compost Pile: The Ultimate Soil Amendment Guide
The Biochemistry of Decomposition: Mastering the C:N Ratio
Understanding how to start a compost pile requires moving beyond the simplistic "greens and browns" advice and looking at the underlying biochemistry. Aerobic decomposition is driven by microorganisms that require two primary elements: carbon (C) for energy and nitrogen (N) for protein synthesis and cellular reproduction. The ideal overall carbon-to-nitrogen (C:N) ratio for a compost pile is between 25:1 and 30:1. If the ratio is too high (excess carbon), decomposition stalls. If it is too low (excess nitrogen), the pile releases ammonia gas, creating foul odors and losing valuable nutrients to the atmosphere.
According to the Environmental Protection Agency (EPA), balancing these materials is the most critical step in producing a high-quality soil amendment. Below is a precise matrix of common household and yard materials to help you formulate your pile.
| Material | C:N Ratio | Classification | Preparation Requirement |
|---|---|---|---|
| Fresh Grass Clippings | 17:1 | Nitrogen (Green) | Dry for 24 hours to prevent matting |
| Coffee Grounds | 20:1 | Nitrogen (Green) | None; apply directly |
| Vegetable Kitchen Scraps | 25:1 | Nitrogen (Green) | Chop into 1-inch pieces to increase surface area |
| Dried Autumn Leaves | 60:1 | Carbon (Brown) | Shred with a mulching mower to prevent compaction |
| Straw / Hay | 80:1 | Carbon (Brown) | None; excellent for structural aeration |
| Pine Needles | 80:1 | Carbon (Brown) | Limit to 10% of total volume due to high acidity |
| Sawdust (Untreated) | 325:1 | Carbon (Brown) | Sprinkle lightly; clumps easily and blocks oxygen |
Selecting Your Compost Architecture
The physical structure you choose dictates your aeration strategy, thermal retention, and pest management. While open piles work for large rural properties, suburban gardeners require contained systems to maintain the thermal mass necessary for hot composting.
Critical Dimension Rule: To achieve thermophilic (hot) composting temperatures, your pile must have a minimum volume of 27 cubic feet (3 feet wide x 3 feet long x 3 feet high). Piles smaller than this lack the thermal mass to insulate the core, resulting in slow, cold decomposition that fails to kill weed seeds and pathogens.
Stationary Plastic Bins ($80 - $150): These enclosed systems retain heat and moisture exceptionally well and deter rodents. However, they lack built-in aeration, requiring you to manually turn the contents with a pitchfork or compost aerator tool every 5 to 7 days.
Compost Tumblers ($150 - $350): Elevated on a stand with a rotating barrel, tumblers make aeration effortless. They are ideal for small spaces and heavy clay soil areas where ground-level bins might cause drainage issues. The trade-off is lower thermal retention in winter months due to the elevated design exposing the barrel to ambient air on all sides.
Wire Mesh DIY Bins ($30 - $50): Constructed from heavy-gauge hardware cloth or welded wire fencing, these offer maximum airflow. They are best suited for processing large volumes of autumn leaves but require more frequent moisture monitoring as the open sides accelerate evaporation.
The 4-Layer Lasagna Assembly Technique
When learning how to start a compost pile, the initial assembly determines the success of the first 30 days. Do not simply dump materials in randomly. Use the lasagna method to establish immediate microbial activity.
- The Base Layer (Aeration): Start with a 4-inch layer of coarse, woody material like twigs, chopped corn stalks, or thick straw. This creates an air plenum at the bottom, allowing oxygen to be drawn up into the pile as warm air rises from the center.
- The Brown Layer (Carbon): Add a 6-inch layer of shredded dry leaves or straw. Water this layer thoroughly until it reaches 40-60% moisture content (it should feel like a wrung-out sponge, yielding only a drop or two when squeezed tightly).
- The Green Layer (Nitrogen): Add a 2-inch layer of nitrogen-rich material (kitchen scraps, fresh grass clippings, or aged manure). This concentrated nitrogen band will act as the ignition switch for bacterial multiplication.
- The Cap Layer (Inoculation & Insulation): Add a 1-inch layer of finished compost or garden topsoil to introduce native microorganisms. Cap the entire pile with a final 2-inch layer of dry browns to insulate the core, retain moisture, and filter out any odors that might attract pests.
Thermal Management and Aeration Schedules
Hot composting occurs in distinct thermal phases. According to research from the Cornell Waste Management Institute, monitoring these temperatures is essential for producing a safe, weed-free soil amendment.
Mesophilic Phase (Days 1-4): Moderate-temperature bacteria consume the most readily available sugars and proteins. Temperatures rise from ambient to 110°F. No turning is required during this phase.
Thermophilic Phase (Days 5-21): Heat-loving bacteria and actinomycetes take over. Core temperatures should reach 130°F to 160°F. Crucial Benchmark: The pile must maintain a minimum of 131°F for three consecutive days to successfully destroy human pathogens and common weed seeds. During this phase, oxygen is rapidly depleted. You must turn the pile whenever the core temperature drops below 120°F, which indicates oxygen starvation or moisture depletion.
Maturation Phase (Months 2-6): Temperatures slowly decline to ambient levels. Fungi and macro-organisms (earthworms, beetles) move in to break down complex lignins and cellulose. Turning is no longer necessary; the pile should be left undisturbed to cure.
Diagnostic Troubleshooting Matrix
Even meticulously planned piles can encounter biological imbalances. Use this diagnostic matrix to identify and correct failure modes rapidly.
| Symptom | Probable Cause | Corrective Action |
|---|---|---|
| Rotten egg or ammonia smell | Anaerobic conditions (lack of oxygen) or excess nitrogen (C:N ratio below 20:1) | Turn pile immediately; mix in 3 parts dry shredded leaves or straw to absorb moisture and add carbon. |
| Pile is cold and inactive | Excess carbon, lack of moisture, or insufficient volume | Add nitrogen (blood meal or fresh grass clippings), water thoroughly, and ensure minimum 27 cu ft volume. |
| Center is dry and ash-like | Thermal runaway (temperatures exceeded 165°F) killing off microbes | Douse center with water, turn the pile to dissipate heat, and rebuild the moisture gradient. |
| Rodents or animal digging | Exposed food scraps or meat/dairy inclusion | Cap pile with 3 inches of brown material; ensure strict exclusion of meat, dairy, and oils. |
Curing and Soil Amendment Application
Compost is not finished when it stops heating up; it must cure. Curing allows the pH to neutralize (typically settling between 6.5 and 7.5) and complex organic acids to break down, preventing root burn when applied to sensitive seedlings. A properly cured compost pile will smell distinctly like rich forest soil, and the original materials will be unrecognizable, forming a dark, crumbly humus.
"Applying raw, unfinished compost to your garden will cause a nitrogen draw-down, as soil microbes rob nitrogen from your plants to finish the decomposition process. Always verify your compost is fully cured by conducting a simple seed germination test: plant radish seeds in a 50/50 mix of your compost and potting soil. If germination rates are below 75%, the compost needs more curing time."
Once cured, apply your compost as a top-dressing at a rate of 1/4 to 1/2 inch thick across established lawns and garden beds, or incorporate it into the top 6 inches of native soil at a 20% volume ratio when preparing new raised beds. This systematic approach to soil amendment will dramatically improve soil cation exchange capacity (CEC), water retention, and long-term microbial vitality.

