
Gardening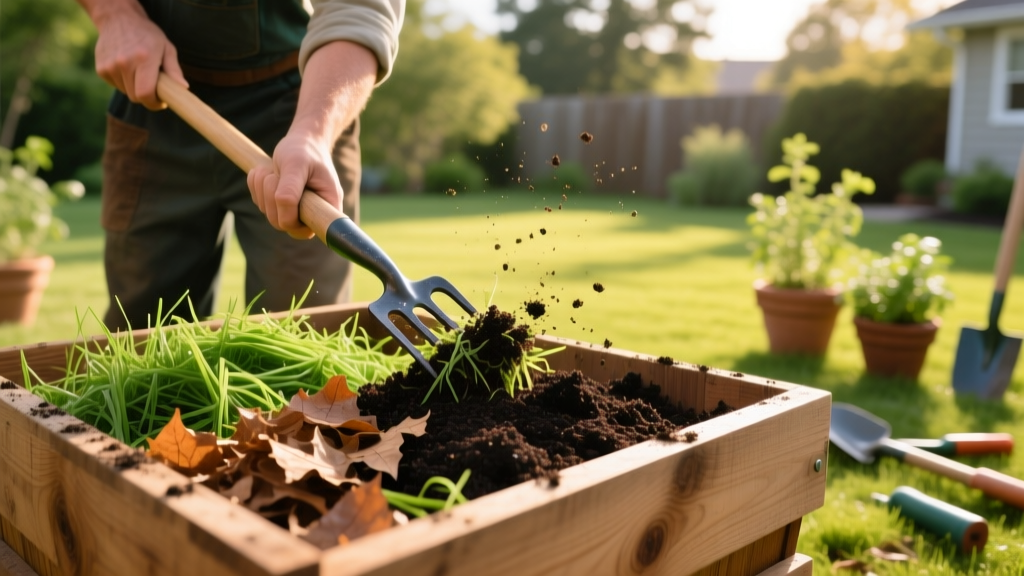
How to Work a Compost Bin: The Complete Layering and Turning Guide
Transforming kitchen scraps and yard waste into nutrient-dense humus is one of the most rewarding practices in organic gardening. However, many homeowners treat their compost bin as a passive trash receptacle, resulting in foul odors, pest infestations, and decomposition timelines that stretch into years. Understanding how to work a compost bin actively—by managing thermodynamics, moisture levels, and aeration—can cut your processing time down to 8 to 12 weeks. This guide provides the exact measurements, layering protocols, and troubleshooting matrices required to engineer a high-performance composting system.
The Thermodynamics of Decomposition: Mastering the C:N Ratio
The foundation of rapid composting is the Carbon-to-Nitrogen (C:N) ratio. Microorganisms require carbon for energy and nitrogen for protein synthesis and reproduction. According to research from Cornell Waste Management Institute, the optimal C:N ratio for a compost pile is between 25:1 and 30:1. If the ratio is too high (excess carbon), decomposition stalls. If it is too low (excess nitrogen), the pile goes anaerobic and releases ammonia gas.
Rather than calculating exact chemical weights, experienced composters manage the C:N ratio by volume, using a standard 3:1 ratio of 'browns' (carbon-rich) to 'greens' (nitrogen-rich). Below is a precise breakdown of common materials and their inherent C:N ratios to help you calibrate your inputs.
| Material Category | Specific Input | Approximate C:N Ratio | Preparation Requirement |
|---|---|---|---|
| Brown (Carbon) | Dry Oak Leaves | 50:1 | Shred with a mulching mower to 1-inch pieces |
| Brown (Carbon) | Corrugated Cardboard | 350:1 | Remove tape; shred into 2-inch strips |
| Brown (Carbon) | Pine Bark Fines | 450:1 | Use as a bulking agent for aeration only |
| Green (Nitrogen) | Fresh Grass Clippings | 15:1 | Pre-dry for 24 hours to prevent matting |
| Green (Nitrogen) | Coffee Grounds | 20:1 | Apply directly; excellent microbial food source |
| Green (Nitrogen) | Vegetable Kitchen Scraps | 25:1 | Chop into 1-inch cubes to increase surface area |
The 4-Step Bin Loading Protocol
Building the initial pile correctly sets the stage for the thermophilic (hot) composting phase. Follow this exact sequence when filling a new or freshly emptied bin.
Step 1: Establish a Drainage and Aeration Base
Start with a 4-inch layer of coarse, woody material at the bottom of the bin. Small twigs, pruned shrub branches (cut to 3-inch lengths), or coarse wood chips create an air plenum that allows oxygen to passively enter the pile from below. This prevents the bottom layer from becoming a waterlogged, anaerobic sludge.
Step 2: Execute Lasagna Layering
Add your materials in alternating layers. For every 3-inch layer of nitrogen-rich greens (kitchen scraps, fresh weeds), add a 3-inch layer of carbon-rich browns (shredded leaves, cardboard). Always cap the top of the pile with a 4-inch layer of browns. This 'bio-filter' traps escaping odors and deters fruit flies and rodents.
Step 3: Calibrate Moisture Levels
Microbes operate in an aqueous environment; the ideal moisture content for a compost pile is 40% to 60%. Rely on the 'squeeze test' rather than a hose. Grab a handful of compost (wearing gloves) and squeeze it tightly. It should feel like a wrung-out sponge, yielding exactly one or two drops of water. If it crumbles, it is too dry; if water streams out, it is too wet.
Step 4: Inoculate the Pile
Introduce a starter culture to accelerate microbial colonization. Add two shovels of finished compost, high-quality topsoil, or a commercial compost starter rich in Bacillus and Actinomycetes bacteria. Distribute this evenly across your first few layers to seed the pile with decomposers.
The Aeration Schedule: When and How to Turn
Oxygen is the limiting factor in hot composting. As aerobic bacteria consume organic matter, they generate heat, pushing the pile into the thermophilic phase (135°F to 160°F). Turning the pile introduces fresh oxygen and moves cooler outer materials into the hot core.
Expert Turning Protocol:
- Days 1-4: Do not turn. Allow the microbial population to establish and the temperature to spike.
- Days 5-14: Turn the pile every 3 to 4 days, or whenever the internal temperature drops below 110°F.
- Tool Selection: Avoid standard pitchforks, which merely lift and drop material. Use a winged compost aerator (such as the Fiskars or Mantis models). Plunge the tool into the center, pull up to deploy the wings, and lift the core material to the top, creating vertical air channels.
According to guidelines published by the Environmental Protection Agency (EPA), maintaining temperatures above 131°F for at least three consecutive days is critical for killing weed seeds and human pathogens like E. coli and Salmonella. Invest in a 20-inch stainless steel compost thermometer to monitor the core temperature accurately.
Troubleshooting Matrix: Diagnosing Bin Failures
Even carefully managed bins can encounter biological imbalances. Use this decision matrix to identify and correct common composting failures immediately.
| Symptom | Root Cause | Exact Corrective Action |
|---|---|---|
| Strong Ammonia Odor | Excess Nitrogen (C:N ratio below 15:1) | Mix in 3 parts shredded corrugated cardboard by volume; turn pile aggressively to off-gas trapped ammonia. |
| Rotten Egg / Sulfur Smell | Anaerobic conditions (compaction or waterlogging) | Add 2 gallons of dry pine bark fines or wood chips; turn the pile to break up clumps and reintroduce oxygen. |
| Pile is Cold and Inactive | Lack of moisture or nitrogen depletion | Perform squeeze test. If dry, add 2 gallons of water mixed with 1 cup of blood meal or alfalfa meal to jumpstart microbes. |
| Fungus Gnats / Fruit Flies | Exposed food scraps or overly wet surface layer | Bury all new greens under at least 6 inches of brown material; cap the top with 1 inch of finished compost or soil. |
| Ant Colonies in Bin | Pile is too dry and undisturbed | Flood the pile with 5 gallons of water, turn thoroughly, and maintain moisture levels above 45%. |
Harvesting and Curing the Finished Humus
Knowing when your compost is finished is just as important as knowing how to work a compost bin. Finished compost is dark brown, crumbly, and smells distinctly like a forest floor after a rainstorm. The original materials (except for small woody bits) should be entirely unrecognizable.
Once the pile no longer heats up after turning and the temperature stabilizes at ambient levels, the active decomposition phase is complete. However, the compost must be cured. Move the material to a separate pile or wheelbarrow, cover it with a breathable tarp, and let it cure for 2 to 4 weeks. This curing period allows pH levels to neutralize (settling around 6.5 to 7.0) and prevents the compost from robbing nitrogen from your soil when applied to delicate plant roots.
Screening for Application
Before using the compost in seed-starting mixes or as a top-dressing for lawns, screen it. Build a simple frame using 1/4-inch hardware cloth (galvanized wire mesh) stretched over a 2x4 wooden frame. Shovel the cured compost over the screen. The fine humus will fall through for immediate use, while the larger, unfinished particles are caught and returned to the active bin for another cycle.
Frequently Asked Questions
Can I compost bioplastics and certified compostable bags in my home bin?
No. While certified compostable plastics (like PLA) will break down in commercial facilities that maintain steady temperatures of 160°F+, home compost bins rarely sustain the uniform heat and specific microbial profiles required to degrade bioplastics. They will likely remain intact for years and contaminate your finished humus. Stick to unbleached paper, cardboard, and natural yard/food waste.
How do I keep rodents out of an open-bottom compost bin?
Hardware cloth is your best defense. Bury a piece of 1/2-inch galvanized hardware cloth 2 inches deep into the soil, extending it up the inside walls of the bin by 6 inches. Furthermore, never add meat, dairy, oils, or cooked grains to a home bin, as the lipid and protein breakdown pathways produce odors that attract rodents from significant distances.
Is it necessary to buy a commercial compost activator?
Commercial activators are generally unnecessary if you are balancing your C:N ratio correctly and inoculating the pile with a few shovels of native soil or finished compost. However, if you are composting high-carbon materials like pure autumn leaves and need to speed up the process before winter, an activator high in alfalfa meal or naturally occurring Trichoderma fungi can provide a temporary microbial boost.

