
Gardening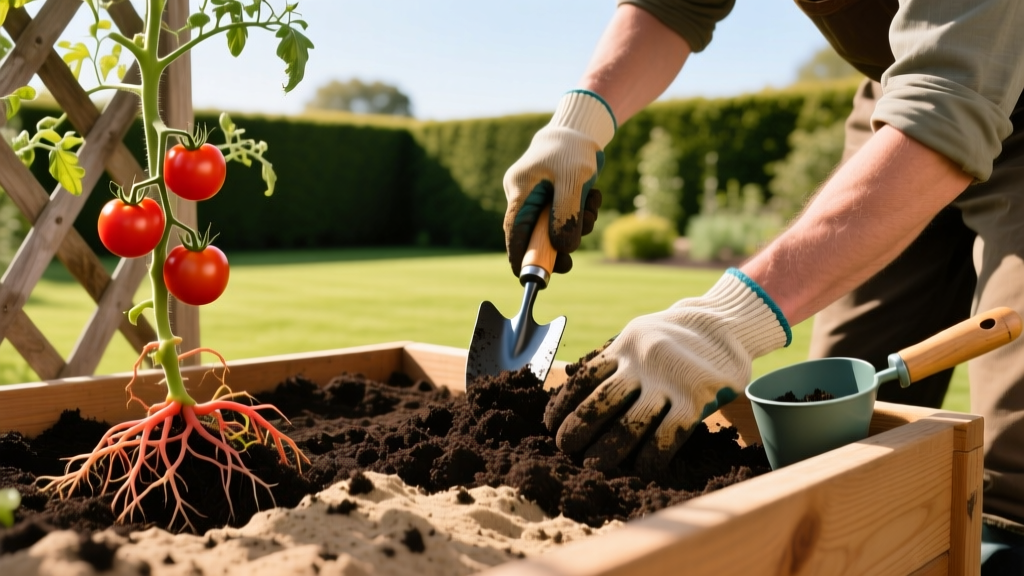
Best Soil for Growing Tomatoes: The Ultimate Mixing and Prep Guide
The Science of Tomato Root Zones: Why Standard Topsoil Fails
Tomatoes (Solanum lycopersicum) are aggressive, deep-rooted heavy feeders that demand a highly specific subterranean environment to produce high yields. While it is tempting to fill raised beds or containers with cheap topsoil or native ground dirt, this approach almost guarantees compaction, poor drainage, and stunted taproot development. According to the University of Minnesota Extension, tomato roots require a soil bulk density of less than 1.0 g/cm³ in containers and raised beds to penetrate effectively and access deep moisture reserves.
Standard topsoil lacks the 20% to 30% air-filled porosity required for optimal root respiration. When native soil is confined in a raised bed or pot, it collapses under its own weight when watered, suffocating the fine feeder roots responsible for nutrient uptake. To cultivate the best soil for growing tomatoes, you must engineer a custom blend that balances water retention, drainage, and slow-release biological nutrition.
💡 Agronomy Insight: A tomato plant's root system can extend up to 4 feet deep and 3 feet wide in optimal, uncompacted soil. In a standard 12-inch raised bed, 85% of the active feeder roots will concentrate in the top 8 inches, making the nutrient density of your upper soil profile critical.
The Ideal Soil Profile: Exact Component Ratios
Creating the perfect soil for growing tomatoes requires moving away from "dirt" and toward a "soilless" or highly amended matrix. The following recipe is calibrated for a standard 4x8-foot raised bed (requiring roughly 32 cubic feet of soil) or multiple large 15-gallon grow bags.
| Component | Volume Ratio | Primary Function | Est. Cost (2026) |
|---|---|---|---|
| Sphagnum Peat Moss or Buffered Coco Coir | 40% | Base structure, moisture retention, cation exchange capacity (CEC). | $0.35 / cu ft |
| High-Quality Aerobic Compost | 30% | Microbial inoculation, slow-release nitrogen, humic acids. | $0.50 / cu ft |
| Coarse Perlite or Pumice (1/4 inch) | 20% | Macroporosity, drainage, prevents anaerobic compaction. | $0.65 / cu ft |
| Earthworm Castings | 10% | Bioavailable micronutrients, chitinase enzymes for pest defense. | $1.40 / cu ft |
Step-by-Step: Mixing and Amending Your Blend
Simply combining the base ingredients is not enough; tomatoes are heavy feeders that require upfront mineralization. Follow this protocol to prepare your beds two weeks before your last frost date.
1. Hydrate the Base Materials
Peat moss is naturally hydrophobic when dry. If you use peat, pre-soak it in a wheelbarrow with warm water 24 hours before mixing. If using coco coir, ensure it is "buffered" (washed with calcium/magnesium to remove sodium), such as the Botanicare Pure Blend buffered bricks, which retail around $18 for a 10lb compressed block yielding 1.5 cubic feet.
2. Incorporate Dry Amendments
For every 10 cubic feet of mixed base soil, incorporate the following dry amendments evenly:
- Base Fertilizer: 2 cups of Espoma Organic Tomato-tone 3-4-6 (approx. $14 per 4lb bag). This provides a steady release of nitrogen and phosphorus without burning young roots.
- Mineral Phosphorus: 1 cup of soft rock phosphate or bone meal to support early root and flower cluster development.
- Kelp Meal: 1/2 cup to provide essential trace minerals and natural cytokinins for cellular division.
3. The Calcium Imperative (Preventing Blossom End Rot)
Blossom End Rot (BER) is the bane of tomato growers. While often blamed on a lack of calcium in the soil, BER is actually a calcium transport issue caused by erratic watering. However, the soil must contain adequate calcium to begin with. The UMass Amherst Extension recommends maintaining a soil pH between 6.5 and 6.8 to keep calcium soluble.
⚠️ Warning: Lime vs. Gypsum
If your soil test shows a pH below 6.2, add Dolomitic Lime (which raises pH and adds calcium/magnesium) at a rate of 5 lbs per 100 sq ft. If your pH is already optimal (6.5) but you want to ensure adequate calcium, use Gypsum (Calcium Sulfate). Gypsum adds calcium without altering the soil pH. Apply 1 cup of gypsum per planting hole.
If your soil test shows a pH below 6.2, add Dolomitic Lime (which raises pH and adds calcium/magnesium) at a rate of 5 lbs per 100 sq ft. If your pH is already optimal (6.5) but you want to ensure adequate calcium, use Gypsum (Calcium Sulfate). Gypsum adds calcium without altering the soil pH. Apply 1 cup of gypsum per planting hole.
Container vs. Raised Bed: Tweaking the Recipe
The physical constraints of your growing vessel dictate how water moves through the soil profile. A mix that performs perfectly in a 24-inch deep raised bed will drown a tomato plant in a 12-inch patio container due to the "perched water table" effect.
Adjustments for Containers and Grow Bags (10-15 Gallons)
- Increase Perlite: Bump the perlite/pumice ratio from 20% to 30%. Reduce the compost to 20%.
- Add Biochar: Incorporate 5% horticultural biochar (like Wakefield Biochar). Biochar acts as a microscopic sponge, holding onto water-soluble nutrients that would otherwise wash out the bottom of a container during daily watering.
- Mulch Heavily: Containers dry out rapidly. Apply a 2-inch layer of arborist wood chips or straw on top of the soil to reduce evaporation by up to 40%.
Adjustments for In-Ground Planting
If you are planting directly into native clay or sandy loam, do not just dig a hole and fill it with potting soil; this creates a "bathtub effect" where water pools in the loose soil and drowns the roots. Instead, excavate a 2-foot wide area, and blend your native soil 50/50 with the compost and perlite mixture to create a gradual transition zone for the roots.
Expert Troubleshooting: Soil Failure Modes
Even with a perfect initial mix, soil chemistry shifts throughout the growing season as roots exude acids and fertilizers break down. Monitor your plants for these specific visual cues:
- Symptom: Lower leaves turning pale yellow while upper growth remains green.
Diagnosis: Nitrogen deficiency or waterlogged soil (suffocated roots cannot uptake N).
Fix: Check soil moisture 3 inches down. If dry, side-dress with blood meal (1 tbsp per plant). If soggy, reduce watering frequency and poke aeration holes with a dibber. - Symptom: Purple discoloration on stems and leaf undersides; stunted vertical growth.
Diagnosis: Phosphorus lockout. This occurs when soil temperatures remain below 60°F or pH spikes above 7.2.
Fix: Apply a liquid kelp and fish emulsion foliar spray to bypass the root zone until soil temperatures rise. - Symptom: White, crusty salt buildup on the soil surface of containers.
Diagnosis: Fertilizer salt accumulation from synthetic liquid feeds or hard tap water.
Fix: Flush the container with 3x its volume in distilled or rainwater to leach excess salts below the root zone. Switch to organic, slow-release granular feeds.
Long-Term Soil Maintenance and Cover Cropping
The best soil for growing tomatoes improves with age, provided you replenish what the crop removes. A single indeterminate tomato plant can extract up to 1.5 ounces of pure nitrogen and 0.5 ounces of phosphorus over a 90-day harvest window. At the end of the season, do not pull the roots out; cut the stalks at the soil line and leave the root mass to decompose, which feeds mycorrhizal fungi networks.
For raised beds, plant a winter cover crop of crimson clover or hairy vetch in late September. These legumes fix atmospheric nitrogen into the soil via rhizobia bacteria. In early spring, chop the cover crop and fold it into the top 4 inches of your tomato soil as a "green manure," eliminating the need for synthetic nitrogen inputs for the upcoming season. For comprehensive regional planting dates and soil testing protocols, consult the Cornell University Growing Guides to ensure your amendments align with local geological baselines.

