
Gardening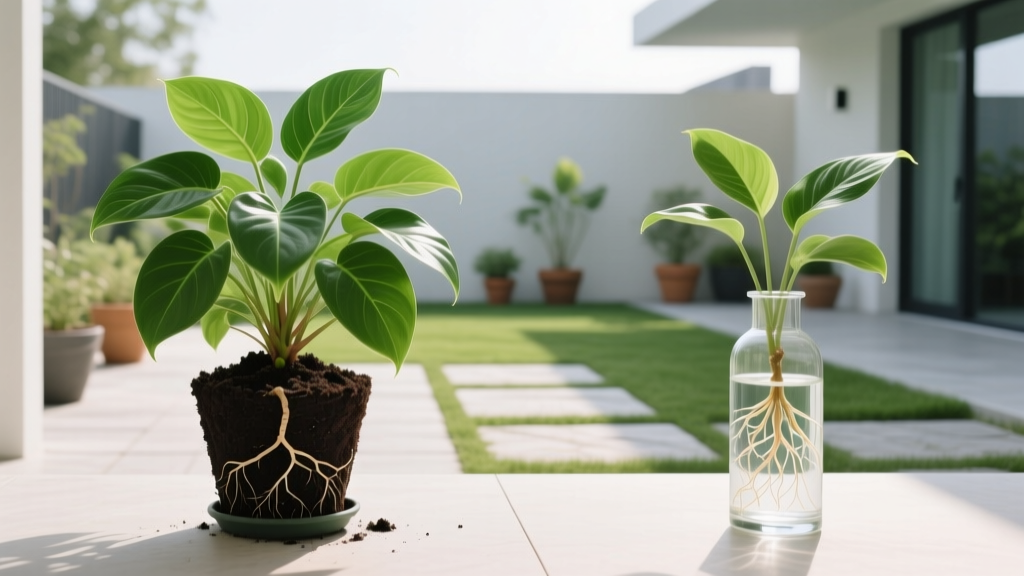
Money Plant Planting Guide: Soil vs Water Establishment
The Botanical Baseline: Identifying Your Money Plant
The common name "money plant" causes significant confusion in the horticultural trade. In North America, this term is occasionally applied to Pachira aquatica (Money Tree) or Crassula ovata (Jade Plant). However, in global cultivation and across most of Asia, the true money plant is Epipremnum aureum, widely known in the US as Pothos or Devil's Ivy. This guide focuses exclusively on the establishment and planting protocols for Epipremnum aureum, an aroid vine prized for its rapid growth and air-purifying qualities. For specific cultivar details and hardiness, the Royal Horticultural Society provides comprehensive taxonomic profiles.
Expert Note on Toxicity: Before establishing Epipremnum aureum in your home, note that all parts of the plant contain insoluble calcium oxalate crystals. According to the ASPCA, ingestion by cats or dogs causes severe oral irritation, drooling, and vomiting. Always establish these plants on elevated shelves or in hanging planters out of reach of pets.
Preparing the Cutting for Establishment
Successful establishment begins with precise cutting technique. The money plant relies on adventitious root primordia located at the nodes—the small, raised bumps on the stem where the petiole (leaf stem) attaches. A cutting without a node will never produce roots; it will simply rot.
Step-by-Step Cutting Protocol
- Sanitize Tools: Wipe your pruning shears with a 70% isopropyl alcohol solution. Avoid 10% bleach solutions, as residual chlorine can burn the delicate vascular tissue of the cut.
- Measure the Cut: Snip the stem exactly 1/4 inch to 1/2 inch below a healthy node. Ensure the cutting includes at least one active leaf and one bare node.
- Submerge Nodes: If propagating in water, only the bare node should be submerged. Submerging the petiole or leaf tissue will cause rapid bacterial rot.
Soil Establishment Protocol
Planting a money plant directly into standard potting soil is the most common cause of establishment failure. Epipremnum aureum is an epiphytic/hemi-epiphytic aroid that requires high oxygen levels at the root zone. Dense soils suffocate the developing root primordia.
The Ideal Aroid Substrate Mix
For optimal soil establishment, mix the following components by volume:
- 60% Premium Indoor Potting Soil: Avoid soils with heavy peat moss or moisture-control crystals. A standard bark-based mix works best.
- 20% Coarse Perlite (Size #3 or #4): This creates macro-pores for drainage and prevents soil compaction over time.
- 20% Orchid Bark: Fir or pine bark chunks (1/2 inch size) mimic the plant's natural arboreal environment, allowing roots to anchor and breathe.
Planting and Initial Watering
Use a 4-inch nursery pot with at least three drainage holes. Fill the pot with the aroid mix, create a vertical channel with a dibber, and insert the rooted cutting so the node is buried 1 inch deep. Water immediately with a liquid fertilizer solution (see Fertilizer section below) until it flows freely from the drainage holes. Place the pot in an area receiving 1,000 to 2,000 foot-candles of light (bright, indirect sunlight).
Water Propagation and Long-Term Hydroculture
Water propagation is visually rewarding and highly effective for initial root development, but it requires specific water chemistry management to prevent node rot. Tap water often contains chlorine, chloramines, and dissolved minerals that can inhibit root growth or cause leaf tip burn.
Water Quality and Maintenance
Use distilled, reverse-osmosis, or rainwater for your propagation vessel. If you must use tap water, let it sit in an open container for 24 hours to off-gas chlorine (note: this does not remove chloramines). Change the water completely every 7 days to prevent bacterial biofilms from forming on the stem. Keep the water level exactly 1 inch above the node to allow the upper portion of the stem to access atmospheric oxygen.
Transitioning Water Roots to Soil: The Moss Method
This is where most gardeners fail. Roots grown in water are structurally different from soil roots. Water roots are thicker, lack microscopic root hairs, and are adapted to hypoxic (low oxygen) environments. If you move a water-rooted money plant directly into potting soil, the sudden change in osmotic pressure and oxygen availability causes the water roots to die, leading to transplant shock and stem rot.
The Moss Transition Method: To successfully transition water roots to soil, remove the cutting from the water and gently wrap the root mass in damp (not wet) long-fiber sphagnum moss. Place the moss-wrapped roots in a plastic bag or humidity dome for 14 days. This intermediate step forces the plant to develop secondary root hairs and adapt to lower moisture levels before it is potted into the chunky aroid soil mix.
Soil vs. Water Establishment: Comparison Matrix
| Metric | Soil Establishment | Water Establishment |
|---|---|---|
| Rooting Timeframe | 21 to 30 days | 14 to 21 days |
| Root Morphology | Thin, highly branched with dense root hairs | Thick, brittle, minimal root hairs |
| Long-Term Growth Rate | Rapid (up to 12 inches per month in peak season) | Stunted without specialized hydroponic nutrients |
| Maintenance Level | Low (water when top 2 inches of soil are dry) | High (weekly water changes, algae management) |
| Variegation Retention | High (excellent nutrient access) | Low (tends to revert to solid green over time) |
Fertilizer Protocols for New Establishments
Unrooted cuttings cannot absorb fertilizer; applying nutrients before root emergence will only feed algae and bacteria. Once roots reach a length of 1 to 2 inches, begin a diluted fertilization regimen. According to Clemson University Extension, houseplants require significantly less fertilizer than outdoor crops due to lower light levels and reduced transpiration rates.
- Product Recommendation: Use a complete, urea-free liquid fertilizer like Dyna-Gro Foliage-Pro (9-3-6 NPK). Urea requires soil microbes to break down into usable nitrogen, which are largely absent in sterile water propagation or fresh potting mixes.
- Water-Grown Dosage: Add 1/4 teaspoon of fertilizer per gallon of water. Apply during your weekly water change.
- Soil-Grown Dosage: Add 1/2 teaspoon of fertilizer per gallon of water. Apply every 14 days during the active growing season (spring through early autumn).
Troubleshooting Establishment Failures
Symptom: The Node Turns Black and Mushy
Cause: Bacterial stem rot. This occurs when the node is buried too deeply in anaerobic soil, or when water propagation vessels are not cleaned, allowing Pythium bacteria to proliferate.
Fix: Snip off the rotted portion with sterilized shears, cutting at least 1/2 inch above the visible rot into healthy, firm green tissue. Dip the new cut in powdered cinnamon (a natural fungicide) and restart the propagation process in fresh water or sterile perlite.
Symptom: Leaves Yellowing and Dropping During Transition
Cause: Osmotic shock or root death from moving water roots directly into dry soil, or exposing the plant to direct sunlight immediately after potting.
Fix: Move the plant to a lower-light environment (500 to 800 foot-candles) for 10 days to reduce transpiration demand. Ensure the soil remains consistently moist (but not waterlogged) to help the remaining roots rehydrate. Do not fertilize until new leaf growth emerges.
Symptom: White, Crusty Buildup on Soil or Pot Edges
Cause: Mineral accumulation from hard tap water or over-fertilization. This alters the soil pH, locking out essential micronutrients like iron and magnesium.
Fix: Flush the pot with 4 times its volume of distilled water to leach out excess salts. Scrape off the top 1/2 inch of soil and replace it with fresh aroid mix. Switch to rainwater or filtered water for all future irrigation.

