
Gardening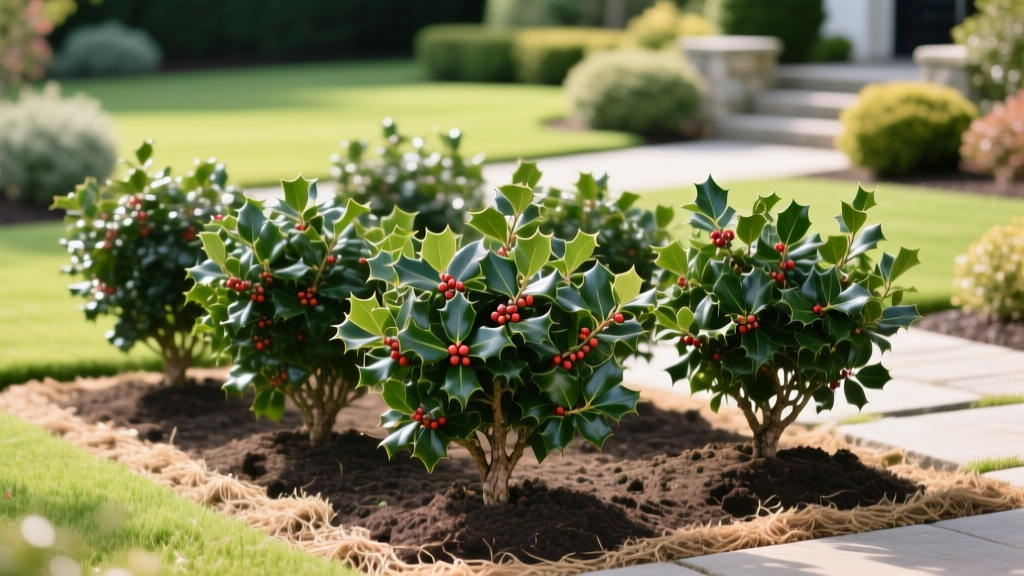
Nellie Stevens Holly Planting: Establishment & Spacing Guide
Botanical Profile & Landscape Value
The 'Nellie R. Stevens' holly (Ilex x 'Nellie R. Stevens') is a premier broadleaf evergreen hybrid, born from a cross between the English holly (Ilex aquifolium) and the Chinese holly (Ilex cornuta). Landscape architects and homeowners favor it for its aggressive 2-to-3-foot annual growth rate, dense pyramidal architecture, and heavy production of brilliant red berries that persist through winter. Unlike many hollies, it is highly tolerant of heat and humidity, thriving in USDA Hardiness Zones 6 through 9.
Quick Specs:
• Mature Size: 15-25 feet tall, 10-15 feet wide
• Growth Rate: Fast (24-36 inches/year under optimal conditions)
• Sun Exposure: Full sun to partial shade (minimum 6 hours direct sun for maximum berry set)
• Hardiness: USDA Zones 6-9
• Mature Size: 15-25 feet tall, 10-15 feet wide
• Growth Rate: Fast (24-36 inches/year under optimal conditions)
• Sun Exposure: Full sun to partial shade (minimum 6 hours direct sun for maximum berry set)
• Hardiness: USDA Zones 6-9
Pre-Planting Site Assessment & Soil Preparation
Hollies are notoriously sensitive to poor drainage and alkaline soils. Before breaking ground, you must verify your soil's percolation rate and pH. According to the Clemson University Home & Garden Information Center, hollies require acidic soil to properly absorb iron and other micronutrients.
Critical Soil Parameters
| Parameter | Target Range | Corrective Action if Outside Range |
|---|---|---|
| Soil pH | 5.0 - 6.0 | Apply elemental sulfur (0.5 lbs per 100 sq ft to lower pH by 0.5 points) |
| Drainage Rate | 1 to 4 inches/hour | If slower, plant in a raised berm or install French drains |
| Organic Matter | 3% - 5% | Incorporate 2 inches of composted pine bark into the top 8 inches |
The Percolation Test: Dig a hole 12 inches deep and 12 inches wide. Fill it with water and let it drain completely. Refill it and measure the water level drop after one hour. If the water drops less than 1 inch, your soil is heavy clay and prone to Phytophthora root rot. You must plant the holly on a raised mound (berm) at least 6 inches above the surrounding grade.
Step-by-Step Planting Protocol
Proper planting depth is the single most critical factor in holly establishment. Burying the root flare is the leading cause of transplant shock and eventual death in container-grown and balled-and-burlapped (B&B) hollies.
- Dig the Hole: Excavate a hole 2 to 3 times wider than the root ball, but no deeper than the root ball's height. The sides of the hole should be sloped, not perfectly vertical, to encourage lateral root expansion.
- Locate the Root Flare: Brush away the top layer of soil from the root ball until you see the trunk flare (where the trunk widens at the base). Remove any soil or potting mix above this flare.
- Inspect and Prune Roots: If the holly is container-grown, use a sterilized utility knife to make four vertical slices (1 inch deep) down the sides of the root ball to sever circling roots. For B&B specimens, cut and remove all synthetic twine and wire baskets once the plant is in the hole.
- Set the Elevation: Place the holly in the hole. The root flare must sit 1 to 2 inches above the surrounding grade to account for soil settling.
- Backfill: Use the native soil you excavated to backfill the hole. Do not amend the backfill heavily with compost, as this creates a 'bathtub effect' that traps water in the planting hole. Tamp the soil gently to remove large air pockets.
Warning: Never lift or carry the holly by its trunk. Always support the root ball. Lifting by the trunk tears the fine feeder roots away from the main root mass, severely stunting first-year growth.
Spacing Matrix: Privacy Screens vs. Specimens
Spacing dictates the long-term health and aesthetic function of your hollies. Crowding them to force a faster screen leads to interior dieback, fungal diseases, and competition for water. Use the University of Florida IFAS Extension guidelines adapted for mature 'Nellie R. Stevens' dimensions.
| Landscape Application | Center-to-Center Spacing | Time to Full Screen | Pruning Requirement |
|---|---|---|---|
| Dense Privacy Hedge | 6 to 8 feet | 3 to 4 years | Annual lateral shearing |
| Staggered Windbreak | 10 feet (zig-zag pattern) | 4 to 5 years | Minimal (structural only) |
| Specimen / Focal Point | 15+ feet from structures | N/A | Lower limb removal only |
| Corner Foundation Planting | 8 to 10 feet from corner | N/A | Size control pruning |
The First 90 Days: Watering & Mulching
Hollies do not show drought stress immediately; by the time leaves yellow and drop, severe root damage has occurred. Implement a strict volumetric watering schedule based on the trunk caliper (diameter measured 6 inches above the soil line).
Volumetric Watering Schedule
- Weeks 1-2: Apply 1.5 gallons of water per inch of trunk caliper every other day.
- Weeks 3-12: Apply 2 gallons per inch of caliper twice a week.
- Months 4-12: Apply 3 gallons per inch of caliper once a week, or after 5+ days without measurable rainfall.
Pro Tip: Use a soaker hose or a slow-drip emitter ring. Blasting the base with a hose nozzle causes runoff and fails to penetrate the dense clay or root ball interface.
Mulching Protocol
Apply a 3-inch layer of aged pine bark mulch over the entire root zone, extending 2 feet beyond the drip line. Crucial: Keep the mulch exactly 3 inches away from the trunk. Piling mulch against the bark ('mulch volcanoes') invites collar rot and encourages secondary roots to girdle the trunk.
Troubleshooting Establishment Failures
Even with perfect planting, environmental factors can disrupt establishment. Use this diagnostic framework to correct issues early.
Symptom: New leaves are pale yellow with dark green veins.
Cause: Iron chlorosis due to high soil pH (above 6.5). The roots cannot absorb iron in alkaline conditions.
Fix: Apply a liquid chelated iron drench immediately for short-term greening. Follow up with granular elemental sulfur to permanently lower the soil pH over the next 6 months.
Symptom: Leaves turn dull olive-green, droop, and drop prematurely.
Cause: Phytophthora root rot or severe underwatering. Check soil moisture 4 inches deep. If it is soggy, you have root rot. If it is bone dry, you have drought stress.
Fix: For root rot, pull mulch back, improve drainage, and treat with a phosphite-based fungicide. For drought stress, deep-water immediately using the volumetric schedule above.
Symptom: Black, powdery coating on leaves and stems.
Cause: Sooty mold, which grows on the honeydew excreted by scale insects or whiteflies.
Fix: The mold itself is harmless, but the insects are not. Apply horticultural oil (like Bonide All Seasons Oil) during the dormant season, or use a systemic imidacloprid drench in early spring.
Expert FAQs
Do I need a male pollinator for my Nellie Stevens holly to produce berries?
No. The 'Nellie R. Stevens' is unique among hollies because it is parthenocarpic, meaning it produces seedless fruit without the need for cross-pollination from a male holly. However, the Missouri Botanical Garden notes that berry production is significantly heavier and more consistent when planted in full sun.
Should I fertilize a newly planted Nellie Stevens holly?
Do not apply synthetic nitrogen fertilizers at the time of planting; this will burn tender new feeder roots. Wait until the following early spring, then apply an acid-loving, slow-release organic fertilizer like Espoma Holly-tone (4-3-4) at a rate of 1 cup per foot of branch spread. Scratch it into the top inch of soil and water thoroughly.
How do I protect young hollies from winter desiccation?
In USDA Zones 6 and 7, young hollies (under 3 years old) are susceptible to winter windburn, where frozen ground prevents roots from replacing water lost to dry winds. In late November, spray the foliage with an anti-desiccant like Wilt-Pruf. This applies a breathable polymer coating that reduces transpiration by up to 50%.