
Gardening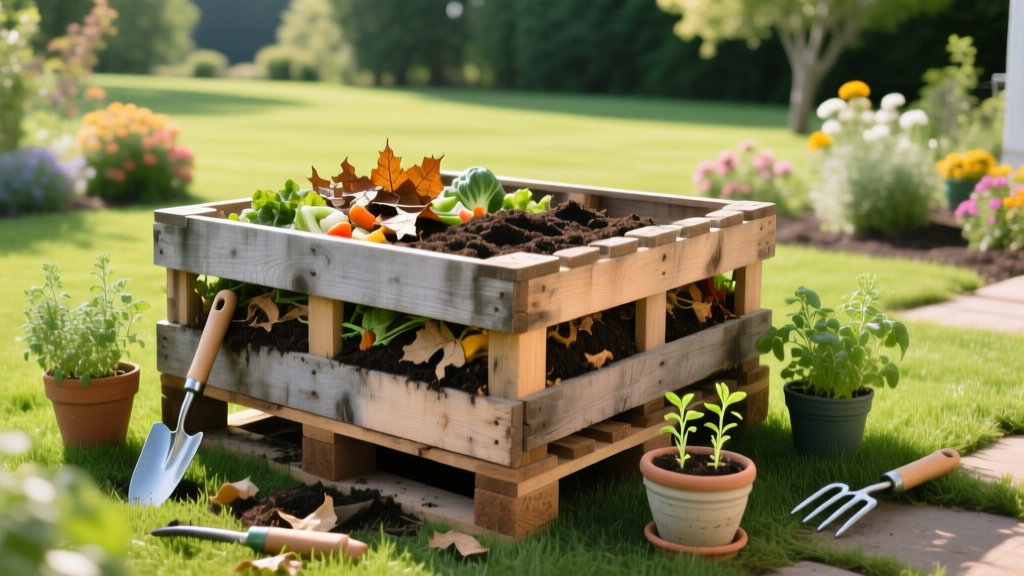
How to Build a Pallet DIY Composter for Chemical-Free Garden Soil
The Biological Advantage of a Pallet DIY Composter
Synthetic fertilizers and chemical fungicides disrupt the soil microbiome, creating a dependency loop that degrades long-term garden health. Transitioning to organic and chemical-free controls requires a massive, consistent supply of biologically active compost. While commercial plastic tumblers are heavily marketed, they often fail to achieve the critical mass required for thermophilic (hot) composting. A 3-bay pallet DIY composter solves this by providing the necessary volume—typically 36 to 48 cubic feet per bay—to sustain the 131°F to 170°F temperatures required to eradicate weed seeds and soil-borne pathogens without a single drop of chemical herbicide.
Commercial Tumbler vs. 3-Bay Pallet DIY Composter
As of 2026, commercial compost tumblers range from $120 to over $250, yet their limited aeration and small volume frequently result in anaerobic, slow-decaying sludge. Here is how a custom-built system compares in both cost and biological output.
| Feature | Commercial Plastic Tumbler | 3-Bay Pallet DIY Composter |
|---|---|---|
| Average Cost | $150 - $250 | $60 - $85 (Materials) |
| Active Volume | 7 - 15 cubic feet | 36 - 48 cubic feet per bay |
| Thermophilic Capability | Poor (Loses heat rapidly) | Excellent (Sustains 140°F+) |
| Aeration Method | Manual spinning (Often compacts) | Passive airflow + manual pitchfork turning |
| Rodent Vulnerability | High (Plastic seams warp) | Low (When lined with hardware cloth) |
Sourcing Safe Pallets: Decoding the ISPM 15 Stamps
The most critical step in building an organic DIY composter is ensuring your wood is free of toxic chemical treatments. Pallets used in international shipping are stamped with an IPPC logo and a treatment code under the ISPM 15 standard.
⚠️ WARNING: Avoid MB and CP Stamps
Never use pallets stamped with MB (Methyl Bromide), a highly toxic pesticide that will leach into your compost and ruin your organic soil. Avoid CP (Chemical Preservatives). You must exclusively source pallets stamped with HT (Heat Treated), meaning the wood was baked to 132°F for 30 minutes to kill pests, leaving zero chemical residue.
Step-by-Step Construction: The 3-Bay System
A 3-bay system allows you to manage three distinct phases of decomposition simultaneously: fresh scraps in Bay 1, active hot decomposition in Bay 2, and curing/harvesting in Bay 3.
- Prepare the Foundation: Clear a level 12x4 foot area. Lay down a 1/2-inch galvanized hardware cloth ($25 for a 10-foot roll) across the entire footprint to prevent burrowing rodents while allowing beneficial earthworms to enter from below.
- Set the Corner Posts: Sink four 8-foot 4x4 pressure-free cedar or locust posts into the ground at the corners of your 12-foot span, leaving 5 feet above ground. Use a post-hole digger and pack the base with tamped gravel for drainage.
- Attach the Pallets: Standard pallets measure 48x40 inches. Stand them on edge between your posts. Secure them using 3-inch exterior-grade decking screws ($8 per box). Use three screws per pallet corner to prevent racking.
- Install Dividers: Create the internal dividers using additional pallets or removable slatted wooden panels. Removable front panels (using T-hinges) are highly recommended for easy access when turning the piles with a pitchfork.
- Cap the Top: Screw a final pallet flat across the top of each bay to act as a structural tie and a mounting point for a tarp, which helps retain moisture and heat during heavy winter rains.
Hot Composting: Your Chemical-Free Pathogen Control
The primary defense against soil-borne diseases like Fusarium wilt and Pythium root rot is a biologically diverse compost. According to the Environmental Protection Agency (EPA), properly managed hot composting destroys pathogens and weed seeds that cold composting leaves behind. To achieve this in your DIY composter, you must master the Carbon-to-Nitrogen (C:N) ratio.
Aim for a 30:1 C:N ratio by volume. This translates to roughly 3 parts "browns" (shredded corrugated cardboard, dry autumn leaves, untreated wood chips) to 1 part "greens" (kitchen vegetable scraps, fresh grass clippings, coffee grounds). The University of Minnesota Extension notes that maintaining a moisture level of 50%—feeling like a wrung-out sponge—is vital for the thermophilic bacteria to thrive. When the core temperature hits 140°F, maintain it for at least three consecutive days to guarantee the eradication of invasive weed seeds like bindweed and crabgrass, eliminating the need for post-emergent chemical herbicides in your garden beds.
Compost Tea: Biological Foliar Disease Suppression
The output of your DIY composter isn't just a soil amendment; it is the base ingredient for a powerful chemical-free foliar spray. Actively aerated compost tea (AACT) coats plant leaves with beneficial bacteria and fungi that outcompete airborne pathogens.
"Applying aerated compost tea to cucurbits (squash, cucumbers) creates a biological barrier on the leaf surface, significantly reducing the spore germination rate of powdery mildew without the use of synthetic fungicides."
Brewing Protocol: Suspend 2 quarts of finished, screened compost in a porous mesh bag inside a 5-gallon bucket of dechlorinated rainwater. Add 2 tablespoons of unsulfured blackstrap molasses as a microbial food source. Use an aquarium air pump to vigorously aerate the mixture for 24 to 48 hours. Apply at a rate of 1 to 2 gallons per 100 square feet of garden canopy within 4 hours of turning off the pump.
Troubleshooting Common DIY Composter Failures
- Problem: Pile smells like ammonia.
Cause: Excess nitrogen (too many greens).
Fix: Turn the pile and aggressively mix in 4 cubic feet of shredded, uncoated cardboard to absorb moisture and spike the carbon levels. - Problem: Core temperature stalls at 90°F.
Cause: Pile is too dry or lacks aeration.
Fix: Water the pile with a soaker hose for 10 minutes while turning it with a pitchfork to introduce oxygen to the anaerobic dead zones. - Problem: Fruit flies and vinegar flies swarm the bins.
Cause: Exposed kitchen scraps.
Fix: Always bury fresh food waste at least 8 inches deep into the center of the pile and cap it with a 2-inch layer of dry leaves or finished compost.
Harvesting the Black Gold
After 4 to 6 months, the material in Bay 3 will transform into dark, crumbly humus with an earthy, geosmin-rich scent. Screen the compost through a 1/4-inch wire mesh to remove uncomposted wood chips, returning those larger pieces to Bay 1 as a bulking agent. The resulting fine compost can be top-dressed at a depth of 1/2 inch across your lawn or tilled into vegetable beds at a 20% volume ratio, completing the organic nutrient loop and fortifying your garden's natural immune system against pests and disease.

