
Gardening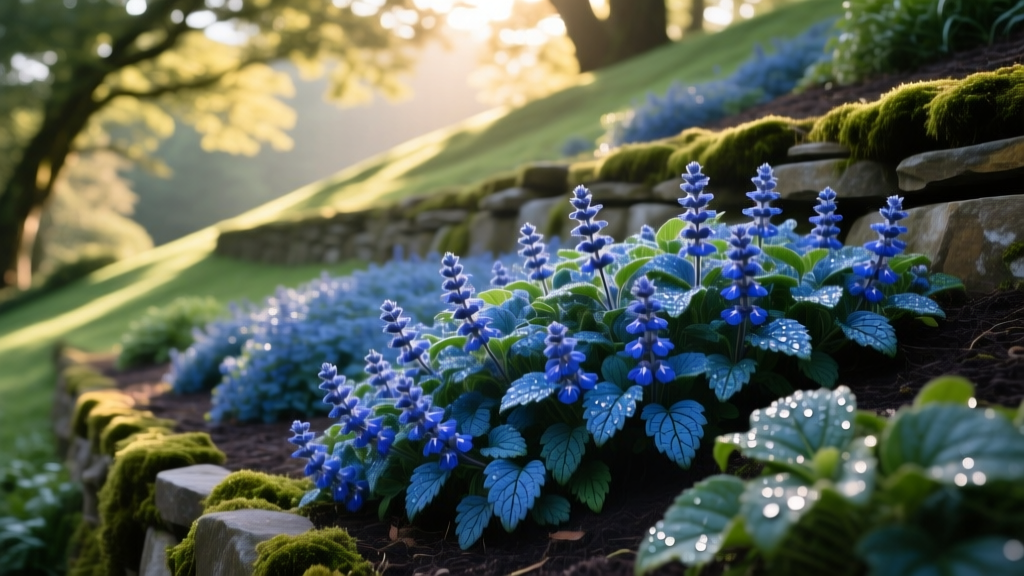
How to Plant and Maintain Blue Ground Cover on Shaded Slopes
Shaded slopes present a unique landscaping challenge: tree canopies block the sunlight most turfgrasses need to survive, while gravity accelerates topsoil erosion during heavy rains. Installing a low-growing, shade-tolerant blue ground cover solves both problems simultaneously. The deep root systems of creeping perennials bind the soil together, while their blue floral displays or foliage provide striking visual contrast against dark mulch and green shade trees.
This guide details the exact site preparation, planting geometry, and maintenance protocols required to establish blue ground covers on sloped terrain, ensuring 100% soil coverage within the first 14 months.
Selecting the Right Blue Ground Cover for Your Zone
Choosing the correct species is the most critical variable in slope stabilization. A plant that thrives in flat, full-sun borders will often fail on a shaded incline due to moisture runoff and light deprivation. Below is a comparison of the four most reliable blue-flowering and blue-foliaged ground covers for sloped, shaded sites.
| Species & Cultivar | Common Name | USDA Zones | Mature Height | Light Requirement | Avg Cost (32-Plug Flat) |
|---|---|---|---|---|---|
| Ceratostigma plumbaginoides | Hardy Plumbago | 5-9 | 8-12 inches | Part Sun / Dappled Shade | $45 - $55 |
| Lithodora diffusa 'Heavenly Blue' | Blue Star Lithodora | 6-8 | 6-10 inches | Part Sun (Morning sun only) | $50 - $65 |
| Isotoma fluviatilis | Blue Star Creeper | 6-9 | 2-3 inches | Part Shade to Full Shade | $40 - $50 |
| Ajuga reptans 'Blueberry Muffin' | Bugleweed | 4-10 | 4-6 inches | Full Shade to Part Shade | $45 - $60 |
For deep, dry shade beneath mature oaks or maples, Ajuga reptans is the superior choice. According to the Missouri Botanical Garden, Ajuga tolerates the allelopathic chemicals released by certain tree roots better than almost any other flowering ground cover. For slopes that receive 3 to 4 hours of morning sun, Hardy Plumbago offers the added benefit of brilliant red foliage in autumn.
Step-by-Step Site Preparation and Planting
Sloped sites require specific preparation to prevent newly planted plugs from washing out during the first heavy rainstorm. Follow this exact sequence for optimal establishment.
- Clear and Grade: Remove all existing weeds, particularly deep-rooted perennials like bindweed or wild violet. Do not use broad-spectrum herbicides on slopes, as the chemical runoff can contaminate lower garden beds. Instead, use a stirrup hoe to sever weed roots just below the soil surface.
- Amend the Soil Matrix: Slopes naturally lose topsoil to erosion. Apply a 2-inch layer of screened leaf compost over the entire planting area. Incorporate 1 cup of bone meal (high phosphorus, 3-15-0 NPK) per 10 square feet to stimulate immediate root development rather than foliar growth.
- Staggered Grid Layout: Mark your planting holes in a staggered, diamond-grid pattern. For rapid fill (100% coverage in year one), space plugs 8 to 10 inches apart. For budget planting, space them 15 inches apart, accepting that full coverage will take two growing seasons.
- Excavate and Plant: Dig holes 1.5 times wider than the plug root ball, but no deeper. Planting too deep on a slope causes water to pool around the crown, inviting rot. Set the plant so the top of the root ball is exactly level with the surrounding soil grade.
- Install Erosion Control Netting: This is the most frequently skipped step. Lay biodegradable jute netting (approximately $35 per 100 sq. ft. roll) over the newly planted slope. Cut X-shaped slits in the jute to pull the plant foliage through. The jute holds the soil and mulch in place for the 12 to 18 months required for the ground cover roots to fully knit together.
Expert Tip: Mulching on Slopes
Never use shredded hardwood bark on a sloped site; it mats together and washes away in solid sheets during heavy downpours. Use pine straw (longleaf pine needles) instead. The interlocking structure of pine straw allows water to permeate while anchoring the mulch to the soil surface.
Never use shredded hardwood bark on a sloped site; it mats together and washes away in solid sheets during heavy downpours. Use pine straw (longleaf pine needles) instead. The interlocking structure of pine straw allows water to permeate while anchoring the mulch to the soil surface.
Watering and First-Year Establishment Protocol
Ground covers on slopes suffer from accelerated moisture loss because gravity pulls water downslope before it can fully penetrate the root zone. During the first 12 months, rely on the following moisture protocol rather than a fixed calendar schedule:
- The 3-Inch Soil Test: Insert a soil moisture probe or your index finger 3 inches into the soil at the top, middle, and bottom of the slope. The top of the slope will invariably dry out 48 hours faster than the bottom.
- Low-Volume, Long-Duration Irrigation: If using sprinklers, apply water at a rate slower than the soil's infiltration capacity to prevent runoff. Apply 0.5 inches of water, wait 30 minutes for absorption, and apply another 0.5 inches. This yields the required 1 inch per week without wasting water to the storm drain.
- Drip Line Alternative: For slopes under 500 square feet, snaking a 1/4-inch soaker hose back and forth across the contour lines (not up and down the slope) is the most water-efficient establishment method.
Troubleshooting Common Failure Modes
Even with perfect planting, blue ground covers can encounter specific pathological and environmental issues. Identifying the exact failure mode early saves the entire slope from collapse.
Phytophthora Root Rot in Lithodora
Lithodora diffusa is highly susceptible to Phytophthora root rot if planted in heavy, unamended clay soils. Symptoms include sudden wilting of individual stems while adjacent plants remain healthy, followed by a dark brown discoloration at the soil line.
The Fix: There is no chemical cure for advanced Phytophthora. Remove the infected plants and a 6-inch buffer of surrounding soil. Amend the empty pocket with 50% perlite and 50% peat moss to drastically improve drainage before replanting. The Royal Horticultural Society strongly emphasizes that Lithodora requires exceptionally well-drained, slightly acidic soil (pH 5.0 to 6.0) to prevent this pathogen.
Leggy Growth and Poor Blooming in Hardy Plumbago
If your Ceratostigma plumbaginoides is producing long, sprawling stems with very few blue flowers in late summer, it is receiving either too much shade or too much nitrogen.
The Fix: Stop using high-nitrogen lawn fertilizers (like 20-10-10) near the ground cover bed. Switch to a liquid 0-10-10 bloom booster applied every three weeks starting in mid-July. If the shade is too dense, selectively limb up the lower branches of the overstory trees to allow dappled afternoon light to reach the slope.
Long-Term Maintenance and Weed Suppression
Once the blue ground cover has fully knit together (typically by month 18), maintenance shifts from establishment to containment and vigor management.
- Spring Edging: Use a half-moon edger to cut a sharp 4-inch deep trench between the ground cover and adjacent lawn or hardscape. Ajuga and Blue Star Creeper will aggressively invade Bermuda and Zoysia lawns if not physically contained.
- Mid-Summer Shearing: After the primary spring bloom fades, set your string trimmer to its highest guard (approx. 3 inches) and lightly skim the surface of the Ajuga or Lithodora. This removes spent flower stalks, prevents the plant from expending energy on seed production, and stimulates a dense, carpet-like flush of new foliage.
- Autumn Leaf Management: On shaded slopes, falling tree leaves will smother evergreen ground covers like Lithodora. Do not use a heavy metal rake, which will tear the shallow root systems. Instead, use a commercial-grade leaf blower on a low setting, or set your lawn mower to its highest deck setting and use the bagger attachment to vacuum leaves off the slope.
Expert FAQ
Can I plant blue ground cover directly over landscape fabric?
No. While landscape fabric suppresses weeds in flat shrub beds, it is detrimental to mat-forming ground covers. Plants like Ajuga and Blue Star Creeper spread via stolons (above-ground runners) that need to root directly into the soil at the leaf nodes to survive and spread. Landscape fabric blocks this natural propagation, resulting in patchy, thin coverage and eventual plant death.
How do I protect Hardy Plumbago from winter dieback in Zone 5?
Hardy Plumbago is notoriously late to emerge in spring, often looking completely dead until late May. In Zone 5, protect the crown from freeze-thaw cycles by applying a 3-inch layer of shredded leaves over the slope after the first hard frost. Remove the leaf cover gradually in early April as soil temperatures rise above 45°F. According to NC State Extension, this mulch layer prevents the premature sprouting that leads to late-spring frost damage.
Will deer or rabbits eat these blue ground covers?
Deer and rabbits generally avoid Ajuga reptans and Ceratostigma plumbaginoides due to their slightly bitter foliage and tough textures. However, Isotoma fluviatilis (Blue Star Creeper) can be lightly browsed by rabbits in early spring when other food sources are scarce. If rabbits are a known issue in your area, prioritize Ajuga or Plumbago for your slope.

