
Gardening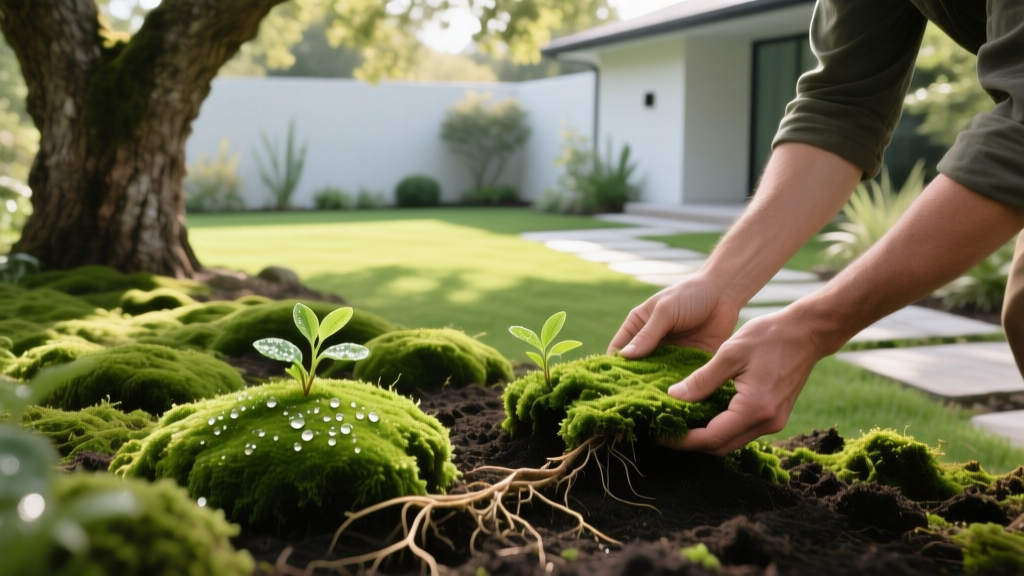
How to Plant Moss in Yard: Step-by-Step Establishment Guide
Why Replace Failing Turf with Bryophytes?
When turfgrass repeatedly fails in deep shade, compacted soil, or chronically damp areas, homeowners face a choice: continue fighting nature or adapt. Learning how to plant moss in yard spaces where grass struggles offers a permanent, ecologically beneficial alternative. Moss requires zero mowing, no synthetic fertilizers, and thrives in the exact acidic, low-light conditions that kill Kentucky bluegrass and fescue. According to NC State Extension, bryophytes act as excellent erosion control on shaded slopes and retain moisture in microclimates, making them superior groundcovers for woodland garden transitions.
Site Assessment: The 3 Non-Negotiable Criteria
Before purchasing live moss, verify your site meets the biological requirements for establishment. Moss does not have true roots; it uses rhizines to anchor to the soil surface and absorbs water and nutrients directly through its leaves.
- Light Exposure: Most landscape mosses require dappled shade or deep shade. Direct afternoon sun will desiccate the plants within hours. Aim for areas receiving fewer than 4 hours of direct sunlight daily.
- Soil pH: Moss thrives in acidic soil between 5.0 and 5.5. If your soil pH is above 6.0, the moss will struggle to outcompete algae and grassy weeds.
- Surface Texture: Moss needs firm, undisturbed soil to anchor its rhizines. Highly mulched or loose, fluffy topsoil will cause the moss to lift and dry out.
Choosing the Right Moss Species for Your Yard
Selecting the correct growth habit is critical for your establishment timeline. Mosses are divided into two primary categories: Pleurocarpous (creeping) and Acrocarpous (clumping).
| Species (Common Name) | Growth Habit | Spread Rate | Best Landscape Application |
|---|---|---|---|
| Hypnum imponens (Sheet Moss) | Pleurocarpous | Fast (6-12 inches/year) | Large shaded lawns, pathways, flat groundcover |
| Thuidium delicatulum (Fern Moss) | Pleurocarpous | Moderate (4-8 inches/year) | Woodland floors, shaded slopes, around tree bases |
| Dicranum scoparium (Broom Fork) | Acrocarpous | Slow (1-2 inches/year) | Rock gardens, borders, accent clumping between pavers |
| Leucobryum glaucum (Pincushion) | Acrocarpous | Very Slow | Decorative terrariums, small focal points, container gardens |
Expert Insight: For rapid lawn replacement, exclusively choose Pleurocarpous species like Hypnum imponens. Their horizontal branching allows them to knit together into a solid carpet much faster than Acrocarpous varieties, which grow vertically and spread radially at a glacial pace.
Site Preparation: Achieving the 5.5 pH Sweet Spot
Proper soil preparation dictates the success or failure of your moss lawn. Do not skip the acidification step.
- Clear the Canvas: Remove all existing grass, weeds, and debris. Use a flat spade to skim off the top inch of organic matter. Moss needs to contact mineral soil, not decaying leaves.
- Test and Acidify: Use a digital soil pH meter. If the pH is 6.5 or higher, apply elemental sulfur. As a general rule, applying 1.5 lbs of elemental sulfur per 100 square feet will drop the pH by roughly 1.0 point in loamy soil. Penn State Extension notes that sulfur takes 3 to 4 months to fully react with soil bacteria, so apply it the season before planting if possible.
- Compact the Soil: Lightly tamp the bare soil with a hand tamper or the back of a steel rake. The surface should be firm and slightly graded to prevent water pooling.
Planting Methods: Debunking the Slurry Myth
A pervasive internet myth suggests blending moss with buttermilk or yogurt to create a "slurry" to paint onto soil. Do not do this. Dairy products in outdoor, humid environments promote fungal rot, attract rodents, and create a foul-smelling biofilm that blocks the moss from anchoring. Instead, use the highly reliable Plug and Pin Method.
The Plug and Pin Method (95% Survival Rate)
- Purchase live moss in 10x10 inch trays. Cut the moss into 3x3 inch plugs using a serrated bread knife.
- Space the plugs 4 to 6 inches apart across the prepared soil grid.
- Press each plug firmly into the soil. Use your heel or a flat piece of wood to apply heavy pressure, ensuring the rhizines make direct contact with the dirt.
- Pin the plugs down using biodegradable wooden toothpicks, landscape staples, or netting. This prevents frost heave and animal disturbance during the critical rooting phase.
Warning: Never harvest wild moss from local forests. Poaching native bryophytes damages fragile ecosystems and is illegal in many state and national parks. Always source from commercial moss nurseries that propagate in controlled environments.
The Critical 60-Day Establishment Watering Schedule
Moss lacks a vascular system to pull water from deep in the soil. If the surface dries out, the moss goes dormant; if it stays flooded, it rots. You must use a brass misting nozzle attached to your hose. Standard spray nozzles will blast the plugs out of the soil.
| Timeline | Watering Frequency | Duration / Technique | Visual Cue for Success |
|---|---|---|---|
| Days 1–21 | 3 times daily | Light misting (30 seconds per zone) | Moss remains vibrant green; edges do not curl. |
| Days 22–45 | 1 to 2 times daily | Light misting (45 seconds per zone) | Rhizines resist gentle tugging; new lateral growth appears. |
| Days 46–60 | Every 2–3 days | Deep soaking (2 minutes per zone) | Plugs begin merging; soil retains moisture longer. |
| Day 60+ | As needed | Water only during droughts exceeding 10 days | Solid carpet formation; dormant browning during dry spells is normal. |
Troubleshooting Common Establishment Failures
Even with meticulous prep, environmental variables can disrupt establishment. Use this diagnostic framework to correct issues early.
- Symptom: Moss turns black and mushy.
Cause: Overwatering or poor drainage leading to cyanobacteria or fungal rot.
Fix: Reduce watering frequency immediately. Aerate the surrounding soil to improve surface runoff. - Symptom: Moss turns brown and crispy at the edges.
Cause: Desiccation from wind exposure or alkaline water runoff from nearby concrete foundations.
Fix: Install a low windbreak. Test runoff water pH; if concrete is leaching lime into the soil, apply a liquid chelated iron and sulfur solution to neutralize the alkalinity locally. - Symptom: Moss lifts off the soil entirely.
Cause: Frost heave in late winter or foraging by birds and squirrels.
Fix: Re-press the lifted mats into the soil immediately. Cover the area with biodegradable jute netting pinned tightly to the ground until rhizines re-anchor.
Cost Breakdown: Plugs vs. Solid Coverage
Establishing a moss yard requires a strategic approach to budgeting. Live moss is typically sold in 10x10 inch trays (covering roughly 0.7 square feet) for $18 to $25 per tray.
100 Square Foot Project Cost Matrix
Option A: Instant Solid Carpet
Requires ~144 trays. Total material cost: $2,592 - $3,600.
Verdict: Only recommended for high-budget commercial installations or tiny courtyard focal points.
Option B: The Plug and Spread Method (Recommended)
Requires ~15 trays (cut into 4 plugs each, spaced 6 inches apart). Total material cost: $270 - $375.
Verdict: The most economical choice for homeowners. Pleurocarpous mosses will fill in the 6-inch gaps within 12 to 18 months under optimal watering and acidic conditions.
By prioritizing soil acidity, selecting creeping species, and adhering to a strict misting protocol, you can successfully establish a lush, emerald moss lawn that thrives in the shaded corners of your property where traditional grass simply cannot survive.

