
Gardening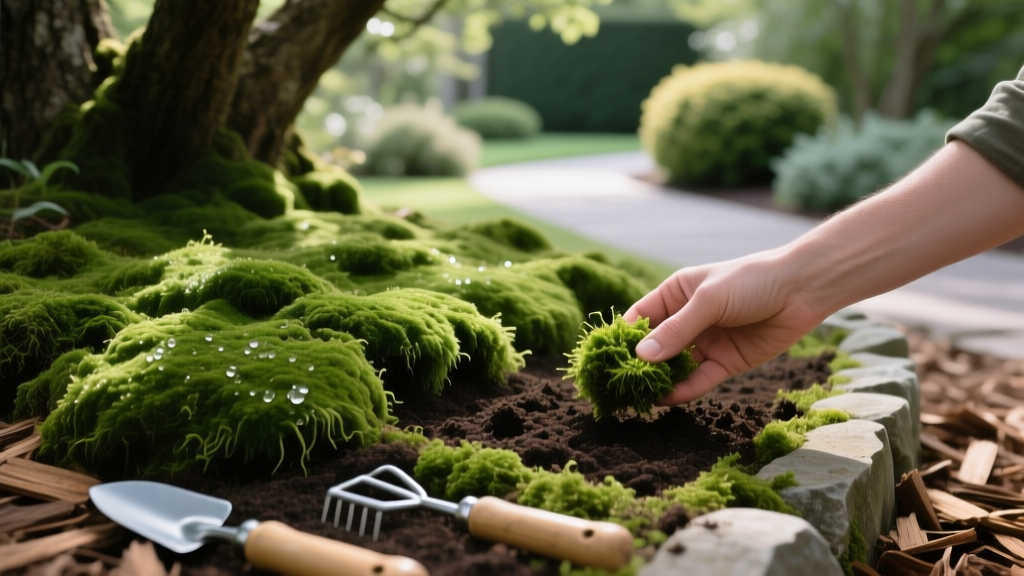
Planting Moss in Shade: Soil Prep, Species, and Establishment Guide
The Economics and Ecology of Moss Lawns
Transitioning from a failing shade turf to a thriving bryophyte carpet solves one of the most persistent landscaping challenges. Fine fescues and shade-tolerant Kentucky bluegrass cultivars require a minimum of 3 to 4 hours of filtered sunlight to survive. When canopy cover drops below 20% sunlight penetration, turfgrass inevitably thins, inviting weed invasion and soil erosion. Planting moss in these deep-shade microclimates provides a permanent, drought-resilient groundcover that requires zero mowing, no synthetic fertilizers, and minimal supplemental irrigation once established.
According to the USDA Forest Service Bryophyte Guide, mosses play a critical role in soil moisture retention and microclimate regulation. From a financial perspective, maintaining a failing shade lawn costs an average of $0.85 to $1.20 per square foot annually in specialized shade fertilizers, aeration, and overseeding. A moss lawn, after the initial installation cost, drops maintenance expenses to near zero.
Species Selection Matrix for Shade Gardens
Not all mosses are suited for foot traffic or deep shade. Selecting the correct species based on your specific microclimate is the most critical step in planting moss successfully. Below is a comparison of the most reliable species for residential shade gardens.
| Scientific Name | Common Name | Texture & Height | Light Requirement | Foot Traffic Tolerance | Avg. Cost (per sq ft) |
|---|---|---|---|---|---|
| Hypnum imponens | Sheet Moss | Flat, carpet-like, 1-2 in | Deep shade to part sun | Moderate | $2.50 - $3.20 |
| Thuidium delicatulum | Fern Moss | Feathery, mounding, 2-3 in | Full to deep shade | Low | $2.80 - $3.50 |
| Dicranum scoparium | Broom Moss | Upright, dense, 2-4 in | Dappled shade | Low | $3.00 - $3.80 |
| Leucobryum glaucum | Pincushion Moss | Cushion-forming, 3-5 in | Part shade to shade | Very Low | $3.50 - $4.50 |
Pro Tip: For high-traffic pathways, Hypnum imponens (Sheet Moss) is the only viable choice. For purely ornamental, untouchable shade garden floors, blend Thuidium and Dicranum to create a multi-textured, forest-floor aesthetic.
Soil Preparation: The pH and Compaction Protocol
The most common reason planting moss fails is preparing the soil as if you were planting grass. Turfgrass requires a pH of 6.0 to 7.0 and loose, heavily aerated soil. Moss requires the exact opposite: a highly acidic environment (pH 5.0 to 5.5) and a firm, compacted substrate.
Step 1: Acidification
Test your soil pH using a digital probe or lab test. If your pH is above 5.5, you must lower it. Apply elemental sulfur (such as Espoma Soil Acidifier) at a rate of 1.2 lbs per 100 square feet to drop the pH by one full point. Incorporate it into the top half-inch of soil and water deeply. Wait 30 days and retest before planting. As noted by Penn State Extension, naturally acidic soils under oak and pine canopies often require no amendment, whereas soils under maples or in alkaline regions require aggressive sulfur application.
Step 2: Substrate Compaction
Moss lacks true vascular roots; it anchors via microscopic rhizoids that require intimate contact with a stable surface. Remove all existing weeds, grass, and debris. Use a hand tamper or a heavy lawn roller to compress the topsoil until it is completely firm. A footprint should barely leave an impression. Rake the surface lightly with a stiff broom to create microscopic grooves for the rhizoids to grip.
Transplant vs. Slurry: Choosing Your Planting Method
There are two primary methods for establishing a moss lawn, but one is vastly superior for residential applications.
The Live Tray Transplant Method (Recommended)
Purchasing live moss trays (typically 10x10 inches) provides instant coverage and drastically reduces the vulnerable establishment window.
- Mist the soil surface lightly before laying the moss.
- Place the moss pieces tightly together, leaving no gaps larger than 1/8 inch.
- Press down firmly with a flat board or walk on them with flat-soled shoes to ensure 100% rhizoid-to-soil contact.
- Secure the edges and seams with 2-inch U-shaped landscape pins to prevent frost heave or animal disturbance.
The Slurry Method (Proceed with Caution)
Internet tutorials frequently recommend blending moss with buttermilk or yogurt. Avoid dairy-based slurries. In humid shade environments, dairy proteins rapidly cultivate black mold (Rhizopus stolonifer), which outcompetes and kills moss protonema. If you must use a liquid application for irregular surfaces or steep slopes, use a commercial bryophyte agar mix or a hydroseeding tackifier combined with fragmented live moss and water.
Warning: Never harvest moss from the wild or public forests. Wild-harvested moss carries a high mortality rate when transplanted to new microclimates and contributes to ecological degradation. Always source from commercial bryophyte nurseries that cultivate sustainably.
The 90-Day Establishment Watering Schedule
Because moss absorbs water directly through its phyllids (leaves) rather than through roots, overhead sprinklers are highly inefficient and waste water. Use a hose-end fine-mist nozzle or a dedicated misting irrigation system.
- Days 1 to 21 (Anchoring Phase): Mist the moss 2 to 3 times daily for 5 minutes each session. The goal is to keep the surface constantly damp, never soggy. This triggers rhizoid extension.
- Days 22 to 60 (Establishment Phase): Reduce misting to once daily in the early morning. If rainfall exceeds 1 inch per week, skip supplemental watering.
- Day 60 and Beyond (Maintenance Phase): Water only during prolonged droughts (14+ days without rain). Moss will naturally go dormant and turn pale brown during severe drought, rehydrating and turning vibrant green within hours of a heavy rain.
Troubleshooting Common Establishment Failures
Even with precise soil preparation, environmental variables can cause stress. Use this diagnostic framework to correct issues early.
| Symptom | Probable Cause | Corrective Action |
|---|---|---|
| Moss turns yellow or bleached white | Excessive direct sunlight or alkaline soil runoff from nearby concrete. | Install shade cloth (40% density) or apply a concrete sealer to stop lime leaching. |
| Black, slimy patches appearing | Cyanobacteria (Nostoc) or fungal growth due to poor drainage and constant sogginess. | Stop watering immediately. Improve grading. Gently scrape off the slime layer. |
| Edges lifting and curling | Frost heave, wind desiccation, or animal scratching (squirrels/birds). | Re-press the moss and secure with 2-inch landscape pins spaced every 6 inches. |
| Weeds emerging through moss | Soil was not adequately compacted or pre-emergent was not applied. | Hand-pull weeds carefully. Apply a moss-safe pre-emergent like corn gluten meal in early spring. |
By prioritizing soil acidity, selecting the correct species for your specific light levels, and adhering to a strict misting schedule, planting moss becomes a highly predictable and rewarding landscaping endeavor. For further reading on managing bryophytes in residential landscapes, consult the Royal Horticultural Society's guidelines on moss ecology.

