
Gardening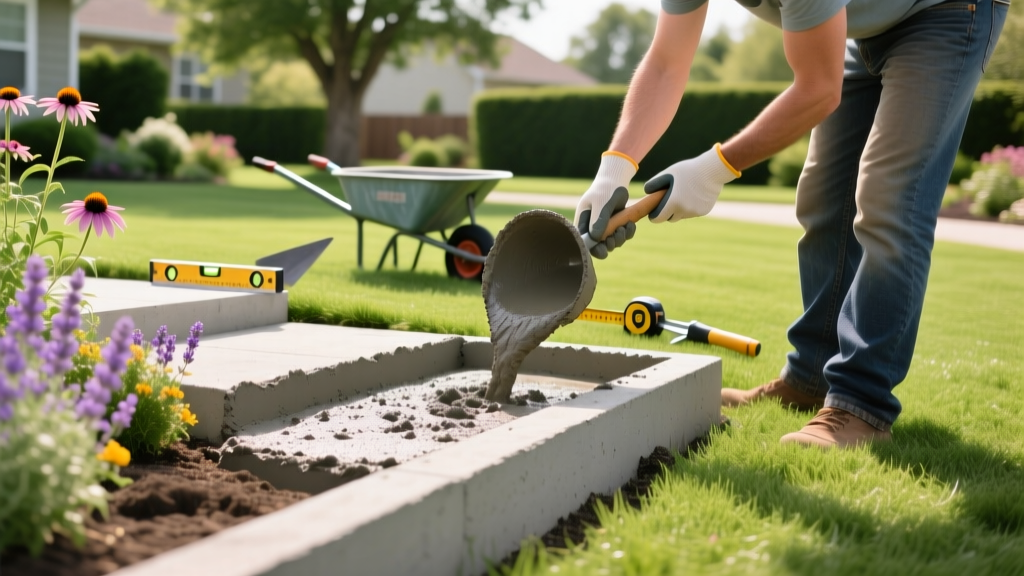
DIY Concrete Borders for Flower Beds: Beginner Installation Guide
Why Poured Concrete Outperforms Standard Edging
Mulch spilling onto your lawn and string-trimmer damage to plant stems are the direct results of inadequate garden edging. While plastic and steel borders offer quick fixes, poured concrete borders for flower beds provide a permanent, monolithic barrier that eliminates weed creeping and withstands heavy foot traffic. Unlike interlocking concrete pavers that shift and settle over time, a continuous poured border acts as a single structural unit, distributing weight and resisting frost heave when properly installed.
According to landscape architecture standards outlined by the University of Minnesota Extension, rigid edging materials significantly reduce long-term maintenance hours by creating a definitive mowing strip. A 4-inch wide concrete mowing edge allows zero-turn and push mowers to glide over the border without dropping wheels into the mulch, saving homeowners an average of 15 minutes per mow session.
Material Comparison Matrix
| Edging Material | Avg. Cost (Linear Ft.) | Lifespan | Primary Failure Mode |
|---|---|---|---|
| Poured Concrete (DIY) | $3.50 - $5.00 | 30+ Years | Surface spalling (if unsealed) |
| Cor-Ten Steel (1/8") | $4.50 - $6.50 | 20-25 Years | Bending/warping under soil pressure |
| HDPE Plastic Coil | $1.00 - $2.00 | 3-5 Years | UV degradation and mower slicing |
| Interlocking Pavers | $6.00 - $9.00 | 15-20 Years | Settling and weed intrusion in joints |
2026 Material Costs and Tool Checklist
Before breaking ground, gather your materials. Pricing below reflects early 2026 average retail costs at major home improvement centers. For a standard 50-linear-foot border (4 inches wide, 3 inches thick), you will need approximately 5 cubic feet of concrete, which equates to roughly eight 80-lb bags.
Core Materials
- Concrete Mix: Quikrete High-Strength Concrete Mix (5000 PSI) - $6.80 per 80-lb bag. (Avoid standard 4000 PSI mixes for thin pours; higher PSI resists freeze-thaw cracking).
- Form Boards: Melamine-coated particleboard (1x6x8 ft) - $14.50 per board. The slick melamine surface eliminates the need for heavy sanding and leaves a glass-smooth finish on the concrete.
- Curved Forms: 1/4-inch Masonite hardboard (8 ft strips) - $9.00 per strip. Soak in water for 2 hours before bending to prevent snapping.
- Stakes: 1x2x12-inch wooden stakes - $1.25 each (place every 16 inches).
- Fasteners: 2-inch exterior duplex nails - $8.00 per lb box.
- Base Aggregate: 3/4-inch crushed gravel - $45.00 per cubic yard (delivered).
Pro Tool Tip: Rent a gas-powered trenching machine (approx. $45 for a half-day at most rental yards) if your project exceeds 40 linear feet. Hand-digging 50 feet of compacted clay soil with a flat spade will exhaust a beginner before the concrete is even mixed.
Step-by-Step Installation Guide
Step 1: Trenching and Base Preparation
The leading cause of cracked concrete borders is an unstable subgrade. Dig a trench 6 inches wide and 5 inches deep along your desired bed line. Compact the native soil at the bottom using a hand tamper. Next, add a 2-inch layer of 3/4-inch crushed gravel and compact it thoroughly. This gravel base provides critical drainage, preventing water from pooling beneath the concrete and freezing, which causes frost heave in USDA Zones 3 through 6.
Step 2: Building and Setting the Forms
Cut your melamine boards to length. Place them into the trench so the top edge sits exactly 1 inch above your finished lawn grade. This 1-inch reveal stops mulch from washing out while allowing mower wheels to ride smoothly on the concrete. Drive wooden stakes into the soil on the outside of the forms every 16 inches. Secure the melamine to the stakes using duplex nails.
Warning: Never use standard drywall screws or common nails to secure forms. The lateral pressure of wet concrete (hydrostatic pressure) can bow the boards outward. Duplex nails have a secondary head that allows for easy extraction after the concrete cures without damaging the form face.
Coat the inside face of the forms with a commercial form-release oil or a light spray of vegetable oil. This prevents the concrete from bonding to the melamine, ensuring easy form removal.
Step 3: Mixing and Pouring
Mix the High-Strength concrete in a motorized wheelbarrow or heavy-duty tub. Add water gradually. The target consistency is similar to thick oatmeal—if you squeeze a handful, it should hold its shape without dripping excess water. Excess water weakens the final cure and causes surface scaling.
Shovel the mix into the forms, using a scrap piece of 2x4 to 'stab' the wet concrete and release trapped air pockets. Overfill the forms by about half an inch.
Step 4: Screeding and Finishing
Drag a straight 2x4 board across the top of the forms in a sawing motion to 'screed' the concrete level. Once the bleed water (a shiny layer of water) evaporates from the surface, use a magnesium bull float to push down the aggregate and bring the cement paste to the top.
Run a concrete edging tool along the inside and outside edges to create a smooth, rounded bevel. This rounded edge is less prone to chipping when struck by a string trimmer or mower deck.
Step 5: Cutting Control Joints
The American Concrete Institute notes that concrete will crack; control joints simply dictate exactly where that cracking occurs by creating a planned weak point.
Using a concrete groover, cut control joints across the width of the border every 4 to 5 feet. Cut them to a depth of exactly one-quarter the thickness of the pour (approx. 3/4 inch deep for a 3-inch border). Timing is critical: cut the joints when the concrete is firm enough to support your weight but soft enough to cut without tearing the edges (usually 2 to 4 hours after pouring, depending on humidity).
Common Beginner Mistakes to Avoid
| Mistake | Consequence | The Fix |
|---|---|---|
| Stripping forms too early | Corners crumble and edges spall. | Wait a minimum of 48 hours before removing melamine forms. |
| Skipping the curing process | Rapid moisture loss causes deep shrinkage cracks. | Spray with a liquid curing compound or cover with damp burlap for 7 days. |
| Pouring on a 95°F+ day | Flash-setting prevents proper finishing. | Pour in the early morning or use a set-retarding admixture in the mix. |
| Ignoring the subgrade slope | Water pools against the house foundation. | Ensure the top of the concrete border slopes away from structures at a 2% grade. |
Frequently Asked Questions
Can I pour concrete borders directly against existing tree roots?
No. Pouring a continuous concrete trench over major structural roots will suffocate the tree and girdle the root system, eventually killing the tree and causing the concrete to crack as the roots expand. If roots are present, switch to a flexible steel edging or build an above-ground timber raised bed instead.
Do I need to seal the concrete border?
While not strictly mandatory, applying a penetrating silane/siloxane concrete sealer after the 28-day full cure period will drastically reduce water absorption. This prevents de-icing salts and freeze-thaw cycles from causing surface pitting and extends the lifespan of the border by decades.
How long before I can backfill mulch against the new border?
Concrete reaches roughly 70% of its compressive strength after 7 days, but you should wait the full 28 days before piling heavy, wet mulch or soil against the green concrete. Lateral earth pressure on uncured concrete can cause the border to tilt or bow outward.

