
Gardening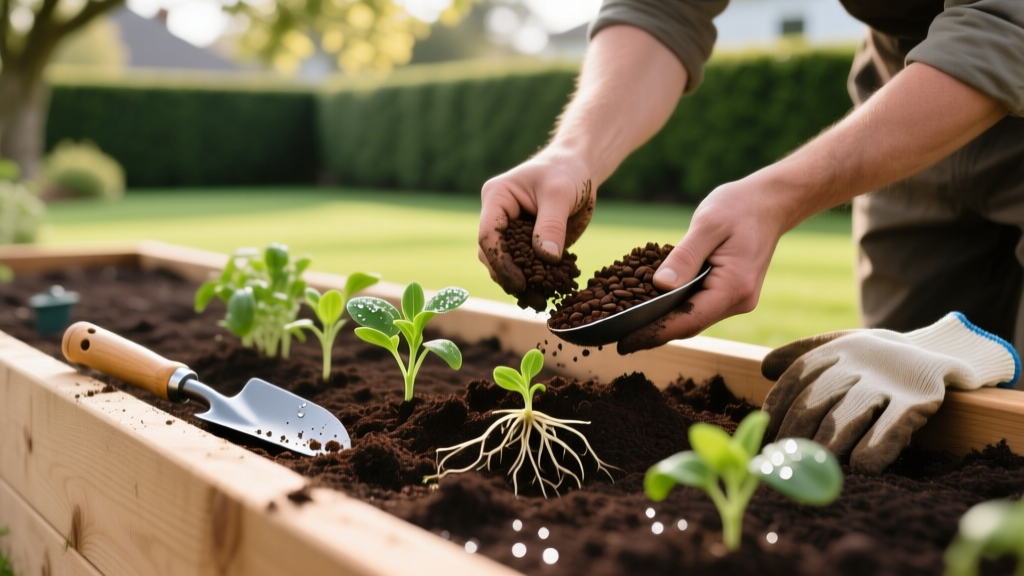
How to Safely Mix Coffee Grounds in Soil for Garden Plants
The Reality of Coffee Grounds in the Garden
For beginner gardeners, the daily ritual of brewing coffee presents an irresistible opportunity: free, organic fertilizer. However, dumping a wet, dense puck of French press grounds directly onto the base of a potted fern or tomato plant is a common mistake that can stunt growth, invite fungal diseases, and create an impenetrable soil crust. To successfully use coffee grounds in soil, you must understand their actual chemical composition and how they interact with the soil microbiome.
According to horticultural research from Penn State Extension, coffee grounds are an excellent source of slow-release nitrogen, but they require specific preparation and application rates to benefit plants rather than harm them. This guide breaks down the exact science, measurements, and methods for integrating coffee waste into your garden safely.
The Science: What Coffee Grounds Actually Do to Soil
Before mixing coffee grounds in soil, it is critical to dispel a few persistent gardening myths and look at the hard data.
The pH Myth
Many beginners assume coffee grounds are highly acidic and will drastically lower soil pH. In reality, the acidic compounds in coffee are water-soluble and end up in your mug. Brewed coffee grounds have a near-neutral pH ranging from 6.5 to 6.8. Only unbrewed, raw grounds possess a lower pH (around 5.0). Therefore, adding used grounds to your garden will not magically turn your soil into an acidic haven for blueberries or azaleas.
The Carbon-to-Nitrogen (C/N) Ratio
Despite their brown color, used coffee grounds are classified as a "green" composting ingredient. They boast a C/N ratio of approximately 20:1, which is remarkably close to the ideal 25:1 to 30:1 ratio required for rapid microbial decomposition. By volume, spent grounds contain roughly 2% Nitrogen, 0.3% Phosphorus, and 0.3% Potassium, making them a mild but valuable soil amendment.
⚠️ The Caffeine Allelopathy Warning:
Residual caffeine and tannic acids in fresh coffee grounds exhibit allelopathic properties—meaning they actively inhibit the germination and growth of competing plants. Never apply raw or freshly dumped coffee grounds directly around seedlings, newly sown seeds, or delicate transplants. The grounds must be composted or thoroughly aged in the soil before planting sensitive crops.
Three Proven Methods for Mixing Coffee Grounds in Soil
How you apply the grounds dictates their effectiveness. Choose the method that best fits your current gardening workflow.
Method 1: The Compost Integration (Safest for Beginners)
The most foolproof way to use coffee grounds is to process them through a compost bin first. The microbial heat of the compost pile breaks down any residual caffeine and tannins.
- Measure the Volume: Limit coffee grounds to a maximum of 20% of your total compost pile volume. Exceeding this ratio can create anaerobic, compacted pockets that smell like ammonia and stall the decomposition process.
- Balance with Browns: For every 1 gallon of wet coffee grounds, add 2 to 3 gallons of carbon-rich "browns" (dry autumn leaves, shredded cardboard, or straw).
- Turn Weekly: Use a pitchfork to aerate the pile every 7 days, ensuring oxygen reaches the microbes breaking down the dense grounds.
Method 2: Direct Soil Incorporation (For Established Beds)
If you want to bypass the compost bin and apply grounds directly to your raised beds or garden rows, you must prevent surface crusting.
- Scatter Thinly: Spread a layer no thicker than 1/2 inch over the soil surface.
- Mechanical Incorporation: Using a hand fork or cultivator, aggressively till the grounds into the top 4 to 6 inches of existing soil. This prevents the grounds from drying into a hydrophobic, water-repellent crust that blocks rain and irrigation from reaching plant roots.
- Pair with Mulch: After tilling, cover the amended soil with 2 inches of standard wood chip or straw mulch to retain moisture and regulate temperature.
Method 3: Liquid Fertilizer "Tea"
For container plants or a quick nutrient boost, you can extract the water-soluble nutrients without adding bulk organic matter to the soil.
- Steep 2 cups of used coffee grounds in a 5-gallon bucket of water for 24 to 48 hours.
- Strain the liquid through a fine mesh sieve or cheesecloth.
- Use the resulting pale-brown liquid to water your established ornamental plants once every two weeks.
Plant Compatibility Matrix: Where to Apply Coffee Grounds
Not all plants respond equally to organic matter amendments. Use this decision matrix to determine where your coffee grounds will provide the highest return on investment.
| Plant Category | Soil Preference | Coffee Ground Strategy | Max Application Rate |
|---|---|---|---|
| Heavy Feeders (Tomatoes, Peppers, Corn) | Rich, well-draining loam | Till into soil 3 weeks before transplanting to allow microbial breakdown. | 1/2 inch layer, incorporated |
| Acid-Lovers (Azaleas, Hydrangeas, Blueberries) | Acidic (pH 4.5 - 5.5) | Use as a compost additive only. Note: Brewed grounds will NOT lower pH. Use elemental sulfur instead. | 20% of compost volume |
| Root Vegetables (Carrots, Radishes) | Loose, sandy loam | Avoid direct application. Fresh grounds can cause root forking and attract fungus gnats in dense soils. | Fully composted only |
| Seedlings & Sprouts | Sterile seed-starting mix | Strictly avoid. Residual caffeine inhibits germination and stunts early root development. | 0% (Do not use) |
Common Beginner Mistakes and How to Fix Them
Even with the best intentions, misapplying coffee grounds can lead to frustrating garden failures. Here are the most frequent troubleshooting scenarios.
Mistake 1: Creating a Hydrophobic Crust
The Symptom: Water pools on the surface of your garden bed and runs off the edges, leaving the soil beneath bone dry.
The Cause: A thick layer of coffee grounds was left on the soil surface. As the fine particles dry out, they bind together into a hard, water-repellent barrier.
The Fix: Break up the crust with a hand rake. Mix the dried grounds with coarse organic matter like wood chips or pine needles to restore soil porosity, and water deeply to rehydrate the soil profile.
Mistake 2: Stalling the Compost Pile
The Symptom: Your compost bin smells sour, resembles wet mud, and has stopped heating up.
The Cause: You exceeded the 20% volume threshold for coffee grounds, overwhelming the carbon-degrading bacteria and creating an anaerobic environment.
The Fix: Immediately add high-carbon "browns" (shredded newspaper, dry leaves, or sawdust) at a 3:1 ratio to the excess grounds. Turn the pile vigorously to introduce oxygen and restore aerobic decomposition.
Mistake 3: Attracting Fungus Gnats
The Symptom: Swarms of tiny black flies emerge from your indoor potted plants or greenhouse beds.
The Cause: Wet coffee grounds left on the surface of indoor potting soil create the perfect moist, decaying environment for fungus gnat larvae.
The Fix: Scrape off the top layer of affected soil. Allow the top 2 inches of your indoor pots to dry out completely between waterings, and use a Bacillus thuringiensis israelensis (Bti) mosquito dunk dissolved in your watering can to eliminate the larvae.
Frequently Asked Questions
Can I use moldy coffee grounds from my countertop bin?
Yes. The blue-green mold that frequently grows on wet coffee grounds left in a kitchen pail is typically Trichoderma, a beneficial fungus that actively aids in the breakdown of organic matter. Scrape the moldy grounds directly into your outdoor compost bin or till them into garden soil. Do not use moldy grounds for indoor houseplants, as the spores can trigger indoor allergies.
Do coffee grounds repel slugs and snails?
While widely repeated on gardening blogs, the WSU Garden Professors network notes that caffeine can be toxic to slugs, but the concentration in used, brewed grounds is far too low to act as an effective deterrent. For reliable slug control, rely on iron phosphate baits or copper tape barriers instead of relying on a thin layer of spent grounds.
Is it safe to use coffee grounds from a local coffee shop?
Absolutely. Many cafes will gladly bag up their spent espresso and drip grounds for gardeners. However, commercial shop grounds may contain trace amounts of dairy, sugar syrups, or artificial flavorings if they are dumped into a shared knock-box. Request grounds from a dedicated espresso machine or standard drip brewer to ensure you are getting pure coffee waste without pest-attracting sugars.

