
Gardening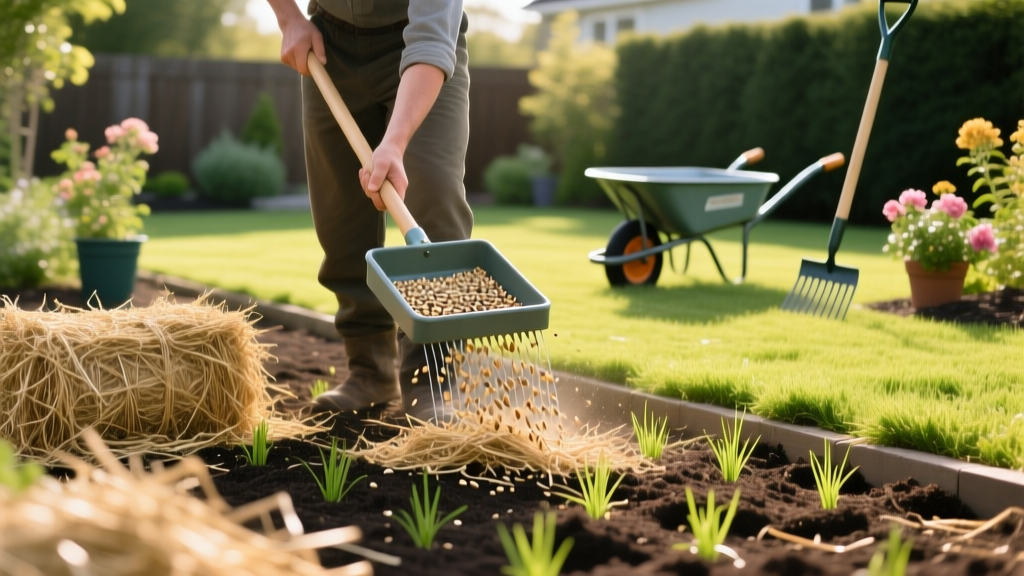
Seed Straw Application Guide for Lawn and Garden Seeding
The Science of Seed Straw in Germination Microclimates
Applying seed straw over newly sown lawns and garden beds is not merely a traditional practice; it is a scientifically backed method for manipulating the soil microclimate. During the critical 7 to 21-day germination window, seeds require consistent moisture and temperature regulation. Bare soil exposed to direct sunlight can fluctuate by 20°F or more in a single day, while surface moisture can evaporate within hours. According to NC State Extension's comprehensive mulch research, a light layer of straw reduces soil surface evaporation by up to 70% and buffers soil temperature variations by 5°F to 10°F.
Unlike heavy wood chips or dense compost, seed straw (typically wheat, oat, or barley stalks left after the grain head is removed) allows 80% to 90% of sunlight to penetrate while physically shielding the soil from wind erosion and the kinetic impact of heavy rain, which can wash away tiny seeds or cause soil crusting.
⚠️ CRITICAL WARNING: The Hay vs. Straw Trap
Never use hay for seed establishment. Hay is harvested as animal feed and contains the seed heads of grasses and legumes, meaning you are actively planting thousands of weed seeds into your garden. Straw is the hollow stalk left over after the grain is harvested. Always ask your supplier for weed-free certified seed straw to prevent introducing invasive agricultural weeds to your landscape.
Calculating Coverage: How Much Seed Straw Do You Need?
Over-mulching is the most common establishment failure. A layer that is too thick will block the light required for photosynthesis once the cotyledons emerge, leading to etiolated, weak seedlings that rot at the soil line. The ideal depth for seed straw is 1/4 to 1/2 inch—just enough so that roughly 25% to 30% of the soil surface is still visible through the mulch layer.
Standard rectangular bales of wheat straw typically weigh between 50 and 70 lbs. Based on 2026 agricultural supply pricing, expect to pay between $10 and $16 per bale, depending on regional transport costs and seasonal availability. Below is the exact coverage matrix for planning your purchase.
| Target Area (Sq Ft) | Bales Required (50-70 lbs) | Estimated Material Cost | Application Depth |
|---|---|---|---|
| 500 | 1 Bale | $10 - $16 | 1/2 inch |
| 1,000 | 2 Bales | $20 - $32 | 1/2 inch |
| 2,500 | 5 Bales | $50 - $80 | 1/2 inch |
| 5,000 | 10 Bales | $100 - $160 | 1/2 inch |
Step-by-Step Application for Lawn Seeding
Proper timing and technique dictate whether your straw acts as a protective blanket or a suffocating barrier. Follow these precise steps for broadcast lawn seeding, as recommended by Penn State Extension's lawn establishment guidelines.
- Prepare and Sow: Grade, rake, and broadcast your grass seed. Use a lawn roller or drag mat to ensure seed-to-soil contact. The seed should be pressed into the top 1/8 inch of soil.
- Shake, Don't Throw: Do not throw chunks of straw from the bale. Hold a handful of straw and shake it vigorously between your fingers or use a pitchfork to flake it apart in the air. This separates the compacted stalks.
- Apply at 1/4 to 1/2 Inch Depth: Walk backward across the seeded area, distributing the flaked straw evenly. You should easily be able to see the soil and grass seed through the straw layer. If you cannot see the soil, the layer is too thick.
- Water In Immediately: Apply a gentle mist of water over the straw. This wets the straw, increasing its weight so it won't blow away in the wind, and initiates the capillary action that draws moisture down to the soil.
Garden Bed and Vegetable Seeding Techniques
While lawn seeding relies on broadcast application, vegetable gardens require row-specific straw management. For large-seeded crops like beans, peas, and squash, you can apply straw immediately after planting, maintaining a 1/2 inch depth over the seed row.
For tiny, light-dependent seeds like carrots, lettuce, and celery, do not apply seed straw directly over the row. These seeds require direct UV light to trigger germination enzymes. Instead, apply the seed straw strictly in the inter-row spaces (the walkways between planting rows) to retain soil moisture and suppress weeds, leaving the 2-inch seed row completely bare until the seedlings reach 2 inches in height. Once established, you can gently pull the inter-row straw slightly over the root zones.
Seed Straw vs. Alternative Establishment Mulches
Seed straw is highly effective, but specific site conditions may warrant alternatives. Use this decision matrix to select the correct mulch for your specific establishment scenario.
| Mulch Type | Best Use Case | Moisture Retention | Drawbacks / Edge Cases |
|---|---|---|---|
| Wheat Seed Straw | Lawns, large garden beds, erosion control | Excellent | Can blow away on steep slopes without tackifier. |
| Pine Straw | Acid-loving plants, perennial beds, slopes | Good | Too thick/matted for tiny grass seed emergence. |
| Peat Moss | Small lawn patches, high-value turf | Superior | Becomes hydrophobic if allowed to dry out completely. |
| Fine Compost | Overseeding existing lawns, vegetable rows | Moderate | Can introduce weed seeds if not hot-composted properly. |
Common Establishment Failures and Troubleshooting
Even with perfect seed selection, improper straw management can derail establishment. Here is how to diagnose and fix the three most common seed straw failures.
1. Nitrogen Immobilization (The Carbon Tie-Up)
Wheat straw has a high Carbon-to-Nitrogen (C:N) ratio of approximately 80:1. When soil microbes break down high-carbon materials, they consume available soil nitrogen. Never till or mix seed straw into the soil. As long as the straw remains on the surface, it will not rob your seedlings of nitrogen. If you accidentally rototilled a thick layer of straw into your seedbed before planting, you must apply a fast-acting nitrogen amendment (like blood meal or a synthetic 46-0-0 urea at 1 lb per 1,000 sq ft) to compensate for the microbial tie-up.
2. Hydrophobic Matting and Crusting
If you apply straw over heavy clay soil and water it with a high-pressure hose nozzle, the kinetic force will push the fine clay particles up into the straw layer, creating a dense, impermeable crust once it dries. Seedlings will fail to penetrate this mat. Always use a fine mist or oscillating sprinkler for the first 14 days. If a crust forms, gently drag a leaf rake over the surface to break the tension without uprooting the germinating seeds.
3. Wind Displacement on Slopes
On grades steeper than a 15% slope, dry seed straw will slide or blow away before seeds anchor it. For sloped terrain, you must use a tackifier. You can purchase organic, guar-gum-based hydraulic mulch tackifiers at landscaping supply stores. Spray the tackifier over the straw immediately after application. Alternatively, pinning biodegradable jute netting over the straw provides mechanical stabilization while the root systems establish, a method heavily endorsed by the University of Minnesota Extension for erosion-prone sites.

