
Gardening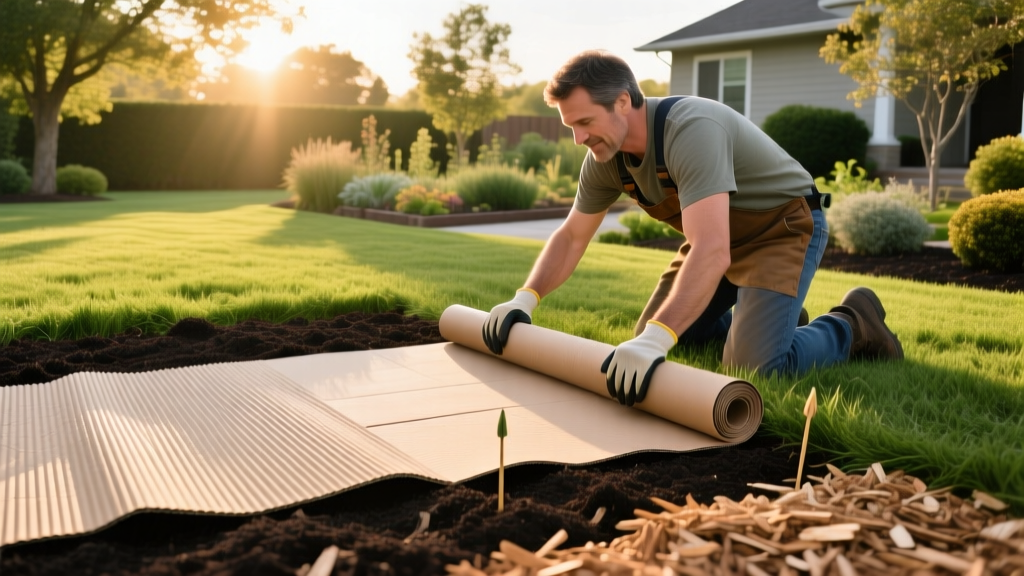
How to Sheet Mulch Over Grass: A Step-by-Step Soil Guide
Transforming a weedy, compacted lawn into a nutrient-dense garden bed does not require a rototiller, backbreaking sod removal, or chemical herbicides. Sheet mulching, often referred to as lasagna gardening, is a no-till soil amendment technique that smothers existing vegetation while simultaneously building deep, biologically active topsoil. By layering carbon-rich barriers with nitrogen-heavy organic matter, you replicate the natural forest floor decomposition process, yielding a friable, plant-ready bed in a single growing season.
The Science Behind Sheet Mulching
When you lay a thick, biodegradable barrier over living grass, you cut off photosynthesis. The grass and weeds die and decompose in place, returning their cellular nutrients to the soil profile. According to research from the Cornell Waste Management Institute, this undisturbed decomposition preserves soil structure, protects mycorrhizal fungal networks, and prevents the dormant weed seed bank from being exposed to sunlight.
Unlike mechanical tilling, which destroys soil aggregates and causes rapid carbon oxidation, sheet mulching feeds the soil food web from the top down. Earthworms and macroarthropods pull the organic matter into the mineral soil, creating natural aeration channels and depositing nutrient-dense castings directly in the root zone.
Material Sourcing: Carbon and Nitrogen Ratios
A successful sheet mulch requires a precise balance of 'browns' (carbon) and 'greens' (nitrogen). Sourcing the wrong materials can introduce persistent herbicides or create hydrophobic layers that repel water.
| Material Type | Examples | Application Thickness | Critical Warnings |
|---|---|---|---|
| Base Barrier (Carbon) | Unbleached corrugated cardboard, plain brown paper | 1-2 layers | Remove all plastic tape, staples, and glossy/waxed labels. Waxed cardboard is hydrophobic. |
| Activator Layer (Nitrogen) | Finished compost, aged manure, grass clippings | 1 to 2 inches | Test municipal compost for persistent herbicides (clopyralid/aminopyralid) which survive the composting process and stunt broadleaf plants. |
| Top Mulch (Carbon) | Arborist woodchips, shredded fall leaves, straw | 3 to 4 inches | Avoid dyed bark mulches (contain chemical colorants) and black walnut woodchips (contain juglone, which is allelopathic to tomatoes and peppers). |
The 5-Layer Sheet Mulch Application Protocol
Execute these steps in sequence to ensure complete weed suppression and optimal microbial breakdown.
- Scalp the Existing Vegetation: Mow the grass or weed-whack the area as close to the soil surface as possible (approx. 1 inch). Do not bag the clippings; leave them on the soil to act as an initial nitrogen source. Scalping removes the thatch barrier, ensuring the cardboard lays flush against the soil profile.
- Hydrate the Base Soil: Water the native soil deeply to field capacity. Earthworms and soil microbes require immediate moisture to begin breaking down the organic matter from the bottom up. Dry soil will stall the decomposition process for weeks.
- Lay the Cardboard Barrier: Place unbleached corrugated cardboard directly over the damp grass. Overlap all seams by a minimum of 6 to 8 inches. Weeds are highly phototropic and will exploit even a 2-inch gap to reach sunlight. Water the cardboard thoroughly until it is saturated and pliable, molding it to the contours of the ground.
- Apply the Compost Activator: Spread a 1 to 2-inch layer of high-quality, screened compost over the wet cardboard. This layer provides the immediate nitrogen required by fungi and bacteria to begin breaking down the carbon-heavy cardboard below it.
- Cap with Bulk Mulch: Top the bed with 3 to 4 inches of arborist woodchips. According to Penn State Extension, coarse woodchips regulate soil temperature, suppress secondary weed germination, and retain moisture far better than finely shredded commercial mulches.
Decomposition Timelines and Moisture Management
The timeline for your sheet mulch to break down into plantable soil depends heavily on the season of application and ambient temperatures.
Seasonal Breakdown Rates
- Spring Application (April-May): High microbial activity and warming soils will break down the cardboard in 8 to 10 weeks. The bed is usually ready for shallow-rooted transplants by mid-summer.
- Summer Application (July-August): Requires aggressive watering to prevent the mulch layers from drying out and becoming hydrophobic. Breakdown takes 10 to 12 weeks.
- Fall Application (September-November): The ideal time to sheet mulch. Winter moisture and freeze-thaw cycles naturally fracture the cardboard. By the following spring, the grass will be entirely decomposed, leaving a deep, rich loam.
Troubleshooting Common Sheet Mulch Failures
Even with careful application, specific edge cases can compromise the integrity of your sheet mulch. Use this diagnostic guide to address issues before they destroy your garden bed.
Warning: Rhizomatous Weed Penetration
Standard sheet mulching will easily smother annual weeds and standard turfgrass. However, aggressive perennial weeds with deep rhizomes—specifically Bermudagrass, Bindweed, and Quackgrass—can easily penetrate a single layer of cardboard. If your lawn is infested with these species, you must apply a double layer of heavy-duty cardboard, overlap seams by 12 inches, and allow the bed to smother for a full 12 months before planting.
Myth Busting: The 'Nitrogen Robbing' Fear
A common concern is that applying raw woodchips will cause nitrogen immobilization (where microbes consume all available soil nitrogen to break down the carbon). This is a misunderstanding of soil biology. Nitrogen drawdown only occurs when carbon is mixed into the soil. When woodchips are left on the surface as a top dressing, decomposition occurs strictly at the mulch-soil interface. The root zone below remains unaffected, and your plants will not suffer nitrogen deficiency.
Year-One Planting Strategy: Pocket Planting
If you need to plant immediately after sheet mulching, or if the cardboard has not fully decomposed, use the 'pocket planting' technique. Do not attempt to turn over the entire bed with a shovel, as this will bring dormant weed seeds to the surface and ruin the layered architecture.
Instead, pull back the top layer of woodchips with a hand rake. Use a sharp trowel or hori-hori knife to cut an 'X' through the damp cardboard. Dig your planting hole directly into the native soil beneath the cardboard. Place your transplant into the hole, backfill with the compost you set aside, and pull the woodchips back around the base of the plant, leaving a 2-inch bare ring around the stem to prevent collar rot. This method allows you to grow deep-rooted crops like tomatoes, brassicas, and peppers in the first season while the surrounding sheet mulch continues to build the soil ecosystem.

