
Gardening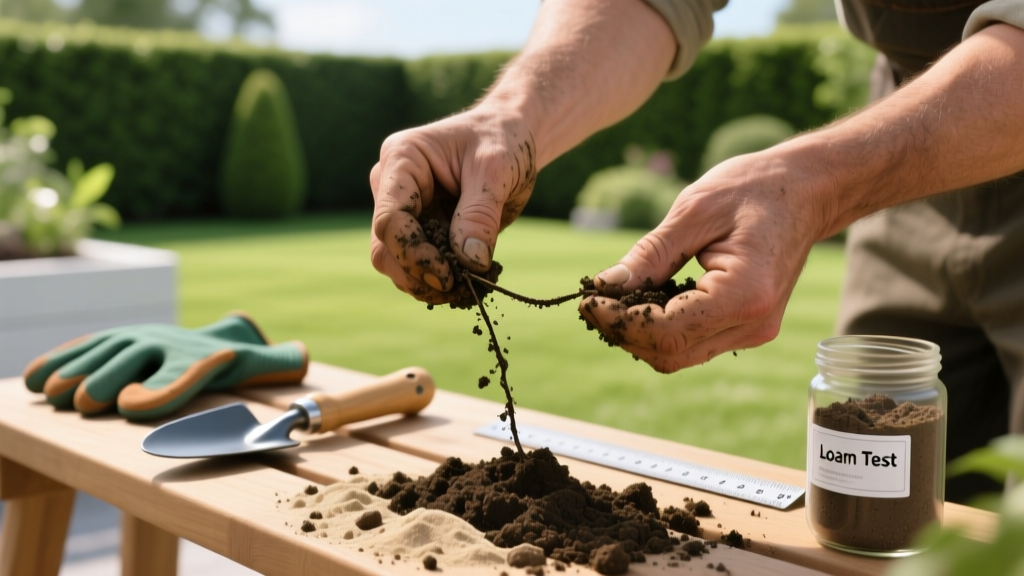
Master the Soil Ribbon Test: A Beginner Guide to Soil Texture
Why Soil Texture Dictates Your Garden's Success
Before you spend hundreds of dollars on premium fertilizers or rare perennial cultivars, you must understand the physical stage where those plants will grow: your soil texture. Soil texture refers to the relative proportions of sand, silt, and clay particles in your garden bed. This ratio dictates water infiltration, nutrient retention, and root penetration. While laboratory analysis provides exact percentages, the soil ribbon test is a free, immediate, and highly accurate field method used by agronomists and master gardeners to classify soil texture on the spot.
By mastering the soil ribbon test, you can diagnose drainage failures, predict drought stress, and select the exact soil amendments required to transform poor dirt into high-yielding loam.
The Physics of the Ribbon Test: Cohesion vs. Friction
The ribbon test relies on the physical properties of soil particles when lubricated by water.
- Clay particles are microscopic, plate-like structures. When wet, water molecules form a film between these plates, creating high cohesion and plasticity. This allows clay to be molded and extruded into a long ribbon.
- Sand particles are large, spherical, and lack surface charge. They rely on friction rather than cohesion. Wet sand crumbles and cannot hold a ribbon shape.
- Silt particles are intermediate in size, feeling like flour when dry, and offer minimal plasticity when wet.
Step-by-Step: How to Perform the Soil Ribbon Test
To get accurate results, you must control the moisture content. Testing soil that is too dry or too wet will yield false classifications.
Step 1: Sample Collection
Use a trowel to extract a soil sample from a depth of 2 to 6 inches. Discard the top 1 inch of soil, as it contains decomposing organic matter and surface debris that will interfere with the mineral texture reading. Remove any pebbles, roots, or earthworms.
Step 2: Moisture Calibration
Place roughly two tablespoons of soil in your palm. Add water drop-by-drop while kneading the soil until it reaches field capacity.
Field Capacity Check: Squeeze the soil ball tightly. It should hold its shape perfectly without crumbling, but no free water should drip out or leave your fingers glistening wet. If it drips, add more dry soil. If it crumbles, add more water.
Step 3: The Extrusion
Form the moist soil into a uniform cylinder about the thickness of a pencil. Place the cylinder between your thumb and the side of your index finger. Slowly and steadily, use your thumb to push the soil upward, extruding it into a flat ribbon. Measure the length of the ribbon before it breaks under its own weight.
The Soil Texture Decision Matrix
Use the table below to classify your soil based on the ribbon length and the tactile feel of the soil ball during the test.
| Ribbon Length | Tactile Feel (Grittiness) | Soil Classification | Water Retention & Drainage |
|---|---|---|---|
| Fails to form a ribbon | Very gritty, abrasive | Sand / Loamy Sand | Excessive drainage, low nutrient holding |
| Less than 1 inch | Gritty but holds shape | Sandy Loam | Good drainage, moderate retention |
| 1 to 1.5 inches | Smooth, slightly gritty | Loam / Silt Loam | Ideal balance for most garden crops |
| 1.5 to 2 inches | Smooth, sticky, minimal grit | Clay Loam / Silty Clay Loam | Slow drainage, high nutrient retention |
| Greater than 2 inches | Very sticky, highly plastic | Silty Clay / Heavy Clay | Poor drainage, prone to compaction |
Troubleshooting Common Beginner Mistakes
Warning: The Organic Matter Interference
If your garden beds have been heavily amended with peat moss, compost, or leaf mold for years, the organic fibers can act like a binder, allowing sandy soils to form a weak ribbon. If you suspect high organic matter, perform a loss-on-ignition test (baking a dry soil sample at 400°F to burn off organics) or send a sample to a university extension lab for a hydrometer analysis, which separates particles by settling velocity rather than plasticity.
Another frequent error is extruding the ribbon too quickly. Pushing the soil aggressively generates shear force that snaps the ribbon prematurely, causing you to misclassify a clay loam as a sandy loam. Maintain a slow, steady upward pressure of about one second per half-inch of extrusion.
Amending Your Soil Based on Ribbon Results
Once you have classified your soil texture, you must apply the correct amendments to optimize the pore space for root growth. According to sustainable agriculture guidelines published by SARE (Sustainable Agriculture Research and Education), improving soil structure requires targeted physical and biological interventions.
Fixing Heavy Clay (Ribbon > 2 inches)
Critical Mistake: Never add sand to heavy clay to improve drainage. Unless you add sand at a rate exceeding 50% of the total soil volume, the small clay particles will simply fill the voids between the large sand particles, creating a concrete-like matrix that suffocates roots.
The Solution: Incorporate expanded shale (often sold under brand names like PermaTill or Espoma Soil Perfector) at a rate of 10% to 20% by volume. Expanded shale is a lightweight, porous aggregate that permanently fractures the clay matrix without compacting. Combine this with 2 to 3 inches of composted pine bark fines, tilling to a depth of 6 inches.
Fixing Sandy Soil (No Ribbon)
Sandy soil leaches nitrogen and potassium rapidly. To increase the cation exchange capacity (CEC), incorporate biochar at a rate of 5 to 10 pounds per 100 square feet. Biochar provides a highly stable, porous carbon structure that holds moisture and nutrients. Follow this with a 2-inch top-dressing of vermicompost to introduce the microbial life necessary to bind sand particles into stable aggregates.
Ribbon Test vs. Jar Test vs. Lab Analysis
While the soil ribbon test is the fastest method for field evaluation, it is part of a broader soil assessment toolkit. University extensions, such as the University of Minnesota Extension Soils Hub, recommend combining field tests with periodic lab analyses for comprehensive garden management.
- The Ribbon Test: Best for instant texture classification and on-the-spot amendment decisions. Costs $0. Takes 2 minutes.
- The Mason Jar Test: Involves shaking soil in water and letting it settle for 48 hours to measure distinct sand, silt, and clay layers. Better for visualizing exact percentages, but highly inaccurate if the soil contains flocculated clays or organic matter that refuses to settle.
- University Lab Hydrometer Test: Costs $25–$45. Uses chemical dispersants (like sodium hexametaphosphate) to separate microscopic clay particles that naturally clump together. This is the only way to get a mathematically perfect texture triangle reading.
Frequently Asked Questions
Can I perform the soil ribbon test on potting mix?
No. Commercial potting mixes are largely composed of peat moss, coir, perlite, and pine bark. The ribbon test is designed exclusively for mineral soils (sand, silt, clay). Organic soilless mixes will not ribbon correctly and require a different assessment of water-holding capacity.
Does soil moisture affect the ribbon test results?
Absolutely. If the soil is too dry, even heavy clay will crumble and fail to form a ribbon. If the soil is saturated (water drips when squeezed), the excess water acts as a lubricant, causing the ribbon to slide and break prematurely. Achieving exact field capacity moisture is the most critical step in the process.
How often should I re-test my garden soil texture?
Mineral soil texture (the sand/silt/clay ratio) does not change over time unless you physically import new topsoil or experience severe erosion. You only need to perform the ribbon test once when establishing a new garden bed. However, you should test your soil's chemistry (pH and NPK levels) via a lab test every 2 to 3 years.

