
Gardening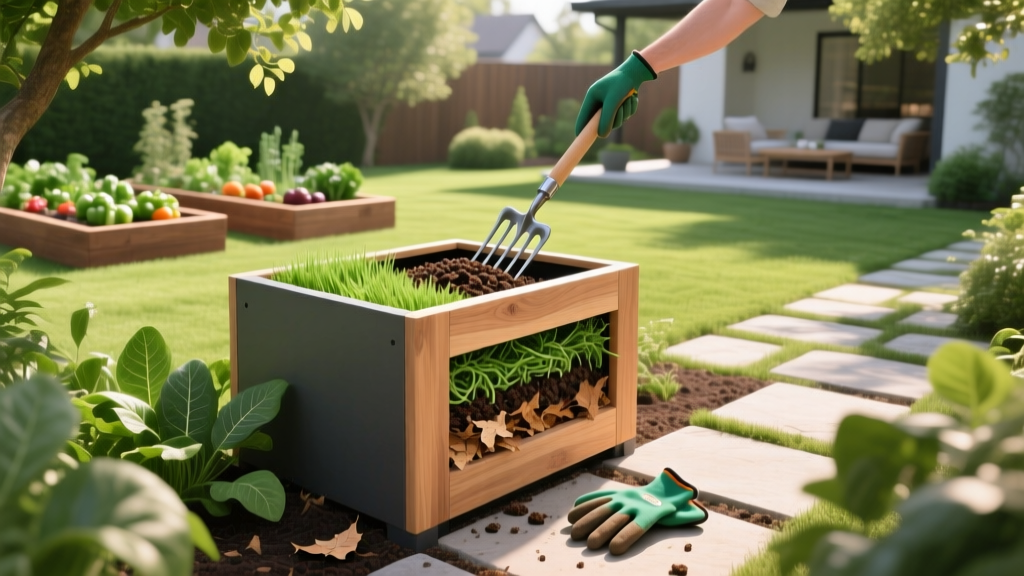
How to Start Composting at Home for Rich Soil Amendments
Transforming kitchen scraps and yard waste into a potent soil amendment is one of the highest-ROI activities a home gardener can undertake. Finished compost improves soil cation exchange capacity (CEC), increases water retention by up to 20% in sandy soils, and introduces beneficial microbiology that synthetic fertilizers cannot replicate. However, learning how to start composting at home requires moving beyond simply throwing apple cores into a pile. It demands an understanding of microbial thermodynamics, moisture management, and structural aeration.
The Core Science: Carbon-to-Nitrogen (C:N) Ratios Explained
The most common reason home compost piles fail or emit foul odors is an imbalance in the Carbon-to-Nitrogen (C:N) ratio. Microbes require carbon for energy and nitrogen for protein synthesis and reproduction. The ideal starting C:N ratio for a home compost pile is between 25:1 and 30:1 by weight. If the ratio drops below 20:1 (too much nitrogen), the pile will go anaerobic and release ammonia gas. If it exceeds 40:1 (too much carbon), microbial activity slows to a crawl.
According to the EPA's composting guidelines, balancing 'greens' (nitrogen-rich) and 'browns' (carbon-rich) is essential. Below is a precise breakdown of common household materials to help you formulate your mix.
| Material Type | Examples | Approximate C:N Ratio | Role in Pile |
|---|---|---|---|
| High Nitrogen (Greens) | Vegetable scraps, coffee grounds, fresh grass clippings | 15:1 to 20:1 | Microbial protein & heat generation |
| Balanced | Manure (herbivore), spent brewery grain | 20:1 to 25:1 | Accelerator / Inoculant |
| High Carbon (Browns) | Dry autumn leaves, straw, shredded corrugated cardboard | 50:1 to 80:1 | Energy source & structural bulking |
| Extreme Carbon | Wood chips, sawdust, pine needles | 200:1 to 500:1 | Aeration (use very sparingly) |
Pro Tip: Coffee grounds are technically brown in color, but they are a nitrogen-dense 'green' material with a C:N ratio of roughly 20:1. Always pair them with dry leaves or shredded paper.
Choosing the Right Compost Bin for Your Space
Your bin selection dictates your aeration strategy and pest resistance. While open piles work for large rural properties, suburban and urban gardeners require contained systems to retain heat and deter rodents. Here is a comparison of the primary systems available in 2026:
1. Dual-Chamber Tumblers (Best for Speed and Small Spaces)
- Top Model: FCMP Outdoor IM4000 Dual Chamber Tumbler (Approx. $99 - $115)
- Pros: Elevated design prevents rodent access; built-in aeration fins mix material effortlessly; dual chambers allow continuous batch processing.
- Cons: Limited capacity (typically 37 gallons); can dry out quickly in summer; requires physical strength to turn when full.
2. Stationary Slatted Bins (Best for Volume and Soil Integration)
- Top Model: Cedar Wood Compost Bin Kits or DIY Pallet Bins (Approx. $60 - $150)
- Pros: Direct ground contact allows earthworms and beneficial fungi to enter; handles high volumes of yard waste; excellent natural insulation.
- Cons: Requires manual turning with a pitchfork or compost aerator tool; vulnerable to burrowing pests if not lined with 1/2-inch hardware cloth.
3. Enclosed Plastic Digesters (Best for Kitchen Scraps Only)
- Top Model: Soil Saver Classic Compost Bin (Approx. $85 - $100)
- Pros: Locking lid deters raccoons; dark plastic absorbs solar heat; compact footprint.
- Cons: Poor bottom aeration; can become a slimy, anaerobic mess if overloaded with wet kitchen scraps without sufficient dry browns.
Step-by-Step: Building Your First Compost Pile
Follow this precise framework to establish a thermophilic (hot) compost pile that breaks down material in 8 to 12 weeks, rather than the 6 to 12 months typical of passive cold composting.
- Establish the Base: Start with a 4-to-6-inch layer of coarse, high-carbon material like wood chips or thick twigs at the bottom of your bin. This creates a passive aeration plenum for oxygen to enter from below.
- Build the Core Volume: A hot pile requires a minimum critical mass of 27 cubic feet (3 feet wide x 3 feet long x 3 feet high) to insulate the core and retain heat. Add your greens and browns in alternating 3-inch layers.
- Inoculate the Pile: Sprinkle a 1-inch layer of native garden soil or finished compost between every few layers. This introduces the initial microbial workforce (Bacillus and Actinomycetes species) required to jumpstart decomposition.
- Hydrate to Field Capacity: Water each layer as you build. The target moisture content is 40% to 60%. Use the 'wrung-out sponge' test: grab a handful of material (wearing gloves) and squeeze. Only one or two drops of water should escape. If it streams, it is too wet; if it crumbles, it is too dry.
- Monitor the Thermophilic Phase: Insert a 20-inch dial compost thermometer (such as the REOTEMP Backyard Compost Thermometer, approx. $35) into the center of the pile. Within 48 hours, temperatures should spike to 130°F–160°F (54°C–71°C). This heat phase is critical for destroying weed seeds and plant pathogens.
⚠️ Contamination Warning: Never add meat, dairy, cooking oils, or pet waste (dog/cat feces) to a standard home compost bin. These materials attract severe pest pressure and require sustained temperatures above 160°F to destroy dangerous pathogens like E. coli and Salmonella, which home piles rarely maintain consistently.
Troubleshooting Common Compost Failures
Even well-managed piles encounter biological bottlenecks. Use this diagnostic matrix to correct issues before they ruin your batch.
| Symptom | Probable Cause | Corrective Action |
|---|---|---|
| Pile smells like ammonia or rotten eggs | Too much nitrogen (low C:N ratio) or excessive moisture causing anaerobic conditions. | Turn the pile immediately to introduce oxygen. Mix in 3 parts dry shredded leaves or cardboard to 1 part existing material. |
| Temperature drops below 100°F after initial spike | Microbes have consumed available nitrogen or the pile has dried out. | Check moisture with the sponge test. If dry, water while turning. If moist, add a nitrogen boost like alfalfa meal or fresh grass clippings. |
| Material is recognizable after 3 months | Pieces are too large, or the C:N ratio is too heavily weighted toward extreme carbon (wood). | Chop or shred all inputs to 1-2 inch pieces before adding. Shred dry leaves with a lawn mower before composting. |
| Swarm of fruit flies (vinegar flies) | Exposed kitchen scraps on the surface of the pile. | Always bury fresh kitchen scraps at least 6 inches deep into the center of the pile and cover with a 'brown' cap layer. |
Harvesting and Applying Your Finished Soil Amendment
Knowing when your compost is finished is just as critical as starting it correctly. According to Penn State Extension, finished compost should no longer generate heat, even after being turned and moistened. It will have a dark, crumbly texture, an earthy aroma (reminiscent of a forest floor after rain), and the original materials will be entirely unrecognizable.
The Curing Phase
Once the thermophilic phase ends and the pile cools to ambient air temperature, do not apply it immediately. Allow the compost to 'cure' for 3 to 4 weeks. This stabilization period allows pH levels to neutralize (finished compost typically sits between 6.5 and 7.5) and gives slow-acting fungi time to colonize the amendment.
Application Rates for Lawns and Gardens
- Established Lawns (Topdressing): Apply a thin layer, no more than 1/4 inch to 1/2 inch thick, immediately after core aeration in the fall. This allows the amendment to filter into the aeration holes and reach the root zone.
- New Vegetable Beds: Incorporate 2 to 3 inches of compost into the top 6 inches of native soil using a broadfork or tiller prior to spring planting. This provides roughly 20-30% organic matter by volume, the ideal threshold for vegetable production.
- Perennials and Shrubs: Apply a 1-inch to 2-inch layer as a mulch around the drip line of the plant, keeping it 2 inches away from the main stem to prevent crown rot.
By mastering the biological mechanics of decomposition, you transition from simply disposing of yard waste to actively manufacturing a premium, biologically active soil amendment. For deeper insights into regional composting regulations and large-scale municipal drop-off programs, consult the Cornell Waste Management Institute resources.

