
Gardening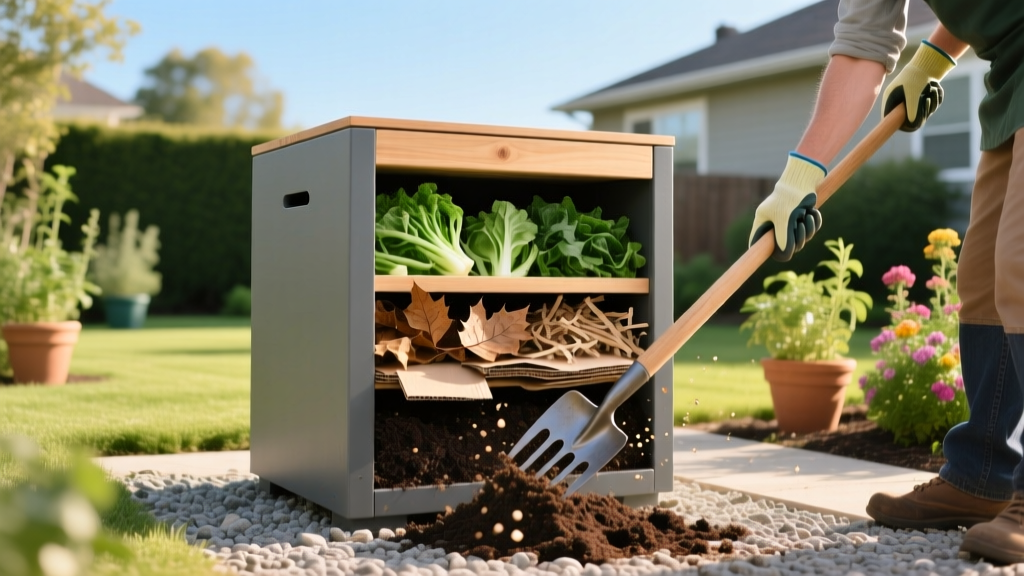
Starting a Compost Bin: The 18-Day Hot Composting Method
The Thermodynamics of Rapid Decomposition
Starting a compost bin for hot, rapid decomposition is an exercise in applied microbiology. The 18-day Berkeley method relies on thermophilic bacteria—specifically Bacillus and Actinomycetes species—to break down organic matter at temperatures between 131°F and 150°F (55°C–65°C). At these temperatures, the metabolic heat generated by microbial respiration is trapped within the pile, accelerating enzymatic breakdown while simultaneously destroying common soil pathogens and weed seeds. According to the EPA's composting guidelines, maintaining 131°F for three consecutive days is the baseline requirement for pathogen reduction.
Cold composting (simply piling yard waste and waiting 6 to 12 months) is passive and forgiving, but it fails to eliminate invasive weed seeds like bindweed or bermudagrass rhizomes. Hot composting demands precise calibration of volume, moisture, aeration, and the carbon-to-nitrogen (C:N) ratio, but it yields a stable, humus-rich soil amendment in under three weeks.
Engineering the Bin: Minimum Volumes and Materials
The most common failure mode when starting a compost bin is building an enclosure that is too small. To achieve thermophilic temperatures, the pile must possess a minimum volume of 27 cubic feet (a 3x3x3 foot cube). This specific dimension optimizes the surface-area-to-volume ratio, insulating the core microbiome from ambient temperature fluctuations while allowing sufficient gas exchange at the edges.
2026 Material Cost and Performance Matrix
| Bin Architecture | Estimated Cost (2026) | Aeration Profile | Thermal Retention | Lifespan |
|---|---|---|---|---|
| Untreated Cedar Pallets (3-bin system) | $0 – $60 | High (slatted gaps) | Moderate (requires tarp cover) | 4–6 years |
| 1/2-inch Galvanized Hardware Cloth Cylinder | $35 – $55 | Maximum (360-degree airflow) | Low (edges dry out quickly) | 10+ years |
| Enclosed Dual-Chamber Tumbler | $140 – $280 | Restricted (small vent holes) | High (sealed plastic drum) | 5–8 years |
| CMU (Concrete Block) U-Shape | $80 – $120 | Low (front-facing only) | High (thermal mass of concrete) | Permanent |
Expert Warning on Tumblers: While heavily marketed to beginners, enclosed plastic tumblers rarely achieve true hot composting temperatures in climates where ambient air drops below 60°F. The small volume (typically 15–20 cubic feet) and lack of ground-contact microbial inoculation result in prolonged mesophilic stalling. For the 18-day method, open-bottom, ground-contact bins are mandatory.
Calibrating the 30:1 Carbon-to-Nitrogen Ratio
The heuristic of 'greens and browns' is functionally inadequate for hot composting. Carbon provides the energy (calories) for bacteria, while nitrogen provides the protein necessary for cellular reproduction. The Cornell Waste Management Institute identifies 30:1 as the optimal starting C:N ratio by weight. If the ratio drops below 20:1, excess nitrogen off-gases as ammonia. If it exceeds 40:1, microbial reproduction halts due to nitrogen starvation.
Real-World C:N Values of Common Feedstocks
- Wood Ash: 0:1 (Pure mineral, use strictly as a pH buffer, max 5% of volume)
- Fresh Grass Clippings: 15:1 (High N, high moisture, compacts easily)
- Coffee Grounds: 20:1 (Despite the brown color, this is a potent nitrogen source)
- Kitchen Vegetable Scraps: 25:1 (Moderate N, high water content)
- Dry Autumn Oak Leaves: 50:1 (High C, lignin-heavy, requires shredding)
- Shredded Corrugated Cardboard: 350:1 (Extreme C, excellent for moisture absorption)
- Pine Sawdust: 400:1 (Avoid in large quantities; binds nitrogen and lowers pH)
The Mixing Formula: To achieve a 30:1 ratio using fresh grass clippings (15:1) and dry oak leaves (50:1), mix them in a 2:1 ratio by volume. Always shred high-carbon materials to a 1/2-inch to 2-inch particle size. Whole leaves mat together, creating anaerobic water-logged layers that produce hydrogen sulfide gas.
The 18-Day Turning Schedule and Temperature Targets
The Berkeley method requires aggressive mechanical intervention to redistribute heat, moisture, and oxygen. Oxygen levels inside the pile must remain above 5% to prevent anaerobic bacteria from taking over. Use a 24-inch dial probe thermometer to monitor the core temperature daily.
- Day 1 (Assembly): Build the entire 27-cubic-foot pile at once. Water each 4-inch layer as you build until the material feels like a wrung-out sponge (40-60% moisture content). Do not compress the material.
- Days 2–4 (Mesophilic Phase): Do not turn. Mesophilic bacteria begin breaking down simple sugars. The core temperature will naturally climb from ambient to 110°F–120°F. The pile volume will shrink by 20%.
- Day 5 (First Turn): Use a pitchfork to completely dismantle and rebuild the pile. Move the outer 6 inches of cool material into the new core, and push the hot core material to the outside. This redistributes the microbial populations. Rehydrate if the outer layers look ashy or dry.
- Days 6–18 (Thermophilic Phase): Turn the pile every 48 hours (every other day). The core temperature should spike to 140°F–155°F within 12 hours of turning. If temperatures exceed 160°F, turn immediately to dissipate excess heat and prevent the death of beneficial Actinomycetes.
'The physical act of turning the pile is not just about mixing; it is a vital aeration event. A pitchfork introduces thousands of micro-pockets of oxygen that exhaust fans or passive vents cannot replicate in a dense, wet matrix.' — Dr. Linda Chalker-Caroli, Michigan State University Extension
Troubleshooting Anaerobic Failure Modes
Even with precise calculations, environmental variables can push the pile out of equilibrium. Use this diagnostic framework to correct failures within 24 hours.
| Symptom / Odor | Probable Cause | Corrective Action |
|---|---|---|
| Sharp ammonia smell | C:N ratio is too low (excess nitrogen) | Mix in 3-4 cubic feet of shredded cardboard or dry straw immediately. Turn thoroughly. |
| Rotten egg / sulfur smell | Moisture >70%, causing anaerobic pockets | Turn the pile and incorporate 2 gallons of coarse wood chips or dry leaves to absorb water and create air voids. |
| Pile is cool (below 90°F) after Day 4 | Insufficient moisture or lack of nitrogen | Check moisture with a probe. If dry, water while turning. If wet, add blood meal or fresh grass clippings to spike nitrogen. |
| White, ashy substance on edges | Actinomycetes thriving in dry, cool zones | This is normal, but indicates the outer layers are too dry. Fold outer layers into the core during the next turn. |
Curing and Application Rates for Garden Beds
By Day 18, the pile will have shrunk to roughly 50% of its original volume, and temperatures will naturally drop back to ambient levels as the readily available carbon and nitrogen are exhausted. However, the compost is not yet ready for direct root contact. It must cure for 21 to 30 days. During curing, humification occurs—complex organic polymers bind together to form stable humus.
The Seed Germination Bioassay
Before applying the compost to sensitive vegetable transplants, perform a bioassay to test for residual phytotoxic organic acids. Fill a small pot with a 50/50 mix of your finished compost and sterile potting soil. Plant 10 fast-germinating seeds (radish or cress). If 8 or more seeds germinate and show healthy green cotyledons within 5 days, the compost is fully cured and safe for use.
Application Metrics for Soil Amendment
According to Penn State Extension, finished compost should be viewed as a biological inoculant and soil conditioner, not a primary NPK fertilizer. Its nutrient analysis typically hovers around 1-1-1, but its cation exchange capacity (CEC) dramatically improves soil nutrient retention.
- New Raised Bed Construction: Incorporate at a maximum rate of 20% by total soil volume. Exceeding 30% compost can lead to excessive moisture retention and root hypoxia.
- Annual Vegetable Bed Top-Dressing: Apply a 1/4-inch to 1/2-inch layer over the soil surface in early spring. Soil macrofauna (earthworms and arthropods) will incorporate the organic matter into the topsoil within 6 weeks.
- Perennial and Shrub Mulching: Apply a 2-inch ring around the drip line, keeping the compost 3 inches away from the main stem or trunk to prevent collar rot.
Mastering the 18-day method requires treating your compost bin as a living bioreactor. By strictly controlling the 30:1 C:N ratio, maintaining 27 cubic feet of mass, and adhering to the 48-hour turning schedule, you will produce a premium, pathogen-free soil amendment that outperforms commercial bagged products in both microbial diversity and structural stability.

