
Gardening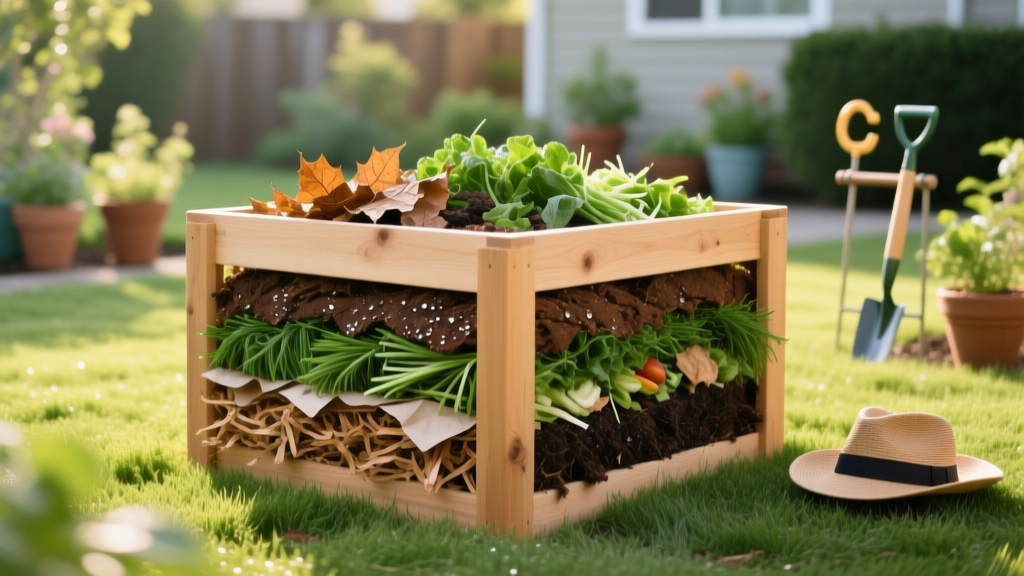
Starting a Compost Pile: Exact C:N Ratios and Layering Framework
When starting a compost pile, most homeowners rely on guesswork, tossing kitchen scraps and yard waste into a corner and hoping for the best. However, high-performance composting is not mere decomposition; it is the active management of a biological reactor. To produce dark, pathogen-free, nutrient-dense humus in 60 to 90 days rather than a year, you must engineer the environment for thermophilic bacteria—specifically Bacillus and Actinomycetes species—to thrive. This requires precise control over the carbon-to-nitrogen (C:N) ratio, moisture content, and pile geometry.
According to the Environmental Protection Agency (EPA), proper aeration and moisture management are the primary drivers of successful aerobic decomposition. Below, we break down the exact mathematics and structural frameworks required to build a hot compost pile from scratch.
The Core Mathematics: Carbon-to-Nitrogen (C:N) Ratios
The most common failure point when starting a compost pile is misunderstanding the C:N ratio. Microbes require carbon for energy and nitrogen for protein synthesis and cellular reproduction. The ideal target ratio for a hot compost pile is 25:1 to 30:1 by dry weight. If the ratio drops below 20:1, excess nitrogen volatilizes as ammonia gas, creating foul odors and losing valuable nutrients. If the ratio exceeds 40:1, microbial reproduction stalls, and the pile remains cold for months.
Pro Tip: Never calculate C:N ratios by volume. A gallon of fluffy dry leaves has vastly different mass and carbon content than a gallon of dense, wet grass clippings. Always estimate ratios based on dry weight, or use the standardized volume approximations provided in the layering guide below.
Common Materials and Their Exact C:N Profiles
| Material | C:N Ratio (Dry Weight) | Average Moisture | Primary Role |
|---|---|---|---|
| Oak Leaves (Dry) | 60:1 | 15% | Carbon / Structure |
| Pine Needles | 80:1 | 20% | Carbon / Acidifier |
| Shredded Cardboard | 350:1 | 10% | Carbon / Bulking Agent |
| Grass Clippings (Fresh) | 17:1 | 75% | Nitrogen / Heat Source |
| Coffee Grounds | 20:1 | 60% | Nitrogen / Microbe Food |
| Vegetable Scraps | 19:1 | 80% | Nitrogen / Moisture |
Site Selection and Bin Dimensions for Thermal Retention
Thermophilic composting requires the core temperature to reach between 131°F and 160°F. This heat is critical for destroying weed seeds, neutralizing plant pathogens, and accelerating the breakdown of complex lignins. To achieve this, your pile must meet a minimum critical mass.
Research from the University of Minnesota Extension highlights that a minimum volume of 1 cubic meter (approximately 3x3x3 feet) is required to insulate the core and retain microbial heat. If your pile is smaller, the surface-area-to-volume ratio is too high, and heat dissipates into the surrounding air faster than the bacteria can generate it. Conversely, piles larger than 5x5x5 feet often suffer from core compaction, cutting off oxygen and forcing the center into anaerobic decay.
- Optimal Dimensions: 3 feet wide × 3 feet deep × 3 feet high.
- Base Preparation: Place the pile directly on bare soil to allow earthworms and native microbes to migrate upward. Avoid placing it on concrete or asphalt, which blocks drainage and aeration.
- Sun Exposure: Partial shade is ideal. Full sun will dry out the pile rapidly, requiring daily watering, while deep shade may keep ambient temperatures too low in early spring.
The 4-Layer Lasagna Method: Step-by-Step Assembly
Rather than dumping materials randomly, build your pile in distinct, measured layers. This ensures an even distribution of moisture, oxygen, and nutrients.
- Layer 1: The Aeration Base (4 inches thick)
Start with coarse, woody materials like pruned twigs, small branches, or corn stalks. This creates a macro-pore network at the bottom of the pile, allowing ambient air to be drawn upward through the core via the chimney effect. - Layer 2: The Carbon Sponge (6 inches thick)
Add dry, brown materials such as shredded autumn leaves, straw, or torn corrugated cardboard. This layer absorbs excess moisture from the nitrogen layer above and provides the bulk carbon required for energy. - Layer 3: The Nitrogen Engine (2 to 3 inches thick)
Add fresh, green materials like grass clippings, vegetable peels, and coffee grounds. This is the primary food source for the initial bacterial bloom. Keep this layer thinner than the carbon layer to maintain the 30:1 overall ratio. - Layer 4: The Inoculant and Moisture Cap (1 inch thick)
Sprinkle a thin layer of finished compost, forest duff, or plain topsoil over the greens to introduce diverse microbial colonies. Lightly water the entire sequence until the materials feel like a wrung-out sponge (approximately 40-60% moisture content).
Repeat Layers 2 through 4 until the bin reaches the 3-foot height mark. Cap the very top with a 4-inch layer of dry leaves or straw to trap heat and deter fruit flies.
Troubleshooting Thermal and Olfactory Failures
Even with precise measurements, environmental variables can shift the pile's biology. Use this diagnostic matrix to correct issues within 24 hours of detection.
| Symptom | Diagnostic Cause | Corrective Action |
|---|---|---|
| Sharp Ammonia Odor | C:N ratio dropped below 20:1 (excess nitrogen) | Mix in 3 parts shredded cardboard or dry leaves by volume to absorb and balance the excess nitrogen. |
| Rotten Egg / Sulfur Smell | Anaerobic compaction, moisture >65% | Turn the pile aggressively with a pitchfork. Integrate 4-inch woodchips to restore macro-pores and oxygen flow. |
| Core Temp < 90°F (Dry) | Moisture content dropped below 30% | Add 2 gallons of water per cubic yard, turn the pile, and cover with a dark tarp to retain hydration. |
| Core Temp < 90°F (Moist) | Nitrogen starvation or insufficient mass | Add 1 lb of blood meal or fresh grass clippings. Verify the pile meets the minimum 3x3x3 ft dimensions. |
Accelerators and Inoculants: Separating Fact from Marketing
The garden center aisle is filled with commercial 'compost starters' and 'accelerators' promising to speed up decomposition. From a microbiological standpoint, these products are largely unnecessary. The bacteria and fungi required for composting are already present on the surfaces of your yard waste and in the soil.
Warning: Avoid adding synthetic nitrogen fertilizers (like urea or Miracle-Gro) to 'speed up' a slow pile. Synthetic salts can desiccate and kill native microbial populations, halting the composting process entirely. If you need a nitrogen boost, use organic sources like blood meal, alfalfa meal, or fresh manure.
Instead of spending $15 to $25 on a commercial powder, use a natural inoculant. Two shovels full of mature compost from a previous batch, or a few handfuls of decomposing leaf litter from a healthy forest floor, will introduce a vastly superior and more diverse microbial consortium than any shelf-stable retail product.
Curing and Application as a Soil Amendment
A hot pile will typically run its thermophilic phase in 21 to 30 days, after which the temperature will slowly drop back to ambient levels. However, a cool pile is not necessarily a finished pile. The compost must undergo a 'curing' phase, where mesophilic microbes and fungi break down the remaining complex humic acids. This curing phase takes an additional 30 to 60 days.
The Jar Test for Maturity
Before applying your compost to garden beds or using it as a seed-starting medium, verify its maturity using the jar test. Place a handful of moist compost into a glass mason jar, seal the lid tightly, and leave it in a warm room for three days. When you open the jar, it should smell earthy and rich, like a forest floor after a rainstorm. If it smells sour, acidic, or like ammonia, the compost is still actively breaking down and will rob your garden soil of oxygen and nitrogen if applied immediately. Let it cure for another two weeks and test again.
Once fully cured, screen the compost through a 1/2-inch hardware cloth mesh. The fine, dark material that passes through is a premium soil amendment, teeming with beneficial biology and capable of increasing soil cation exchange capacity (CEC), improving water retention in sandy soils, and loosening heavy clay profiles.

