
Gardening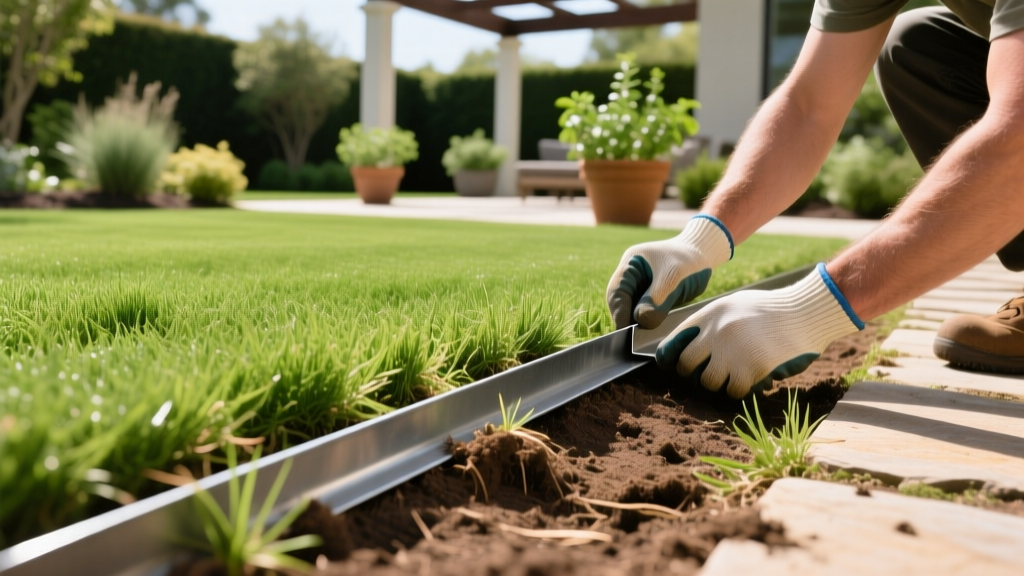
Bordering Garden Beds: Diagnose and Fix Edging Failures
A poorly executed garden border creates three primary headaches: aggressive turfgrass invading your soil, mulch washing onto your lawn, and mower wheels dropping into trenches to scalp your grass. When bordering garden beds, homeowners often rely on shallow plastic barriers or purely aesthetic edging that fails under environmental stress. True landscape edging must function as a physical root barrier, a water management tool, and a structural boundary for maintenance equipment.
This guide moves past basic installation tutorials to diagnose the specific failure modes of garden borders and provides engineered solutions, exact material specifications, and precise measurements to ensure your edging survives seasonal frost heaves and aggressive root systems.
The Anatomy of a Failed Garden Border
Most edging failures stem from a misunderstanding of turfgrass biology and hydrology. A border is not just a visual line; it is a retaining wall for soil and a dam for surface water. When you install a barrier, you alter how water drains and how rhizomes travel. Diagnosing the exact symptom of your failing border is the first step toward a permanent fix.
Symptom 1: Rhizomatous Grass Creeping into Beds
The Diagnosis
If you find Kentucky Bluegrass, Bermudagrass, or Zoysia pushing through your mulch, your physical barrier is either too shallow or made of a material that degrades and cracks. According to NC State University's TurfFiles, rhizomatous grasses spread via underground stems that can easily travel 4 to 8 inches below the soil surface. Standard 3-inch or 4-inch corrugated plastic edging is entirely ineffective against these species; the rhizomes simply grow beneath the barrier and emerge in your garden bed.
The Fix: Deep Barrier Installation
To permanently stop grass creep, you must install a rigid, non-porous barrier that extends at least 6 inches into the subgrade, with a minimum of 1 inch protruding above the soil line to block surface stolons.
- Material Specification: Use 14-gauge or 16-gauge aluminum edging (such as Permaloc or Dimex professional grade). Aluminum will not rust, rot, or become brittle in UV light like plastics.
- Trenching Depth: Dig a trench 7 inches deep and 2 inches wide using a manual trenching spade or a motorized bed edger.
- Anchoring: Secure the aluminum edging with 10-inch steel spikes driven at a 45-degree angle away from the garden bed every 4 feet. This angle prevents frost heave from pushing the edging upward.
- Cost Expectation: Professional-grade 14-gauge aluminum edging costs between $3.50 and $5.50 per linear foot in 2026, compared to $1.20 for commercial plastic that requires replacement every 24 months.
CRITICAL WARNING: Before trenching deeper than 4 inches anywhere on your property, you must contact Call 811 to have underground utility lines marked. Striking an irrigation wire or gas line with a trenching spade is a severe safety hazard and carries heavy financial liability.
Symptom 2: Mulch Washout and Mower Scalping
The Diagnosis
If your hardwood mulch or river rock is spilling onto the lawn after heavy rains, or if your mower wheels are dropping off the edge and tearing up the turf canopy, your border lacks a structural transition zone. Relying solely on a vertical metal or plastic edge leaves the adjacent soil unsupported, leading to erosion and a dangerous drop-off for mower wheels.
The Fix: Designing a Flush Mowing Strip
The ultimate solution for mulch retention and mower safety is installing a flush mowing strip (also known as a header or paver strip). This creates a flat, hardscape runway for your mower wheels while acting as a secondary retaining wall for your bed materials.
- Select the Pavers: Use concrete pavers or natural flagstone that are at least 12 inches wide. A standard commercial mower deck is 21 inches, and the wheels are typically spaced 14 to 18 inches apart; a 12-inch strip ensures both wheels remain supported during turns.
- Excavate the Base: Dig a trench 4 inches deep along the perimeter of the garden bed. Add 2 inches of crushed gravel (3/4-inch minus) and compact it with a hand tamper to prevent settling.
- Set the Grade: Lay the pavers on a 1-inch bed of coarse sand. The top of the paver must sit exactly 0.5 inches below the desired turf canopy height. This allows the mower blade to overlap the edge slightly for a clean cut without the wheel dropping into the mulch.
- Lock it in: Sweep polymeric sand into the joints between the pavers and mist with water to lock them into a solid, unified ribbon that resists frost heave.
Edging Material Failure Matrix
Choosing the wrong material is the root cause of 80% of bordering garden beds failures. Use this matrix to select the correct material for your specific landscape problem.
| Material Type | Lifespan | Cost per Lin. Ft. | Best Application | Primary Failure Mode |
|---|---|---|---|---|
| Corrugated Plastic | 1-3 Years | $1.00 - $1.50 | Temporary annual flower beds | UV degradation, frost heave, rhizome penetration |
| 14-Gauge Aluminum | 20+ Years | $3.50 - $5.50 | Aggressive turf borders, curved beds | Bending under heavy impact (mower strikes) |
| 10-Gauge Corten Steel | 50+ Years | $7.00 - $12.00 | Modern designs, heavy retaining needs | Rust runoff staining adjacent concrete/stone |
| Natural Stone/Cobble | Lifetime | $9.00 - $18.00 | Aesthetic borders, low grass creep areas | Gaps allow grass creep, difficult to mow along |
Symptom 3: Water Pooling and Root Rot at the Border
The Diagnosis
If the plants immediately adjacent to your edging are showing signs of root rot, yellowing leaves, or if water pools against the inside of your hardscape border during rainstorms, your edging is acting as an impermeable dam. Solid steel, concrete, and tightly interlocked plastic edging prevent lateral water movement, trapping excess moisture in the garden bed soil profile.
The Fix: Engineering Weep Holes and Permeable Bases
To maintain proper hydrology when bordering garden beds with solid materials, you must engineer passive drainage into the barrier.
- Weep Hole Drilling: If using steel or thick aluminum edging, drill 1/2-inch weep holes every 24 inches along the bottom 2 inches of the barrier before installation. Backfill the trench on the lawn side with 3/4-inch clear gravel to create a French drain effect that pulls water away from the bed.
- Permeable Edging Alternatives: For low-lying areas prone to heavy saturation, avoid solid barriers entirely. The EPA's Green Infrastructure guidelines recommend utilizing permeable materials to manage runoff. Consider using heavy-duty plastic ground grids filled with pea gravel as a border, or spacing natural stone pavers 1 inch apart to allow surface water to escape laterally.
- Subgrade Grading: Ensure the soil inside the garden bed is crowned slightly (sloped down toward the center of the bed) rather than sloping toward the edging. This directs water away from the border and prevents the soil from washing over the top of the edging during heavy downpours.
Quick Diagnostic Troubleshooting Guide
Use this rapid decision tree to identify your exact border failure and apply the correct intervention.
- Symptom: Mulch is washing onto the lawn after rain.
Cause: Edging is set too low, or bed soil is graded toward the edge.
Fix: Raise the edging so 1.5 inches are exposed above the soil line, and re-grade the bed soil to crown toward the center. - Symptom: Mower wheels are dropping and tearing the turf.
Cause: Vertical edging lacks a structural transition zone.
Fix: Install a 12-inch wide flush concrete paver mowing strip set 0.5 inches below the turf canopy. - Symptom: Bermudagrass or Zoysia is growing inside the mulch bed.
Cause: Barrier is shallower than 6 inches, or material is cracked plastic.
Fix: Remove existing edging, trench to 7 inches, and install 14-gauge aluminum with angled steel spikes. - Symptom: Soil is pulling away from the edging, leaving a visible gap.
Cause: Frost heave pushed the edging up, or soil shrinkage during drought.
Fix: Hammer the edging back down to grade, add 10-inch angled spikes, and backfill the gap with a 50/50 mix of topsoil and coarse sand to improve drainage and compaction.
Maintaining the Integrity of Your Borders
Even the most robust aluminum or steel edging requires seasonal maintenance to function correctly. In late autumn, use a string trimmer to cut back any overhanging turf stolons that have crept over the top lip of the barrier. In early spring, walk the perimeter of your garden beds and check for frost-heaved spikes; tap them flush with a rubber mallet to prevent them from puncturing mower tires. By treating your garden borders as engineered landscape infrastructure rather than mere decorative accents, you eliminate the constant cycle of re-edging, re-mulching, and hand-weeding that plagues poorly planned landscapes.

